
Medical Education Surgical anatomy
Skull Base Dissection Atlas
An anatomy atlas for neurosurgery residents and fellows, with more than 300 endoscopic and microsurgical photographs from Dr. Almeida’s cadaveric fellowship dissections, organized by surgical approach.
- Chapters
- 16
- Photographs
- 310
- Checklist modules
- 13
How to use this atlas
How the chapters are organized
Each chapter follows one surgical approach from the initial exposure to the deep anatomy. Key steps give the dissection in order, with the landmarks to identify in bold. The photographs follow as one numbered sequence, and every photograph opens at a larger size. A completion checklist for fellows follows the chapters.
Cadaveric anatomy and image preparation
All photographs come from cadaveric dissections Dr. Almeida performed during fellowship anatomy training. Some microscope images were digitally enhanced for clarity; the anatomy and spatial relationships are unchanged, and the original images are preserved.
The atlas is educational material for anatomy training. It is not clinical guidance or patient information. With gratitude to the body donors whose gift made this training possible.
01Endoscopic Chapters 1 to 5
Endoscopic endonasal
Nasal corridor, sphenoid sinus, ethmoid, medial orbit, and expanded endonasal exposures.
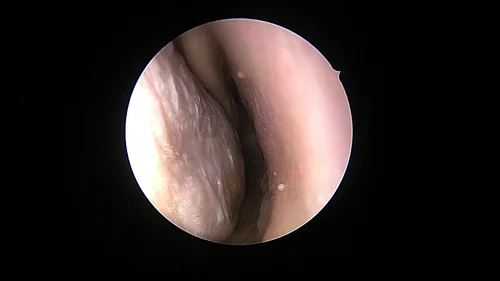
Chapter 01 17 photographs
Nasal Anatomy and Nasoseptal Flap
An endoscopic survey of the nasal cavity, from the turbinates and choana to the sphenoethmoidal recess, is followed by harvest of a nasoseptal flap pedicled on the posterior septal artery.
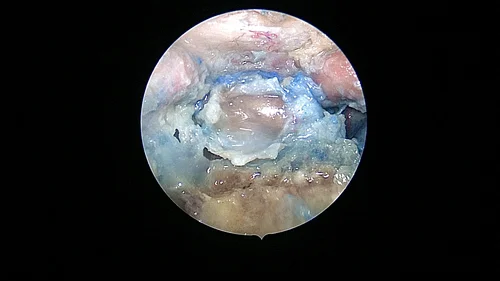
Chapter 02 10 photographs
Sphenoid Sinus and Sellar Region
A wide sphenoidotomy exposes the bony landmarks of the posterior sphenoid wall.
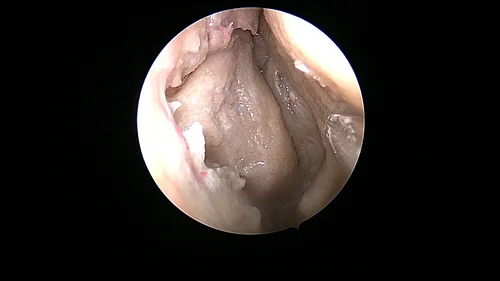
Chapter 03 8 photographs
Ethmoidectomy
The ethmoid cells are removed from anterior to posterior between two fixed boundaries, the lamina papyracea laterally and the skull base superiorly, with the ethmoidal arteries identified along the roof.
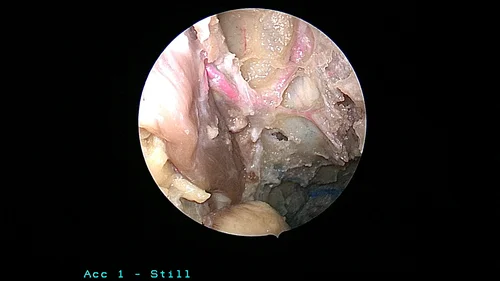
Chapter 04 12 photographs
Endoscopic Orbital Anatomy
An endoscopic endonasal dissection opens the medial orbit from the lamina papyracea through the extraconal fat into the medial intraconal space, as far as the optic nerve.
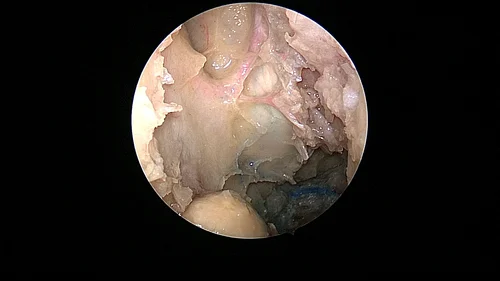
Chapter 05 23 photographs
Expanded Endonasal Approaches
One wide sphenoid opening is the base for midline corridors from the cribriform plate to the craniovertebral junction and for lateral corridors through the pterygopalatine fossa to the cavernous sinus, Meckel’s cave, and the petrous apex.
02Microsurgical Chapters 6 to 9
Orbit, cavernous sinus, and infratemporal fossa
Transcranial and lateral views of the orbit, parasellar region, paraclinoid carotid, and deep face.
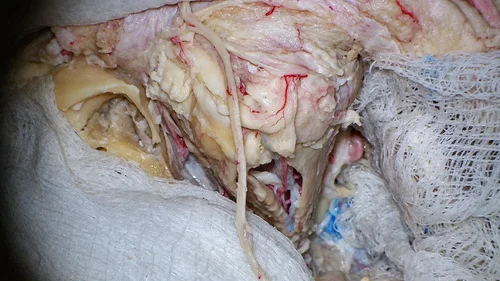
Chapter 06 16 photographs
Microsurgical Orbital Anatomy
With the orbital roof and lateral wall removed, the orbit is dissected under the microscope from above and from the lateral side, through the periorbita and the extraconal nerves to the intraconal vessels and nerves and the annulus of Zinn.
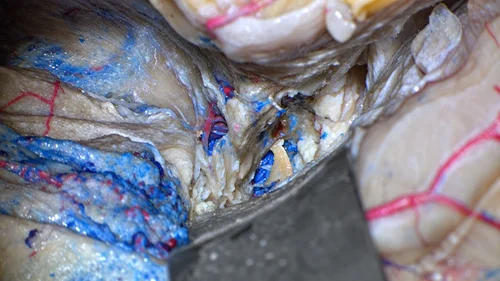
Chapter 07 22 photographs
Cavernous Sinus
The cavernous sinus is dissected extradurally from the middle fossa.
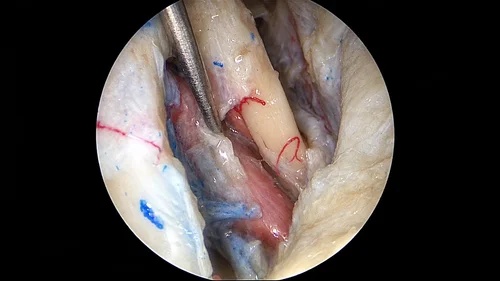
Chapter 08 28 photographs
Distal Dural Ring
The distal dural ring and the paraclinoid internal carotid artery are dissected with both the microscope and the endoscope.
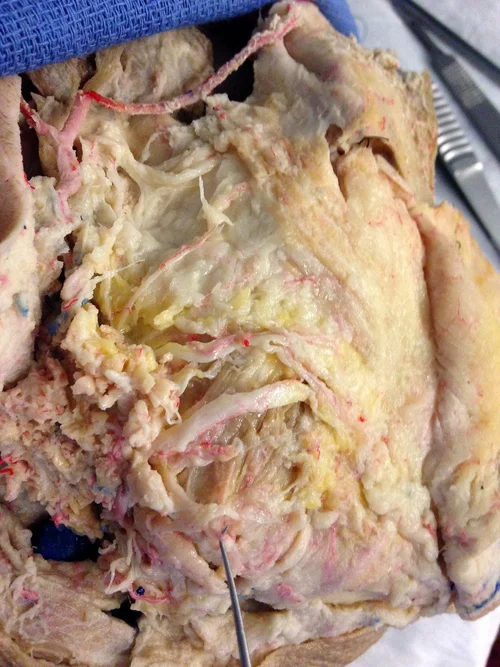
Chapter 09 26 photographs
Infratemporal and Pterygopalatine Fossae
A preauricular transzygomatic approach reaches the anterior infratemporal fossa through a zygomatic osteotomy, a frontotemporal craniotomy, and the drilled middle fossa floor, and exposes the branches of the maxillary and mandibular nerves.
03Microsurgical Chapters 10 to 12
Temporal bone and petrous apex
Mastoid, presigmoid, and petrosal exposures around the labyrinth, cochlea, facial nerve, and petrous carotid.
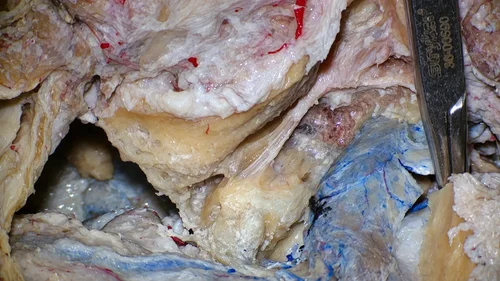
Chapter 10 17 photographs
Mastoidectomy
A mastoidectomy with the posterior wall of the external auditory canal preserved is drilled from the cortical surface to the skeletonized labyrinth and facial nerve.
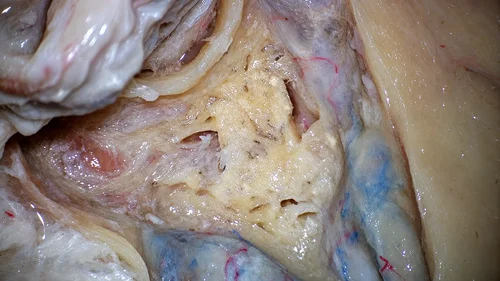
Chapter 11 28 photographs
Retrolabyrinthine Approach
A presigmoid exposure is developed between the sigmoid sinus and the intact labyrinth, and the posterior fossa dura is opened onto the lateral cerebellopontine angle.
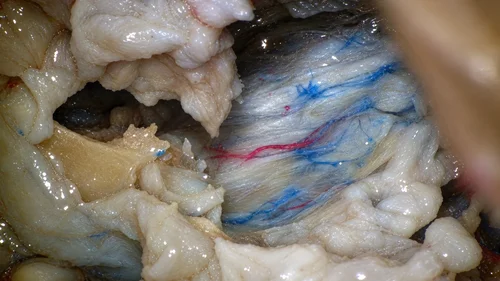
Chapter 12 25 photographs
Petrosectomy
The petrosal approach, described by Al-Mefty and colleagues for petroclival meningiomas, joins a temporal exposure above the petrous ridge with a presigmoid exposure below and behind it by dividing the superior petrosal sinus and tentorium, and in its combined form adds drilling of the petrous apex through the middle fossa.
04Microsurgical Chapters 13 to 16
Posterior fossa and craniocervical junction
Cerebellopontine angle, upper neck, jugular foramen, and foramen magnum.
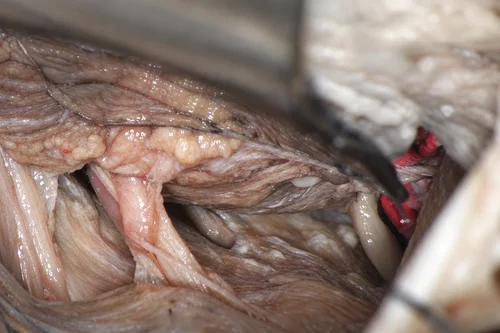
Chapter 13 8 photographs
Retrosigmoid Approach
A craniotomy behind the sigmoid sinus and below the transverse sinus gives a lateral view of the cerebellopontine angle.
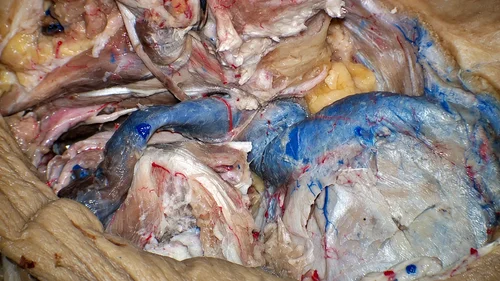
Chapter 14 4 photographs
High Cervical Exposure
An upper neck dissection combined with a mastoidectomy follows the internal jugular vein, the carotid arteries, and the lower cranial nerves from the carotid space up to the jugular foramen and the carotid canal.
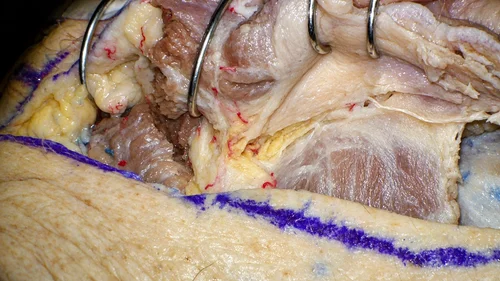
Chapter 15 28 photographs
Transjugular Approach
A postauricular transmastoid exposure combined with a high cervical dissection reaches the jugular bulb and the lower cranial nerves at the jugular foramen from below and from the side at the same time.
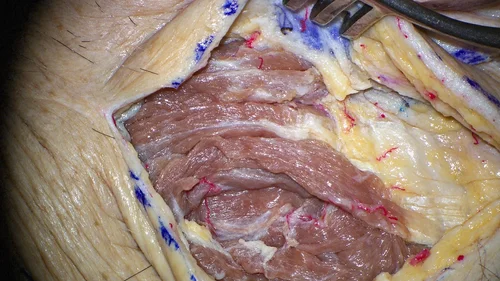
Chapter 16 38 photographs
Far-Lateral Approach
This chapter follows the extreme lateral (ELITE) variant of the far-lateral approach: the posterior neck muscles are turned forward in layers, the V3 vertebral artery is freed on the arch of C1, and the posteromedial occipital condyle and the jugular tubercle are drilled to open a view along the front of the medulla.
05Fellow reference
Fellow checklist
Skull Base Dissection Atlas Chapter 01 of 16
Nasal Anatomy and Nasoseptal Flap
An endoscopic survey of the nasal cavity, from the turbinates and choana to the sphenoethmoidal recess, is followed by harvest of a nasoseptal flap pedicled on the posterior septal artery.
- Endoscopic endonasal
- 17 photographs
- 9 key steps
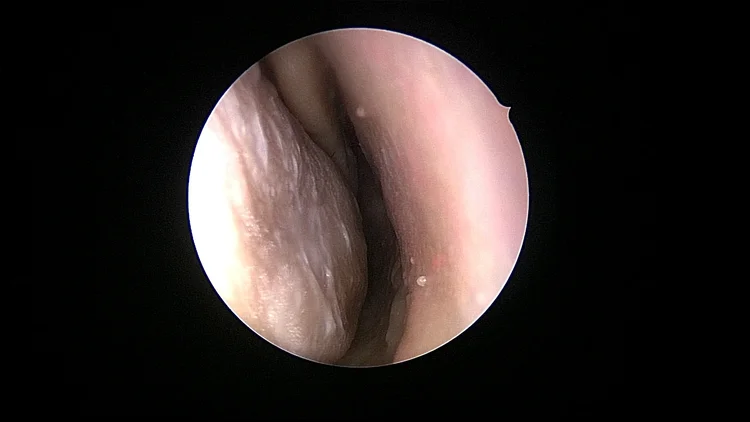
Overview
The nasal cavity is the working corridor for every endonasal route, and its landmarks stay the same whatever the target. It is bounded by the septum medially, the lateral nasal wall with its three turbinates laterally, the hard palate below, and the olfactory cleft and cribriform plate above, and it opens posteriorly through the choana into the nasopharynx. The dissection first maps these walls and the sphenoethmoidal recess, then outlines a flap of septal mucoperichondrium and mucoperiosteum around its posterior vascular pedicle and raises it as a single layer.
The lateral wall structures met here are opened in Ethmoidectomy, and the sphenoid face exposed under the pedicle is the entry point for Sphenoid Sinus and Sellar Region. A flap raised this way is the usual cover for the skull base openings described in Expanded Endonasal Approaches.
Lab setup
- Specimen supine, head in neutral position or slightly extended and turned a few degrees toward the operator, fixed in a head holder
- 0-degree endoscope (4 mm, 18 cm) for the survey and flap; 30-degree endoscope for the nasopharynx and recesses
- Long-handled blade or sickle knife, angled endonasal scissors, Cottle and suction Freer elevators, ball-tipped probe
- Flap side chosen before any mucosal work, with the opposite septal mucosa kept intact
- Arterially injected specimen, to show the septal branches within the elevated flap
Key steps
Landmarks to identify are in bold. The numbered photographs below appear in their original order.
Step 1: Survey the nasal floor and the turbinates
Advance the 0-degree endoscope along the nasal floor with the septum on the medial side. The head of the inferior turbinate is the first lateral structure; above and behind it, the middle turbinate marks the entrance to the middle meatus. Lift the inferior turbinate gently to see the inferior meatus, where the opening of the nasolacrimal duct lies under the anterior part of the turbinate.
Identify the parts of the septum from front to back: the septal cartilage anteriorly, the perpendicular plate of the ethmoid above and behind it, the vomer posteroinferiorly, and the maxillary crest along the floor. A spur often forms at the junction of cartilage and vomer. Note any deviation, since it narrows the corridor on one side and thins the mucosa where the flap will be elevated.
Follow the narrow space between the middle turbinate and the septum upward and backward. Its upper part, the olfactory cleft, carries the olfactory mucosa that the superior flap incision is designed to spare.
Step 2: Follow the floor through the choana to the nasopharynx
At the tail of the inferior turbinate the floor opens through the choana into the nasopharynx. The free posterior edge of the vomer forms the medial border of the choana, the medial pterygoid plate its lateral border, and the sphenoid body its roof, the choanal arch.
Turn a 30-degree endoscope laterally. The torus tubarius surrounds the pharyngeal opening of the eustachian tube, and the pharyngeal recess (fossa of Rosenmüller) lies above and behind it. The parapharyngeal segment of the internal carotid artery lies deep to the posterolateral part of this recess, outside the field of a standard flap harvest. Follow the roof of the nasopharynx up to the inferior surface of the sphenoid body.
The choanal arch is the inferior reference for the rest of the sequence: the sphenoid ostium lies roughly 1 to 1.5 cm above it, and the inferior flap incision starts on it.
Tip. Compare both choanae from one side. A midline vomer seen through the opposite choana confirms the midline before any incision.
Step 3: Find the sphenopalatine foramen and its branches
Displace the middle turbinate gently medially with a Freer elevator to look along the middle meatus, keeping its attachment intact. Follow the meatus back to the tail of the middle turbinate. Just behind and above it, on the lateral wall, lies the sphenopalatine foramen, with the small bony crista ethmoidalis immediately in front of it.
The sphenopalatine artery enters the nose through this foramen and usually divides near it. The posterior lateral nasal artery runs forward to the turbinates. The posterior septal artery runs medially across the sphenoid face, in the band of mucosa between the sphenoid ostium and the choanal arch, to reach the septum. This band becomes the flap pedicle, so leave the mucosa over it intact during the rest of the survey.
Palpate the lateral wall with a probe to feel the crest and the softer area behind it. In an injected specimen the branches can often be followed through the thin mucosa as they fan out over the sphenoid face.
Step 4: Expose the sphenoethmoidal recess and the ostium
Lateralize the middle turbinate gently to open the space toward the superior turbinate. The sphenoethmoidal recess lies medial to the superior turbinate, between it and the septum. The natural sphenoid ostium opens on the anterior sphenoid wall within the recess, usually in the upper half of the wall and a few millimeters from the septum. A small supreme turbinate is present above the superior turbinate in some specimens and can be mistaken for it.
Trace the inferior edge of the superior turbinate back to its tail, which points toward the ostium. Use a probe to confirm the opening without enlarging it. Below the ostium, the sphenoid rostrum forms the midline keel where the vomer joins the sphenoid body.
Confirm the three references for the flap before cutting: the lower edge of the ostium above, the choanal arch below, and the posterior septal artery crossing between them.
Step 5: Plan the flap around the pedicle
Lay out the flap on the septum before any incision. Its posterior end is the pedicle over the sphenoid face, held between the lower edge of the sphenoid ostium and the choanal arch. Its upper margin runs parallel to the septal roof, leaving a strip of about 1 to 1.5 cm below the cribriform plate for the olfactory mucosa. Its lower margin follows the junction of the septum with the nasal floor.
The length is set by the anterior incision. A flap carried to the mucocutaneous junction near the columella gives the greatest length, for a long rotation toward the anterior skull base. The width can be increased by continuing the lower margin out across the nasal floor toward the inferior meatus.
Plan the flap generously, since the elevated tissue contracts somewhat once it is freed from the perpendicular plate of the ethmoid and the vomer.
Tip. Mark the planned lines lightly with the tip of the knife first. Shallow marks are easy to adjust before the full-thickness cuts are made.
Step 6: Make the inferior incision
Begin at the lateral end of the choanal arch and follow the arch medially to the vomer. Turn down along the septum a few millimeters in front of the free posterior edge of the vomer, keeping the cut on bone, until reaching the nasal floor. Then carry the incision forward along the junction of the septum and the floor, over the maxillary crest, as far as the planned anterior end.
For a wider flap, run the floor incision laterally across the floor toward the inferior meatus and then forward, under the inferior turbinate, which can be displaced medially to see the floor fully. Keep the posterior end of the incision below the band of mucosa that carries the posterior septal artery.
Cut through mucosa and perichondrium or periosteum down to cartilage or bone along the whole line, so the edges separate cleanly during elevation and the flap keeps its full thickness.
Step 7: Make the superior and anterior incisions
Start the superior incision at the lower edge of the sphenoid ostium and carry it forward on the septum, parallel to the septal roof and about 1 to 1.5 cm below it, leaving the olfactory cleft mucosa intact. Check the height of the cut against the middle turbinate beside it at intervals, so the line stays parallel to the roof all the way forward.
Anterior to the head of the middle turbinate, the olfactory mucosa no longer extends as far down the septum, and the superior incision can be brought higher toward the roof when extra width is needed. Continue the incision to the planned anterior end.
Join the superior and inferior incisions with a vertical anterior incision, near the mucocutaneous junction for a full-length flap or farther back for a shorter one. Check that the two posterior limbs remain far enough apart to keep the pedicle intact over the sphenoid rostrum.
Tip. Hold the endoscope in the opposite half of the nostril and work the knife along the septum, so the full incision stays in view as it is cut.
Step 8: Raise the flap in the subperichondrial and subperiosteal planes
Begin elevation at the anterior incision with a Cottle elevator, finding the plane beneath the perichondrium of the septal cartilage. Continue backward in the subperiosteal plane over the perpendicular plate of the ethmoid and the vomer. Holding the elevator against cartilage and bone keeps mucosa, perichondrium, and periosteum together, with the vessels inside the flap.
The mucosa is thin and adherent over septal spurs, at the junction of cartilage and bone, and along the maxillary crest. Free these areas with short, controlled strokes and sharp division where needed. Raise the floor component, when included, as a continuous sheet from the nasal floor.
Continue posteriorly until the flap is free over the sphenoid rostrum. Elevate the pedicle laterally over the sphenoid face toward the sphenopalatine foramen to gain length and rotation. Near the junction of the vomer with the sphenoid floor, a small pharyngeal branch in the palatovaginal canal may be seen entering from the lateral side.
Step 9: Inspect the bare septum and store the flap
With the flap reflected, the bare septal cartilage, perpendicular plate of the ethmoid, and vomer are exposed, with the sphenoid rostrum and the anterior wall of the sphenoid sinus behind them. Examine the flap itself: the mucosal surface faces the nasal cavity, the deep surface is the raw perichondrial and periosteal layer, and the posterior septal artery can be followed along the pedicle.
Store the flap in the nasopharynx during the remaining dissection, or in the maxillary sinus when a wide antrostomy is part of the exposure, with the pedicle free of twisting or compression.
After the posterior bony septum and rostrum are removed and the sella, planum, and clivus are opened, as described in later chapters, the flap can be laid over each region, with the deep surface against bone, to see how pedicle length and the rotation point at the sphenopalatine foramen set its reach.
Tip. Keep the flap moist during a long session. A moist flap stays supple and lies flat when its reach is tested.
Dissection sequence
Dissection photographs
17 photographs, numbered in sequence. Select a photograph to view it larger.
Skull Base Dissection Atlas Chapter 02 of 16
Sphenoid Sinus and Sellar Region
A wide sphenoidotomy exposes the bony landmarks of the posterior sphenoid wall. Opening the sella then shows the pituitary gland and stalk, the ophthalmic artery, and the intracavernous carotid artery with its branches.
- Endoscopic endonasal
- 10 photographs
- 10 key steps
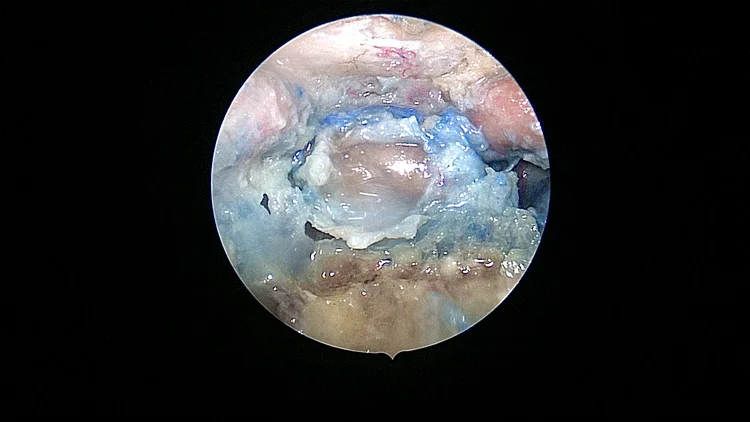
Overview
Once the sphenoid sinus is opened widely, its posterior wall shows the sella in the center, the planum and tuberculum above, the clival recess below, and the carotid and optic prominences on each side. Four venous channels frame the sellar opening: a cavernous sinus on each side and an intercavernous sinus along the upper and lower margins. In this specimen the arteries are injected red and the venous sinuses blue, which makes these venous boundaries easy to see. The photographs show the sella, the intradural pituitary stalk, the ophthalmic artery, and the intracavernous carotid artery with its branches.
The approach continues from Nasal Anatomy and Nasoseptal Flap, which exposes the sphenoid face, and from Ethmoidectomy, which reaches the sphenoid through the posterior ethmoid. Expanded Endonasal Approaches extends the same opening through the tuberculum and planum and down the clivus. The intracavernous carotid branches seen here from the medial side are seen from the lateral side in Cavernous Sinus.
Lab setup
- Specimen supine, head in neutral position, turned a few degrees toward the operator and fixed in a head holder
- 0-degree endoscope for the sphenoidotomy and sellar opening; 30- and 45-degree endoscopes for the suprasellar space and the cavernous sinus
- Binostril work after a posterior septectomy, so the endoscope and two instruments share the sphenoid opening
- Kerrison rongeurs and mushroom punches, high-speed drill with 3 to 4 mm coarse and fine diamond burs, through-cutting forceps
- Ring curettes, blunt microdissectors, sickle knife, and angled endonasal scissors for the dura
- Injected specimen (red arteries, blue veins), to distinguish the intercavernous sinuses, cavernous sinus, and carotid branches
Key steps
Landmarks to identify are in bold. The numbered photographs below appear in their original order.
Step 1: Open both sphenoid ostia and remove the rostrum
Identify the natural sphenoid ostium medial to the superior turbinate on each side, about 1 to 1.5 cm above the choanal arch. Enlarge each ostium inferiorly and medially with a mushroom punch or Kerrison rongeur, keeping the instruments close to the midline.
Detach the posterior 1 to 2 cm of the bony septum from the sphenoid rostrum and remove it, together with the rostrum, to join the two ostia into one opening. The posterior septal artery crosses the sphenoid face below the ostium. Keep it within the raised nasoseptal flap, or push the mucosa below the ostium downward to preserve it when no flap is raised.
Widen the opening superiorly to the planum sphenoidale, inferiorly to the floor of the sinus, and laterally on each side until the walls of the sinus are flush with the opening. At the upper lateral corner, the posterior ethmoid cells and the posterior ethmoidal artery lie just in front of the sphenoid face.
Tip. Remove the rostrum and the anterior wall completely, so the endoscope and two instruments can move freely through the opening.
Step 2: Trace and remove the intersinus septa
Identify the main intersinus septum and any accessory septa. Follow each septum along the posterior wall to its attachment before removing it. A septum that runs off the midline commonly inserts on a carotid prominence, and some insert on the optic prominence or the sellar floor.
Remove the free anterior part of each septum with through-cutting forceps, then reduce the base with a diamond bur until it is flush with the posterior wall, including where it joins the bone over the internal carotid artery.
Note the pneumatization pattern. In a sellar or postsellar sinus the air extends below the sella and the landmarks are clear. In a presellar sinus the air stops in front of the anterior sellar wall, and in a conchal sinus the sella is covered by thick bone with little relief. Lateral extension of the sinus forms a lateral recess between the foramen rotundum above and the vidian canal below, reaching toward the base of the pterygoid process.
Strip or reflect the sinus mucosa from the posterior wall so the bony relief is visible in the next step.
Step 3: Read the bony landmarks of the posterior wall
Identify the sellar floor in the midline, the tuberculum sellae and planum sphenoidale above it, and the clival recess below. On each side, the optic prominence runs above the carotid prominence. The carotid prominence has a parasellar part beside the sella and a paraclival part beside the clival recess.
The lateral opticocarotid recess lies between the optic and carotid prominences and marks the pneumatized optic strut, which forms the floor of the optic canal. The medial opticocarotid recess lies where the optic canal, the tuberculum, and the paraclinoid carotid meet, at the lateral end of the tuberculum. These recesses are the main guides to the clinoidal segment of the carotid and the distal dural ring.
On the floor of a well-pneumatized sinus, the vidian canal runs toward the lower end of the paraclival carotid and marks the junction of its petrous and paraclival segments.
Confirm these relationships on both sides before drilling. In a conchal or presellar sinus, where these landmarks may be flat or absent, their expected relative positions guide the opening.
Step 4: Remove the sellar floor
Open the sellar floor in the midline, where it is thinnest and farthest from the carotid prominences. Thin it with a diamond bur or fracture it gently with a dissector, then lift the fragments away.
Extend the opening with a Kerrison rongeur laterally to the medial edge of each carotid prominence, superiorly to the tuberculum sellae, and inferiorly to the clival recess. Keep the footplate of the rongeur flat against the dura and away from the bone over the carotid.
With the bone removed, the blue-filled venous sinuses outline the exposure. The cavernous sinus lies on each side, the superior intercavernous sinus runs across the upper margin behind the tuberculum, and the inferior intercavernous sinus crosses the lower margin. The size of these channels varies, and an intercavernous channel may extend across the entire anterior face of the gland.
Tip. Open the bone until all four venous boundaries are visible. A sellar opening of this size leaves room to work toward the stalk, the gland margins, and the cavernous sinus in the steps that follow.
Step 5: Open the sellar dura over the gland
Incise the sellar dura in the midline between the superior intercavernous sinus and the inferior intercavernous sinus, keeping the blade shallow over the gland. Extend the opening as a cross or a window, and reflect the leaflets toward the four venous boundaries.
The anterior surface of the pituitary gland is now exposed. The firmer anterior lobe occupies most of the sellar opening, and the softer posterior lobe lies behind it against the dorsum sellae.
Widen the dural opening laterally toward one side. The medial wall of the cavernous sinus comes into view as a thin dural layer that covers the side of the gland, and the parasellar segment of the internal carotid artery lies within the sinus behind this wall.
Identify the diaphragma sellae at the upper margin of the opening. Its central aperture transmits the pituitary stalk and is the route to the suprasellar space in the next step.
Step 6: Inspect the suprasellar space and the stalk
Divide the superior intercavernous sinus, carry the dural opening up to the tuberculum sellae, and open the front of the diaphragma sellae toward the stalk. Direct a 30- or 45-degree endoscope upward past the tuberculum.
The pituitary stalk descends in the midline from the hypothalamus to the gland, through the aperture of the diaphragma. Above and in front of it lie the optic chiasm and the intracranial optic nerves. Fine superior hypophyseal arteries arise from the medial side of the supraclinoid carotid on each side and run toward the stalk and the undersurface of the chiasm and optic nerves, often forming a network around the upper stalk.
Follow the surface vessels of the stalk up and down to see how its supply connects with the gland below.
Tip. Keep the dissector against the stalk and the gland, away from the undersurface of the chiasm. The superior hypophyseal branches are small and run close to the optic apparatus.
Step 7: Identify the ophthalmic artery below the optic nerve
Follow the optic nerve laterally from the chiasm toward the optic canal. The supraclinoid internal carotid artery lies below and lateral to the nerve as it leaves the distal dural ring, at the level of the medial opticocarotid recess.
Remove the thin bone over the medial end of the optic canal and open the dura along the tuberculum toward the canal. The ophthalmic artery usually arises from the upper surface of the carotid just above the distal dural ring, beneath the optic nerve. It runs forward along the underside of the nerve into the optic canal, where it lies inferolateral to the nerve on its way to the orbit.
An origin at the level of the ring or within the cavernous sinus occurs in a minority of specimens, so confirm the origin on each side.
Note the relation of the ophthalmic artery to the optic strut and the lateral opticocarotid recess, which separate the optic canal above from the carotid below.
Step 8: Mobilize the gland and inspect its margins
Displace the pituitary gland gently with a blunt dissector to see its lateral and inferior margins. Below the gland, the opened inferior intercavernous sinus and the venous channels that continue toward the basilar plexus behind the clivus appear as blue-filled trabeculated spaces.
Lift the lower pole of the gland upward to see the posterior lobe and the floor of the sella behind it, with the dorsum sellae and the posterior clinoid processes forming the back wall.
Along the lateral margin, the gland lies against the medial wall of the cavernous sinus. Small capsular arteries, when present, cross from the carotid to the capsule of the gland in this area, and the inferior hypophyseal artery reaches the posterior lobe from the lateral side.
Tip. Move the gland in one direction at a time and return it before moving it the other way. Each margin is easiest to read with the rest of the gland in its natural position.
Step 9: Open the medial wall of the cavernous sinus
Incise the medial wall of the cavernous sinus on one side, starting at the lateral surface of the gland and working laterally. Lift the wall away from the gland in small steps, keeping the dissector between the dural layer and the venous spaces behind it.
The blue-filled venous compartments of the cavernous sinus open behind the wall. Within them, the intracavernous internal carotid artery runs forward as its horizontal segment, between a posterior bend behind and an anterior bend below the anterior clinoid process.
The abducens nerve runs free within the sinus on the lateral side of the carotid, after passing through Dorello’s canal beneath the petrosphenoidal ligament. The oculomotor, trochlear, ophthalmic, and maxillary nerves lie farther lateral, in the lateral wall of the sinus, and are seen from this side only after the carotid is gently displaced.
Clear the venous spaces from the carotid wall with gentle suction so the branches arising from the artery can be followed in the next step.
Step 10: Identify the intracavernous carotid branches
Follow the posterior bend of the intracavernous internal carotid artery. The meningohypophyseal trunk usually arises here and divides into three branches. The inferior hypophyseal artery runs medially to the posterior lobe of the gland. The tentorial artery runs posterolaterally toward the tentorial edge, and the dorsal meningeal artery runs posteriorly to the clival dura near the abducens nerve.
Along the lateral side of the horizontal segment, the inferolateral trunk arises and passes above or lateral to the abducens nerve, supplying the nerves of the lateral wall and the dura around the superior orbital fissure and foramen rotundum. Small capsular arteries, when present, leave the medial side of the horizontal segment for the floor and capsule of the gland.
Follow each branch back to its origin before naming it, since branches may share a trunk or arise directly from the carotid.
Tip. Compare both sides. The pattern of branching differs from side to side more often than the course of the carotid itself.
Dissection sequence
Dissection photographs
10 photographs, numbered in sequence. Select a photograph to view it larger.
Skull Base Dissection Atlas Chapter 03 of 16
Ethmoidectomy
The ethmoid cells are removed from anterior to posterior between two fixed boundaries, the lamina papyracea laterally and the skull base superiorly, with the ethmoidal arteries identified along the roof.
- Endoscopic endonasal
- 8 photographs
- 10 key steps
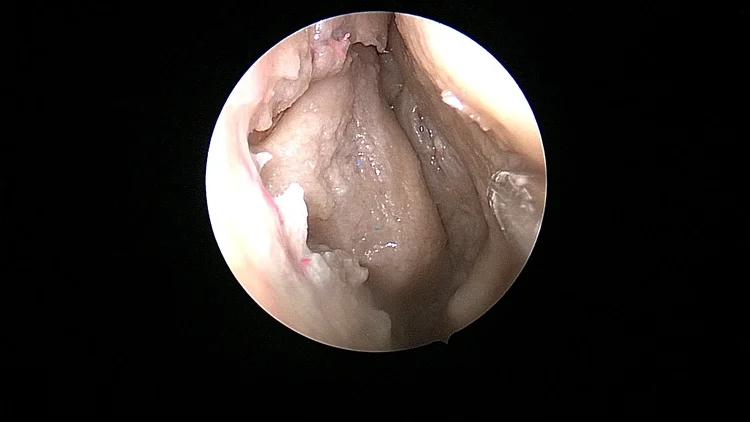
Overview
The ethmoid labyrinth is a set of thin partitions arranged in lamellae: the uncinate process, the ethmoid bulla, the basal lamella of the middle turbinate, and the lamella of the superior turbinate. Counting these in order keeps the dissection oriented as the cells are cleared. The corridor runs from the frontal recess in front to the sphenoid face behind, with the lamina papyracea laterally, the fovea ethmoidalis and cribriform plate above, and the middle and superior turbinates medially.
The dissection begins from the nasal survey in Nasal Anatomy and Nasoseptal Flap and ends at the sphenoid face, where Sphenoid Sinus and Sellar Region continues. The lamina papyracea and the orbital course of the ethmoidal arteries are followed further in Endoscopic Orbital Anatomy, and the roof exposed here is opened in the transcribriform part of Expanded Endonasal Approaches.
Lab setup
- Specimen supine, head in neutral position, turned a few degrees toward the operator and kept in the same position throughout
- 0-degree endoscope for most of the dissection; 30- and 45-degree endoscopes for the roof, the anterior ethmoidal artery, and the frontal recess
- Sickle knife, Freer elevator, ball-tipped probe, backbiter, straight and upturned through-cutting forceps, J-curette, and curved frontal recess curettes
- Mushroom punch for the sphenoid entry; diamond bur for thick bone around an embedded ethmoidal canal
- Microdebrider for soft tissue only; cutting instruments near the roof and the ethmoidal arteries
- Arterially injected specimen, to follow the ethmoidal arteries across the roof
Key steps
Landmarks to identify are in bold. The numbered photographs below appear in their original order.
Step 1: Survey the middle meatus and the lateral wall
Medialize the middle turbinate gently with a Freer elevator to open the middle meatus, keeping its attachment intact. Anterior to the turbinate, identify the agger nasi bulge and the maxillary line, the firm curved ridge that marks the anterior attachment of the uncinate to the maxilla.
Palpate the uncinate process behind the maxillary line: it is a thin crescent of bone that springs back when pressed laterally. Behind it lies the rounded ethmoid bulla. The cleft between the free edge of the uncinate and the face of the bulla is the hiatus semilunaris, which leads into the ethmoid infundibulum.
Note where the upper end of the uncinate attaches: to the lamina papyracea, to the skull base, or to the middle turbinate. This attachment sets the drainage route of the frontal recess, which is examined at the end of the dissection.
Tip. Keep the middle turbinate intact and attached. It is the medial boundary of the whole dissection and the reference for the anterior skull base.
Step 2: Remove the uncinate process
Pass a backbiter into the middle meatus, rotate it to engage the free posterior edge of the uncinate process, and cut through the middle portion of the uncinate. Alternatively, incise the uncinate near its attachment to the maxillary line with a sickle knife, keeping the tip shallow and directed parallel to the lamina papyracea.
Displace the uncinate medially, away from the orbit, and remove its upper and lower parts with through-cutting forceps so the mucosa of the lateral wall is preserved. Keep the backbiter bites behind the harder bone over the nasolacrimal duct.
With the uncinate removed, the ethmoid infundibulum is opened, the face of the ethmoid bulla is fully exposed, and the natural ostium of the maxillary sinus can be seen in the floor of the infundibulum, usually hidden until the lower uncinate is gone.
Clear the upper part of the uncinate as high as its attachment, since remnants there narrow the view of the frontal recess later.
Step 3: Enlarge the maxillary ostium
Identify the natural maxillary ostium at the floor of the infundibulum, below and in front of the ethmoid bulla. Check the posterior fontanelle behind it for an accessory ostium, and join the two when present so that both open into one antrostomy.
Enlarge the ostium posteriorly and inferiorly with a backbiter and through-cutting forceps, toward the attachment of the inferior turbinate. Limit the anterior extension, where the nasolacrimal duct lies, and stop posteriorly at the level of the posterior wall of the maxillary sinus, before the branches of the sphenopalatine artery.
Look into the sinus with an angled endoscope. The orbital floor forms its roof, with the infraorbital nerve running along it, and the posterior wall gives a sense of depth.
These two references are used throughout the ethmoidectomy: the orbital floor marks the height of the medial orbital wall, and the posterior wall of the sinus lies close to the depth of the posterior ethmoid and the sphenoid face.
Step 4: Enter the ethmoid bulla
The ethmoid bulla is usually the largest and most constant anterior ethmoid cell. Enter it through its inferior and medial wall with a J-curette or a suction tip, well away from the lamina papyracea.
Remove the inferior and medial walls with through-cutting forceps. The lateral wall of the bulla is the lamina papyracea, which appears as a thin, smooth plate. Use the orbital floor seen through the antrostomy to judge the height of this plate.
Behind the bulla, the retrobullar recess separates it from the basal lamella of the middle turbinate. Above it, the suprabullar recess reaches toward the skull base.
Leave the upper part of the anterior bulla wall in place for now. It is the guide to the anterior ethmoidal artery in the next step.
Tip. Work with the endoscope above the instrument and the instrument pointing medially and downward. This keeps the lamina papyracea in view as each partition is removed.
Step 5: Clear the anterior cells up to the roof
Follow the anterior wall of the ethmoid bulla upward to its attachment at the skull base, where it forms the bulla lamella. The anterior ethmoidal artery usually crosses the roof just behind this attachment, and the frontal recess lies in front of it.
Remove the remaining anterior cells and the posterior wall of the bulla, working from the suprabullar recess toward the roof. Along the roof, use a curved curette from posterior to anterior, which keeps the instrument moving away from the skull base.
Identify the fovea ethmoidalis, the roof of the ethmoid formed by the orbital plate of the frontal bone. Medially it joins the lateral lamella of the cribriform plate, the thinnest part of the anterior skull base. The cribriform plate usually lies lower than the fovea, and the height difference varies from side to side.
Keep the lamina papyracea in view as the lateral limit and the middle turbinate as the medial limit throughout.
Tip. A 45-degree endoscope directed upward brings the roof and the anterior ethmoidal artery into view while the instruments stay low in the cavity.
Step 6: Open the basal lamella
The basal lamella of the middle turbinate separates the anterior from the posterior ethmoid cells. It has a vertical part, which runs up to the skull base, and a horizontal part, which attaches the back of the turbinate to the lamina papyracea.
Open the vertical part at its inferior and medial corner, just above the horizontal part and close to the turbinate. Enlarge the opening upward and laterally with through-cutting forceps.
Preserve the horizontal part. It anchors the posterior middle turbinate and keeps it stable for the rest of the dissection.
The posterior ethmoid cells lie behind the lamella. They fill the space between the lamina papyracea and the superior turbinate, under the skull base and in front of the sphenoid face. Compare the height of the cells with the roof of the maxillary sinus: the posterior ethmoid cells lie above that level.
Step 7: Clear the posterior ethmoid cells
Remove the posterior ethmoid partitions with through-cutting forceps, staying in the lower and medial part of each cell until its upper limit is seen. The roof slopes downward as the dissection moves backward, so the skull base lies closer to the instrument here than in the anterior ethmoid.
Identify the superior turbinate and the superior meatus on the medial side. The lamella of the superior turbinate is the fourth lamella and leads back to the sphenoethmoidal recess.
Check for a sphenoethmoidal cell (Onodi cell), a posterior ethmoid cell that extends lateral and superior to the sphenoid sinus. When present, the optic nerve runs in its lateral or superior wall, and the carotid may also bulge into it. Confirm the position of the sphenoid sinus below and medial to such a cell before removing further bone.
Skeletonize the posterior lamina papyracea as it narrows toward the orbital apex, keeping the bone intact.
Step 8: Identify both ethmoidal arteries along the roof
The anterior ethmoidal artery and posterior ethmoidal artery leave the orbit through foramina along the frontoethmoidal suture, at the upper edge of the lamina papyracea. Each crosses the roof toward the lateral lamella of the cribriform plate, the anterior artery obliquely from posterolateral to anteromedial and the posterior artery on a more transverse course.
Each artery may lie in a bony canal flush with the roof, in a partly dehiscent canal, or in a mesentery hanging below the roof. A vessel in a mesentery is fully visible and lies within reach of instruments working along the roof.
The posterior ethmoidal artery crosses the roof just in front of the upper part of the sphenoid face. It lies roughly 6 mm ahead of the optic canal, with wide variation, and the two ethmoidal arteries lie roughly 12 mm apart. An additional middle ethmoidal artery is present between them on some sides.
Follow each artery laterally to the point where it leaves the orbit. This point is the upper limit of the lamina papyracea and a reference for the orbital part of the dissection.
Tip. Use the 0-degree endoscope for the posterior ethmoidal artery and an angled endoscope for the anterior one, which lies higher and farther forward on the roof.
Step 9: Enter the sphenoid through the posterior ethmoid
Locate the sphenoid face at the back of the posterior ethmoid. Remove the lower part of the superior turbinate to see the natural sphenoid ostium in the sphenoethmoidal recess medial to it.
Enter the sphenoid at its inferomedial part, in line with the ostium and close to the septum. Enlarge the opening with a mushroom punch medially and inferiorly, then upward and laterally once the inside of the sinus is in view.
The upper and lateral parts of the sphenoid face lie near the optic nerve and the internal carotid artery, so extend the opening in those directions only after the optic prominence and carotid prominence are identified from inside the sinus.
The posterior septal artery crosses the sphenoid face below the ostium. Keep the inferior enlargement above it when the nasoseptal flap pedicle is to be preserved.
The posterior wall of the sphenoid sinus is examined in detail in Sphenoid Sinus and Sellar Region.
Step 10: Review the cavity and open the frontal recess
The completed cavity runs from the frontal recess to the sphenoid face, bounded by the lamina papyracea laterally and the fovea ethmoidalis and cribriform plate superiorly, with the middle turbinate preserved medially.
Direct a 30- or 45-degree endoscope upward, lateral to the anterior attachment of the middle turbinate, to see the frontal recess, the drainage pathway of the frontal sinus. The agger nasi cell forms its anterior boundary, the bulla lamella and the anterior ethmoidal artery its posterior boundary, and the lamina papyracea its lateral wall. Remove the cap of the agger nasi cell with an angled curette to open the recess up to the frontal sinus ostium.
Pass the endoscope from front to back along the roof and name each landmark in order: frontal recess, anterior ethmoidal artery, fovea ethmoidalis, posterior ethmoidal artery, sphenoid face, and optic prominence.
Tip. Compare the two sides at the end. The height of the roof, the cribriform depth, and the course of the ethmoidal arteries often differ from one side to the other.
Dissection sequence
Dissection photographs
8 photographs, numbered in sequence. Select a photograph to view it larger.
Skull Base Dissection Atlas Chapter 04 of 16
Endoscopic Orbital Anatomy
An endoscopic endonasal dissection opens the medial orbit from the lamina papyracea through the extraconal fat into the medial intraconal space, as far as the optic nerve.
- Endoscopic endonasal
- 12 photographs
- 10 key steps
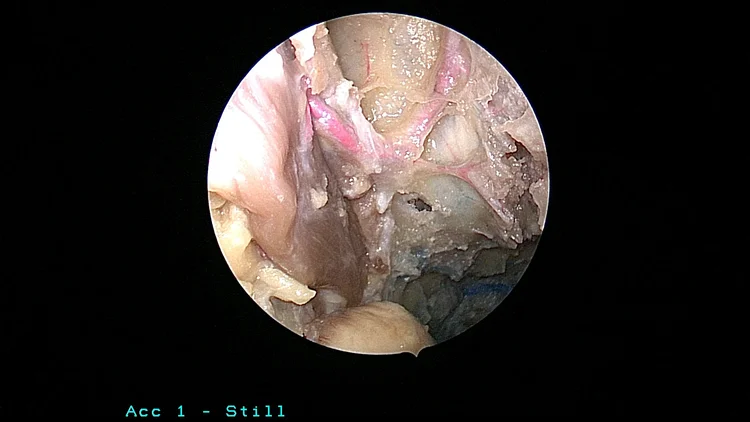
Overview
The medial orbital wall is reached through a complete sphenoethmoidectomy, the corridor built in Ethmoidectomy. After the lamina papyracea is removed and the periorbita opened, the dissection proceeds in layers: the ethmoidal arteries where they leave the orbit for the skull base, the extraconal fat, the medial rectus muscle, and the vessels and nerves of the medial intraconal space. The ethmoid roof and frontoethmoidal suture frame the corridor above, the orbital floor and infraorbital nerve below, and the optic nerve laterally, with the orbital apex and optic canal at its posterior end.
This corridor gives a medial and inferomedial view of the orbit. Microsurgical Orbital Anatomy shows the same compartments from above and from the lateral side, and Expanded Endonasal Approaches continues from the optic canal into the planum and the parasellar region.
Lab setup
- Specimen supine, head fixed in a head holder, neutral to slightly extended and turned a few degrees toward the operator
- 4 mm, 18 cm endoscopes: 0-degree for the corridor, 30- or 45-degree for the roof, the apex, and the undersurface of the optic nerve
- Binostril work with a posterior septectomy or an anterior septal window; endoscope holder or assistant
- Cottle and Freer elevators, sickle knife, ball-tipped probe, angled microscissors, fine bipolar forceps, 1 and 2 mm Kerrison rongeurs
- High-speed drill with 2 to 3 mm diamond burs for the posterior lamina, the optic canal, and the orbital floor
- Vessel loops or fine sutures to hold the medial rectus aside
- Injected specimen (red arteries, blue veins), to distinguish the ophthalmic branches from the orbital veins
Key steps
Landmarks to identify are in bold. The numbered photographs below appear in their original order.
Step 1: Build the sphenoethmoid corridor to the medial wall
Lateralize the inferior turbinate, resect the middle turbinate, and remove the uncinate process to find the natural ostium of the maxillary sinus. Widen it into a large antrostomy, then complete the anterior and posterior ethmoidectomy and a wide sphenoidotomy so that the lamina papyracea is seen in one plane from the nasolacrimal duct region anteriorly to the optic canal posteriorly.
Clear the ethmoid roof to identify the frontoethmoidal suture, which carries the anterior ethmoidal artery and the posterior ethmoidal artery in their canals. In the sphenoid, identify the optic prominence and the carotid prominence to fix the posterior end of the field. Follow the roof of the maxillary sinus to the infraorbital nerve and expose the posterior wall of the maxillary sinus, which frames the lower and posterior part of the window.
Check that the medial wall can be seen from the frontal recess to the sphenoid in a single endoscopic view before any bone is removed from it.
Tip. A posterior septectomy or a small window in the anterior septum lets instruments enter from the opposite nostril. They then reach the medial orbit at a flatter angle and move clear of the endoscope.
Step 2: Remove the lamina papyracea and expose the periorbita
Fracture the lamina papyracea with a Cottle elevator near the middle of the ethmoid, where it is thinnest, and lift it off in small flakes while the periorbita stays intact beneath it. Extend the bone removal up to the frontoethmoidal suture, forward to the lacrimal bone over the nasolacrimal duct, and back toward the optic canal, where the bone thickens and is best thinned with a diamond bur.
Inferiorly, follow the wall down to its junction with the orbital floor. The floor stays in place at this stage; it can be thinned later to widen the inferomedial window.
With the bone removed, the periorbita appears as a smooth gray-white sheet. The medial rectus often shows through the membrane as a darker band running from front to back, most clearly toward the apex. Use this band to orient the incisions in the next step.
Tip. Leave the bone of the ethmoidal canals and a thin strip along the suture line in place for now. They hold the anterior ethmoidal artery in a fixed position and mark the upper limit of the window.
Step 3: Open the periorbita and enter the extraconal fat
Incise the periorbita with a sickle knife along the long axis of the medial wall, from posterior to anterior, and add short vertical cuts at each end so the edges fold back as flaps. Keep the blade superficial: the extraconal fat lies immediately beneath the membrane, and the medial rectus lies close under it posteriorly.
The fat bulges into the ethmoid cavity as soon as the periorbita is opened. Fine fibrous septa run through it to the muscle sheaths and give it a lobulated texture. Near the globe the septa are easy to follow; near the apex they thin out, and the boundary between extraconal and intraconal fat is harder to trace.
At the back of the exposure, the fat thins out and the muscle origins converge toward the annulus of Zinn beside the optic canal. Veins in the posterior extraconal fat may drain back toward the superior orbital fissure; note any that cross the field.
Tip. Place the periorbital opening to suit the target. An opening centered over the medial rectus serves the space above the muscle, and an opening placed lower serves the window between the medial and inferior rectus.
Step 4: Follow the ethmoidal arteries to the skull base
Along the upper border of the medial rectus, find the anterior ethmoidal artery where it leaves the orbit and turns medially into its canal at the level of the ethmoid roof. It passes between the medial rectus and the superior oblique muscle together with the anterior ethmoidal nerve, a branch of the nasociliary nerve. Inside the ethmoid, the artery may lie within the roof or a few millimeters below it on a thin bony or membranous mesentery.
Trace the posterior ethmoidal artery about 1 cm farther back. It usually runs above the superior oblique and enters its canal close to the skull base, a short distance in front of the optic canal. The number and size of the ethmoidal arteries vary between sides: a middle ethmoidal artery is present on some sides, and the posterior artery is occasionally absent.
Confirm that each artery connects the ophthalmic artery inside the orbit with the ethmoid roof before moving on. These vessels link the orbital dissection to the anterior skull base above it and mark the upper limit of the orbital window.
Tip. Measure the distance from the anterior to the posterior artery and from the posterior artery to the optic canal on each side. Use them as depth references in the later steps.
Step 5: Clear the extraconal fat to the medial muscular wall
Remove the extraconal fat in small pieces, working along the septa from anterior to posterior with a blunt dissector and gentle suction. Each lobule comes away cleanly once its septal attachments are released. Follow small vessels in the fat to their destination before dividing them, so that the vessels supplying the muscles are kept.
As the fat clears, the medial muscular wall of the orbit appears. The medial rectus forms most of it, the inferior rectus lies below, and the superior oblique lies above, running forward to the trochlea.
Identify the two windows that lead deeper: the space above the medial rectus, toward the superior oblique, and the space between the medial and inferior rectus, which opens onto the intraconal fat. The lower window is the widest route into the medial intraconal space from this corridor.
Tip. A vessel loop around the belly of the medial rectus, held toward the nasal septum, widens both windows and frees one hand for dissection. Release it from time to time so the muscle and its supply can return to their resting position.
Step 6: Expose the vessels and nerves above the medial rectus
Retract the medial rectus gently downward to open the space between it and the superior oblique. In this plane the distal ophthalmic artery runs forward along the medial orbit after crossing the optic nerve. It gives off the posterior and anterior ethmoidal arteries and continues toward its terminal branches near the medial canthus, including the dorsal nasal artery.
The nasociliary nerve travels with the artery. Identify the origins of the posterior and anterior ethmoidal nerves from it, then follow the nerve forward to the trochlea, where it continues as the infratrochlear nerve.
Small venous channels in this area drain toward the superior ophthalmic vein, which lies higher and more lateral, along the medial side of the superior rectus in the anterior orbit. Name each of these three structures before working below the medial rectus.
Confirm the course of the ophthalmic artery from where it crosses the optic nerve to where its ethmoidal branches leave the orbit. This links the vessels seen inside the orbit with the arteries identified at the ethmoid roof in the earlier step.
Step 7: Enter the intraconal space below the medial rectus
Open the window between the medial rectus and the inferior rectus and clear the intraconal fat with blunt dissection, keeping close to the muscle surfaces where the septa separate most easily.
On the intraconal surface of the medial rectus, in its posterior part, find the branch of the inferior division of the oculomotor nerve that supplies the muscle, with the muscular branches of the ophthalmic artery entering beside it. Each rectus muscle receives its nerve and arteries on the surface facing the optic nerve, in the posterior part of the muscle, so its outer surface can be freed with little effect on the supply.
Below, the inferior rectus receives its own branch from the inferior division. Another branch runs forward along the lateral border of the inferior rectus toward the inferior oblique. As the fat is cleared deeper, the medial surface of the optic nerve comes into view and sets the lateral limit of the window.
Tip. Work in short passes from posterior to anterior along each muscle. The nerve and arterial branches enter at predictable points near the back of the muscle, and this direction keeps them in view as the fat is removed.
Step 8: Expose the intraorbital optic nerve and its vessels
Deep to the medial intraconal fat lies the intraorbital optic nerve, which follows a gently curved, slightly redundant course from the apex to the globe. Clear the fat from its medial surface and keep its dural sheath intact.
Near the globe the nerve is surrounded by a network of ciliary arteries, branches of the ophthalmic artery, with long ciliary nerves from the nasociliary nerve running close to them. Trace the posterior ciliary arteries back to the proximal ophthalmic artery; toward the globe each breaks up into short ciliary arteries that wind around the nerve.
Look for the central retinal artery on the inferior surface of the nerve, where it usually enters the sheath about 1 cm behind the globe; it sometimes enters from the medial side. The vessel is very fine, so inspect the undersurface of the nerve with an angled endoscope before any further work around it.
The optic nerve is the lateral limit of this corridor. The lateral rectus, the ciliary ganglion, and the lateral orbital compartment lie beyond it.
Step 9: Define the orbital apex and the annulus of Zinn
Follow the medial rectus and inferior rectus back to their origins on the annulus of Zinn, the common tendinous ring around the optic canal and the central part of the superior orbital fissure. The space here is narrow, and the periorbita, fat, and muscle origins condense into a firm fibrous cone.
Open the ring in the interval between the medial and inferior rectus origins. The inferior division of the oculomotor nerve lies in this interval and sends a branch to each of the two muscles, and the proximal orbital ophthalmic artery is found close by; it leaves the optic canal below and lateral to the optic nerve and then crosses the nerve, usually above it.
Relate the apex to the sphenoid. The optic canal lies above and behind the window, with the optic prominence and the lateral opticocarotid recess marking it from the sphenoid side, and the cavernous sinus lies immediately behind the superior orbital fissure. The abducens and nasociliary nerves and both divisions of the oculomotor nerve pass within the ring, and the trochlear, frontal, and lacrimal nerves pass above it, outside the ring.
Tip. Open the thin medial wall of the optic canal from the sphenoid side before splitting the annulus. The nerve is then seen in its canal and in the orbit at the same time, which orients the apex.
Step 10: Widen the window through the medial orbital floor
At the lower end of the exposure, the medial wall meets the orbital floor above the maxillary sinus. Thin and remove the medial part of the floor with a diamond bur and a Kerrison rongeur, working from the antrostomy, to enlarge the window into the inferomedial orbit.
Carry the floor removal laterally only as far as the infraorbital groove, which holds the infraorbital nerve and artery. The bony angle between the medial wall and the floor, the inferomedial strut, supports the orbital contents; keeping it intact holds the globe steady for the rest of the dissection.
Open the periorbita over this area to show the orbital fat and the inferior rectus from below. The inferior oblique crosses the anterior floor from its origin just lateral to the nasolacrimal canal.
Finish by reviewing the whole medial orbit from this lower vantage: the medial rectus above, the inferior rectus below, the optic nerve deep and lateral, and the ethmoidal arteries at the roof. This view completes the medial and inferomedial compartments reached through the endonasal corridor.
Dissection sequence
Dissection photographs
12 photographs, numbered in sequence. Select a photograph to view it larger.
Skull Base Dissection Atlas Chapter 05 of 16
Expanded Endonasal Approaches
One wide sphenoid opening is the base for midline corridors from the cribriform plate to the craniovertebral junction and for lateral corridors through the pterygopalatine fossa to the cavernous sinus, Meckel’s cave, and the petrous apex.
- Endoscopic endonasal
- 23 photographs
- 12 key steps
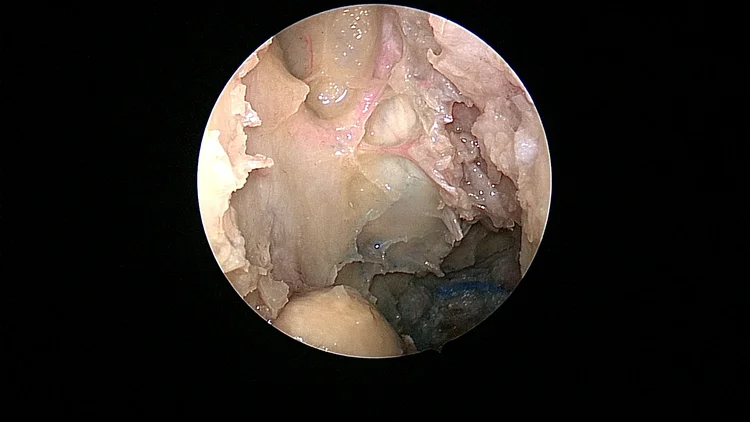
Overview
Each corridor starts from the same binostril exposure and the same intrasphenoid landmarks. Bone removal is then carried forward along the anterior skull base, upward through the tuberculum and planum, backward behind the pituitary gland, downward through the clivus, and laterally through the pterygoid base, with the optic apparatus, the internal carotid arteries, and the basilar artery as the main reference structures. The steps follow the midline corridors from front to back and then the lateral corridors. The cribriform photographs come after the retrosellar photographs in the numbered sequence.
The nasal stage and flap are covered in Nasal Anatomy and Nasoseptal Flap, the intrasphenoid landmarks in Sphenoid Sinus and Sellar Region, and the ethmoid roof in Ethmoidectomy. The parasellar anatomy continues in Cavernous Sinus and Distal Dural Ring, and Infratemporal and Pterygopalatine Fossae reaches the pterygopalatine fossa from the lateral side. The photographs in this chapter cover the sellar, transtuberculum, suprasellar, retrosellar, transcribriform, and transclival exposures; the craniovertebral and lateral corridor steps are bench guidance without photographs.
Lab setup
- Specimen supine, head fixed in a head holder with the neck neutral; slight extension for the cribriform plate and slight flexion for the clivus and craniovertebral junction
- Binostril, two-person technique, with an endoscope holder for long drilling
- 4 mm, 18 cm endoscopes: 0-degree for most work, 30- and 45-degree for the suprasellar and retrosellar spaces and the lateral recesses
- Long-shaft high-speed drill with 3 to 4 mm coarse diamond burs, plus a cutting bur for the sphenoid floor and clivus
- 1 to 3 mm Kerrison rongeurs, Cottle and ball-tipped dissectors, hook blade, angled microscissors, bipolar forceps
- Injected specimen (red arteries, blue veins); the blue injection outlines the intercavernous sinuses and the basilar plexus
- Navigation and a micro-Doppler probe, where available, to practice carotid localization
Key steps
Landmarks to identify are in bold. The numbered photographs below appear in their original order.
Step 1: Build the binostril corridor and store the flap
Lateralize both inferior turbinates, resect one middle turbinate, and outfracture the other. Raise a nasoseptal flap on the side opposite the planned lateral work, pedicled on the posterior septal artery where it crosses the face of the sphenoid below the sphenoid ostium, and store it in the nasopharynx or in a maxillary antrostomy.
Remove the posterior 1 to 2 cm of the septum by separating the vomer from the sphenoid rostrum, then join both ostia into one wide sphenoidotomy that reaches the planum above, the lateral recess on each side, and the sinus floor below. Complete bilateral anterior and posterior ethmoidectomies from one lamina papyracea to the other. Keep the upper septum attached to the skull base until the transcribriform step.
On the side chosen for the lateral corridors, widen the maxillary sinus ostium into a large antrostomy that shows the posterior maxillary wall and the infraorbital nerve in the roof of the sinus. With the sphenoid open behind it, the anterior skull base from the ethmoid roof to the sella can be seen in one view.
Tip. Make the sphenoidotomy as wide as the landmarks allow. A rectangular opening from orbit to orbit and from planum to floor lets two instruments and the endoscope move freely for every corridor that follows.
Step 2: Map the sphenoid and open the sellar floor
Trace each intersinus septum to its insertion, then reduce it to the level of the posterior wall with the drill; many insert on a carotid prominence. Identify the landmarks of the posterior wall: the sella in the center, the planum sphenoidale and tuberculum sellae above it, the clival recess below, the parasellar and paraclival carotid prominences on each side, the optic prominence above each carotid, and the medial opticocarotid recess and lateral opticocarotid recess between them. In a well-pneumatized sinus, the lateral recess shows the maxillary nerve high on its wall and the vidian canal in its floor.
Open the bone over the sella out to the medial edge of each cavernous sinus, thinning it with the diamond bur and lifting the last shell with a dissector. Around the exposed sellar dura, identify the venous channels at its margins: the cavernous sinus on each side, the superior intercavernous sinus above, and the inferior intercavernous sinus below. In this specimen the superior intercavernous sinus is filled with blue injection.
Confirm the midline from the rostrum remnant and the symmetry of the carotid prominences before extending bone removal in any direction.
Tip. Keep the drill moving parallel to the carotid prominence when thinning bone near it. A polished eggshell layer can then be lifted away with a dissector.
Step 3: Open the cribriform plate and anterior fossa dura
Expose the anterior skull base from the frontal recess to the planum. Identify the anterior ethmoidal artery crossing the roof behind the frontal recess and the posterior ethmoidal artery about 1 cm farther back, then coagulate and divide both arteries on each side. A frontal sinus drillout carries the anterior limit to the posterior table of the frontal sinus when a longer opening is wanted.
Detach the upper septum from the skull base. Drill the cribriform plate and the floor of the olfactory fossa from anterior to posterior between the two orbits, and thin the crista galli to an eggshell before removing it, since it anchors the falx. The lamina papyracea on each side, at the outer edge of the fovea ethmoidalis, is the lateral bony limit, and the posterior ethmoidal arteries mark the transition from cribriform plate to planum.
Open the dura on each side of the midline and coagulate the anterior falcine artery before dividing the falx. The opening shows the gyri recti on either side of the interhemispheric fissure, with small orbitofrontal and frontopolar arteries on the frontal base. The olfactory bulb and tract lie in the olfactory sulcus lateral to each gyrus rectus.
Tip. Separate the dura from the bony margins of the opening before incising it. This leaves a clean dural margin on each side for inspection and closure practice.
Step 4: Remove the tuberculum and posterior planum
Thin the bone over the tuberculum sellae, the chiasmatic sulcus, and the posterior planum sphenoidale with a coarse diamond bur until it is translucent, then lift it off while the dura stays intact. The thickened dural fold under the limbus sphenoidale marks the junction between tuberculum and planum.
Carry the removal laterally to the medial opticocarotid recess on each side. The lateral end of the tubercular strut lies at this recess, which marks the transition from the paraclinoid carotid artery below to the supraclinoid carotid above. The paraclinoid carotids and the optic canal on each side set the lateral limits, and the posterior ethmoidal artery marks the usual anterior end of the planum opening.
Where the optic nerve is to be followed, open the medial wall of each optic canal with a 1 mm Kerrison rongeur or by thinning with a 2 mm diamond bur, from the tuberculum forward toward the orbital apex. The opening can be widened a little above and below; the optic strut and the base of the anterior clinoid, lateral to the canal, stay in place.
The exposed dura now shows three zones: planum dura above, the superior intercavernous sinus at the tuberculum, and sellar dura below, with a carotid prominence on each side.
Tip. Thin the canal wall with the diamond bur first. The Kerrison then needs only a shallow bite, with the footplate just under the bone edge and pressed against the bone, away from the nerve.
Step 5: Open the dura and survey the suprasellar space
Incise the dura above and below the superior intercavernous sinus, coagulate and divide the sinus, and carry the opening forward across the planum. The gyri recti and the anterior cerebral artery branches on the frontal base come into view first. Laterally, extend the cut along the falciform ligament over each optic nerve only after reflecting the dural leaf to find the origin of the ophthalmic artery from the supraclinoid carotid.
Above the chiasm, the suprachiasmatic space shows the gyrus rectus, the A1 and A2 segments of the anterior cerebral arteries, the anterior communicating artery with the recurrent artery of Heubner, and the lamina terminalis behind them. The lamina terminalis, the thin anterior wall of the third ventricle, lies behind and below the anterior communicating complex.
Below the chiasm, the subchiasmatic space shows the pituitary stalk and the superior hypophyseal artery branches. These arise from the medial wall of the supraclinoid internal carotid artery and run to the undersurface of the optic chiasm, the optic nerves, and the stalk. The supraclinoid carotids are seen laterally, and the pituitary gland fills the lower part of the field.
Tip. Trace one superior hypophyseal branch from the carotid all the way to the chiasm. Once the first branch is traced, the rest of the network across the stalk can be followed the same way.
Step 6: Free the pituitary gland and transpose it upward
Incise the sellar dura with a hook blade, keeping the capsule of the pituitary gland intact so the plane between gland and dura stays clear. Join this opening to the suprasellar opening through the divided superior intercavernous sinus, and extend it laterally and along the inferior intercavernous sinus until the whole anterior face of the gland is exposed.
Laterally, fine fibrous bands tether the gland to the medial wall of the cavernous sinus. Divide them with sharp dissection, one side at a time. Along the inferolateral surface, find the inferior hypophyseal artery entering the gland from the meningohypophyseal trunk; it is divided for a complete transposition, together with the veins that leave the gland beside it.
Open the diaphragma sellae in the midline as far back as the pituitary stalk. The superior hypophyseal branches and the chiasmatic cistern arachnoid lie just above this cut and stay intact. The gland can then be lifted upward into the suprasellar space. In an interdural variation, the posterior sellar dura stays attached to the gland and is lifted with it, which keeps its posterior venous drainage.
Tip. Free one side completely before starting the other. Working one side at a time keeps the medial cavernous wall in view, and the gland lifts a little more as each side comes free.
Step 7: Remove the dorsum and open the interpeduncular cistern
With the gland lifted, the dorsum sellae and the posterior clinoid process on each side lie behind the sella, between the cavernous carotid segments. Thin the dorsum and upper clivus with a diamond bur until the posterior fossa dura shows through. Free each posterior clinoid at its base before lifting the dorsum out. Ligaments bind it to the anterior clinoid beside the carotid, and the oculomotor nerve runs just lateral to it, so a dorsum removed with the clinoids still attached would pull on both. A disconnected clinoid can stay in place.
Coagulate the basilar venous plexus between the dural layers and open the posterior fossa dura in the midline, extending the cut laterally while watching for the abducens nerve. Open Liliequist’s membrane to enter the interpeduncular cistern.
The cistern shows the basilar apex with the posterior cerebral artery and superior cerebellar artery on each side and the oculomotor nerves passing between them, the posterior communicating arteries with their perforators, and the mammillary bodies above. The tuber cinereum lies between the mammillary bodies and the stalk in the floor of the third ventricle.
Tip. A 45-degree endoscope angled upward shows the retroinfundibular space behind the transposed gland and the full course of each oculomotor nerve toward the cavernous sinus roof.
Step 8: Drill the clivus and open the prepontine cistern
Below the sella, drill the sphenoid floor flush with the clival recess and thin the clival bone with a diamond bur down to the clival dura, with the paraclival carotid artery on each side as the lateral limit. The vidian canal leads back to the carotid at the foramen lacerum, the lower end of the paraclival segment; drilling along the inferior and medial side of the canal widens the corridor toward it. The basilar venous plexus, which lies between the periosteal and meningeal layers of the clival dura, is filled with blue injection.
Reaching the lower clivus requires lowering the sphenoid floor and reflecting the nasopharyngeal mucosa. The limits of a full clivectomy are the dorsum sellae above, the foramen magnum below, and the carotid arteries and eustachian tubes laterally.
Open the dura in the midline. The basilar artery lies on the ventral pons with its pontine perforators and the anterior inferior cerebellar artery on each side. The abducens nerve on each side leaves the pontomedullary junction and ascends lateral to the basilar artery to pierce the clival dura, then runs between the dural layers behind the paraclival carotid. Keep the dural opening centered on the midline and widen it laterally only after both nerves are seen.
Tip. Use the vertebrobasilar junction as a reference for height; the abducens nerves usually emerge close to its level.
Step 9: Extend the clival exposure to C1 and C2
Below the clivus, incise the nasopharyngeal mucosa and the pharyngobasilar fascia in the midline or raise them as an inferiorly based flap, and strip the longus capitis and longus colli muscles laterally. Expose the lower clivus, the anterior atlanto-occipital membrane, the anterior arch of C1 with its tubercle, and the base of the odontoid process.
Remove the central part of the C1 arch and core out the odontoid with the drill, leaving a thin cortical shell that is lifted off the apical ligament and the alar ligaments. Deep to them lie the transverse ligament and the tectorial membrane, the upward continuation of the posterior longitudinal ligament onto the clivus. Laterally, the occipital condyles and the hypoglossal canal above each condyle define the bony margin, and the eustachian tubes and parapharyngeal carotids limit the soft-tissue corridor.
Opening the dura shows the vertebral artery on each side converging toward the basilar artery, the posterior inferior cerebellar arteries, the hypoglossal rootlets, and the ventral medulla.
Tip. A line from the lower end of the nasal bones to the posterior edge of the hard palate predicts the lowest point the endoscope and drill can reach. Check it on the specimen before planning the C1 and C2 work.
Step 10: Open the pterygopalatine fossa and the vidian canal
Raise the mucosa of the lateral nasal wall behind the crista ethmoidalis to find the sphenopalatine artery and posterior nasal artery at the sphenopalatine foramen. Coagulate and divide them, then remove the posterior wall of the maxillary sinus from medial to lateral as far as the infraorbital nerve, keeping the periosteum over the pterygopalatine fossa intact.
Open the periosteum to show the maxillary artery and its terminal branches in the fat in front, with the neural layer behind them: the maxillary nerve at the foramen rotundum superolaterally, the pterygopalatine ganglion suspended from it, and the vidian nerve entering the ganglion from behind. The descending palatine artery and palatine nerves run downward in the greater palatine canal. Displace the contents laterally to expose the base of the pterygoid plates.
On the face of the pterygoid base, three openings line up obliquely from superolateral to inferomedial: the foramen rotundum, the vidian canal, and the palatovaginal canal. Drill the base of the pterygoid around the vidian canal, removing bone along its inferior and medial side, and follow the nerve back to the cartilage of the foramen lacerum and the anterior genu of the petrous carotid, which lies above the posterior end of the canal.
Tip. Use the sphenopalatine foramen and the infraorbital nerve as fixed points. The maxillary nerve, the vidian nerve, and the ganglion sit at the level of the foramen or higher, the palatine nerves descend below it, and the nerves of the fossa are reached on the medial side of the infraorbital nerve.
Step 11: Open the cavernous sinus and Meckel’s cave
Remove the bone over the parasellar and paraclival carotid prominences and the sellar floor out to the superior orbital fissure. Open the outer periosteal layer starting at the gland and working laterally to enter the medial compartment of the cavernous sinus. The carotid shows its paraclival segment, posterior bend, horizontal segment, and anterior bend, with the meningohypophyseal trunk arising from the posterior bend and the inferolateral trunk from the horizontal segment.
Displace the carotid gently medially to see the lateral compartment. The abducens nerve runs free in the sinus, lateral to the carotid and medial to the ophthalmic nerve (V1). The oculomotor and trochlear nerves and V1 lie in the lateral wall between its dural layers. The maxillary nerve (V2) runs below the lower margin of the sinus to the foramen rotundum.
Below the sinus, define the quadrangular space that leads into Meckel’s cave: the paraclival carotid medially, the horizontal petrous carotid below, the abducens nerve above, and V2 laterally. Remove the maxillary strut between the superior orbital fissure and the foramen rotundum, follow V2 back from the foramen rotundum toward the ganglion, and open the dura of the cave inferomedial to V2 to show the trigeminal ganglion and the origins of V2 and V3.
Tip. Keep the dissection in the quadrangular space below the upper border of V2. That border keeps the work beneath the abducens nerve.
Step 12: Reach the petrous apex beside the carotid
With the anterior genu exposed, unroof the paraclival carotid canal from the foramen lacerum up toward the cavernous sinus and remove the bone over the horizontal petrous carotid laterally. Remove the fibrocartilage of the foramen lacerum down to the upper edge of the cartilaginous eustachian tube.
Two routes reach the petrous apex. Medially, a partial clivectomy opens the apex behind the paraclival carotid, and freeing the carotid from its canal allows it to be displaced laterally by a few millimeters. From below, the infrapetrous route drills the apex beneath the horizontal petrous carotid, medial to the eustachian tube and lateral to the petroclival fissure.
Drill the apex cells or marrow posteriorly and laterally. The inferior petrosal sinus runs along the petroclival fissure, the abducens nerve passes over the tip of the apex behind the paraclival carotid on its way into Dorello’s canal, and the cochlea and internal acoustic canal lie at the posterolateral limit of the cavity. Following the pterygoid base farther laterally shows the mandibular nerve at the foramen ovale, in front of the petrous carotid.
Tip. Keep a thin shell of bone over the horizontal carotid while drilling the apex beneath it. It gives a fixed reference for depth as the cavity enlarges.
Dissection sequence
Dissection photographs
23 photographs, numbered in sequence. Select a photograph to view it larger.
Skull Base Dissection Atlas Chapter 06 of 16
Microsurgical Orbital Anatomy
With the orbital roof and lateral wall removed, the orbit is dissected under the microscope from above and from the lateral side, through the periorbita and the extraconal nerves to the intraconal vessels and nerves and the annulus of Zinn.
- Orbit, cavernous sinus, and infratemporal fossa
- 16 photographs
- 9 key steps
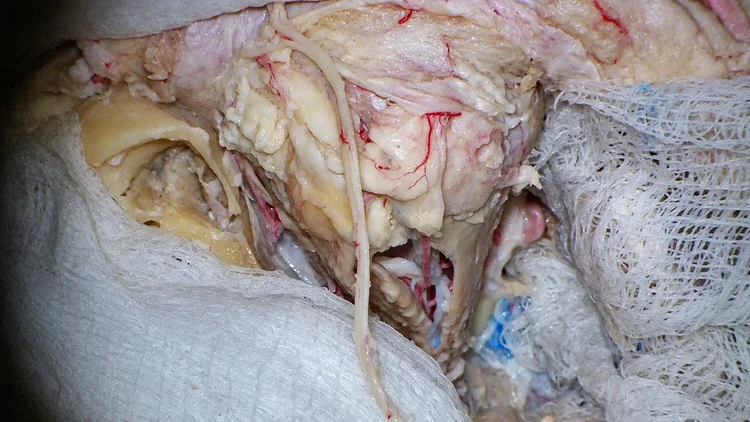
Overview
Removing the orbital roof and lateral wall exposes the periorbita from the orbital rim back to the optic canal and superior orbital fissure. The frontal dura lies above the exposure, the temporal dura and greater sphenoid wing lie behind the lateral wall, and the ethmoid air cells lie medially. The dissection proceeds in layers: the nerves directly beneath the periorbita, the superior and lateral muscles, the intraconal space around the optic nerve, and the convergence of all these structures at the annulus of Zinn. Orbital fat is removed so that each vessel and nerve can be followed.
Three windows from above (medial to the levator, between the levator and superior rectus, and between the superior rectus and lateral rectus) and a lateral window around the lateral rectus organize the intraconal anatomy. The same structures are seen from the medial side in Endoscopic Orbital Anatomy, and the superior orbital fissure and optic canal lead into the Cavernous Sinus and Distal Dural Ring chapters.
Lab setup
- Specimen supine, head rotated 15 to 30 degrees to the opposite side and slightly extended so the orbital roof lies in the line of sight
- Operating microscope, with higher magnification for the apex and annulus
- High-speed drill with cutting and diamond burs; fine osteotome or reciprocating saw for the rim cuts
- Sharp curved periosteal elevator for the periorbita; gelatin sponge strips as spacers during bone cuts
- Microdissectors, fine scissors, and microforceps for fat removal and nerve tracing
- Injected specimen (red arteries, blue veins)
Key steps
Landmarks to identify are in bold. The numbered photographs below appear in their original order.
Step 1: Expose the frontal bone and orbital rim
Elevate the scalp with the pericranium in one layer down to the supraorbital rim, and reflect the temporalis muscle from the zygomatic process of the frontal bone so that the frontozygomatic suture and the upper lateral orbital rim are in view. Identify the supraorbital nerve and its artery at the supraorbital notch or foramen. When the nerve runs in a closed foramen, open the foramen with a small V-shaped osteotomy or a fine diamond bur so the nerve can be released and carried with the scalp flap. The supratrochlear nerve lies medial to it at the rim.
Continue the exposure laterally along the frontal process of the zygoma, detaching the temporalis from the back of the lateral rim and from the greater sphenoid wing. The rim, the suture, and the anterior temporal fossa now show where the frontal craniotomy and the orbital rim cuts will be placed.
Tip. Keep the pericranium and the released supraorbital nerve together in the flap. The medial rim cut can then pass medial to the notch with the nerve protected.
Step 2: Remove the orbital roof and lateral wall
Turn a frontotemporal bone flap. Separate the periorbita from the orbital roof and lateral orbital wall with a sharp curved elevator, working from the rim backward, and slip strips of gelatin sponge between bone and periorbita as a spacer. Elevate the frontal dura from the anterior fossa floor.
Cut the rim medially, just medial to the released supraorbital nerve, and laterally just beyond the frontozygomatic suture, then join the two cuts through the roof about 1 cm behind the rim and lift out the bar of bone. Cut the lateral orbital rim above and below and drill the lateral wall back toward the greater sphenoid wing.
Remove the rest of the roof with rongeurs and a diamond bur back toward the optic canal and superior orbital fissure, leaving the thin bone of the apex until the position of the optic nerve is clear. Medially, the ethmoid air cells and the posterior ethmoidal artery mark the edge of the roof removal. The exposure is now bounded by the periorbita below, the frontal dura above, the temporal dura laterally, and the meningo-orbital band at the lateral edge of the superior orbital fissure.
Step 3: Open the periorbita and find the frontal nerve
Incise the periorbita along the long axis of the orbit, from the rim toward the apex, and reflect the edges. Remove the orbital fat in small pieces along its fibrous septa, staying superficial at first. The first structure beneath the periorbita in the midline is the frontal nerve, lying on the upper surface of the levator palpebrae superioris. Follow it forward to its division into the supraorbital nerve and the supratrochlear nerve, which run toward the rim with the supraorbital artery.
In the superolateral orbit, identify the lacrimal gland in its fossa behind the rim. The levator runs forward in the center of the field, and the superior rectus lies directly beneath it, its edges visible on each side of the levator near the apex. Use the frontal nerve on the levator as the reference line for the rest of the superior dissection: structures medial to it belong to the medial window, and structures lateral to it belong to the lateral window.
Step 4: Map the extraconal nerves and the superior oblique
Medially, identify the superior oblique running forward along the junction of the roof and medial wall. Follow it to the trochlea, the fibrocartilaginous pulley attached to the frontal bone just behind the superomedial rim, where its tendon turns sharply backward and laterally toward the globe. Trace the trochlear nerve from the apex: it crosses medially above the origin of the levator and enters the orbital surface of the superior oblique in its posterior part.
Laterally, find the lacrimal nerve and lacrimal artery running forward along the upper border of the lateral rectus to the lacrimal gland. A recurrent branch of the lacrimal artery may run back through the superior orbital fissure to join the middle meningeal artery.
The trochlear, frontal, and lacrimal nerves enter the orbit through the superior orbital fissure above and outside the annulus of Zinn. Together they form the extraconal layer. Identify all three before entering the muscle cone, and keep them as the outer reference for each of the windows that follow.
Step 5: Open the medial window beside the superior oblique
Open the medial window between the superior oblique on the medial side and the levator palpebrae superioris and superior rectus, which are retracted together toward the lateral side. The optic nerve lies deep in this window. Identify the nasociliary nerve and the distal ophthalmic artery as they cross above the optic nerve from lateral to medial and run toward the medial wall. Lateral to the optic nerve the nasociliary nerve gives the sensory root to the ciliary ganglion, and as it crosses the nerve it gives the long ciliary nerves to the globe. On the medial side it gives the posterior ethmoidal nerve and ends as the anterior ethmoidal nerve and infratrochlear nerve.
Follow the posterior ethmoidal artery with its nerve to the posterior ethmoidal foramen along the frontoethmoidal suture line, and the anterior ethmoidal artery farther forward along the same line. Deep and medial, find the medial rectus and the branch of the inferior division of the oculomotor nerve that enters its intraconal surface. At the apex, the trochlear nerve passes above this window, outside the cone, on its way to the superior oblique.
Step 6: Open the central window between the levator and superior rectus
Separate the levator palpebrae superioris from the superior rectus along their shared border and move the frontal nerve medially or laterally with the levator. The optic nerve lies beneath the superior rectus in the center of the cone. Identify the superior ophthalmic vein, injected blue: it begins in the superomedial orbit near the trochlea, runs backward and laterally under the superior rectus, and crosses above the optic nerve toward the superior orbital fissure. The ophthalmic artery and nasociliary nerve cross the optic nerve along the same lateral-to-medial path.
On the undersurface of the superior rectus, find the superior division of the oculomotor nerve, which supplies the superior rectus and sends a branch around the medial border of the muscle, or through it, to the levator. Near the globe, the posterior ciliary arteries and short ciliary nerves surround the optic nerve as it reaches the sclera.
Tip. Keep the branch to the levator in view while the two muscles are separated; it runs close to the medial edge of the superior rectus near the apex.
Step 7: Open the lateral window toward the lateral rectus
Work in the interval between the lateral rectus and the superior rectus, retracting the superior rectus and levator toward the medial side with the frontal nerve on them. The lateral side of the optic nerve lies at the depth of this interval. Identify the ophthalmic artery entering the orbit through the optic canal below and lateral to the optic nerve. While it is still lateral to the nerve, it gives off the central retinal artery and the lacrimal artery; in most orbits it then crosses above the nerve from lateral to medial and continues with muscular, ciliary, and ethmoidal branches.
The superior ophthalmic vein leaves the cone between the superior rectus and lateral rectus and passes to the superior orbital fissure, usually above the annulus. Find the abducens nerve entering the intraconal surface of the lateral rectus in its posterior part. In the posterior intraconal space, between the optic nerve and the lateral rectus, look for the ciliary ganglion. Its sensory root comes from the nasociliary nerve, its parasympathetic root from the nerve to the inferior oblique, and its sympathetic fibers from the carotid plexus; the short ciliary nerves run forward from it to the globe.
Step 8: Retract the lateral rectus to see above and below it
With the lateral wall removed, follow the lateral rectus from the globe back to its two heads at the annulus, with the lacrimal gland superficial to it anteriorly. Retract the muscle downward to look above it: the superior rectus, the optic nerve, the frontal nerve above the cone, and branches of the ophthalmic artery come into view. Then retract it upward toward the roof to look below it at the inferior rectus and the inferior division of the oculomotor nerve beneath the optic nerve.
Follow the inferior division to its branches: one to the medial rectus, one to the inferior rectus, and a long branch to the inferior oblique that runs forward along the lateral border of the inferior rectus and gives the parasympathetic root to the ciliary ganglion. The inferior ophthalmic vein runs back along the inferior rectus in the floor of the orbit and drains into the superior ophthalmic vein or through the inferior orbital fissure to the pterygoid plexus. Anteriorly, the inferior oblique runs across the orbital floor from its origin at the anteromedial floor to the globe; it is the one extraocular muscle that arises at the front of the orbit.
Step 9: Trace each structure to the annulus of Zinn
The four rectus muscles arise from the annulus of Zinn, the common tendinous ring that encloses the optic canal and the central part of the superior orbital fissure. The optic nerve and ophthalmic artery pass through the optic canal within the ring. The superior and inferior divisions of the oculomotor nerve, the nasociliary nerve, and the abducens nerve pass through the fissure inside the ring, through the opening between the two heads of the lateral rectus. The trochlear nerve, frontal nerve, and lacrimal nerve, and usually the superior ophthalmic vein, pass through the fissure above and lateral to the ring.
Follow each muscle and nerve back to the ring, then forward again to the globe. Confirm the order of the extraconal nerves at the apex: the trochlear nerve most medial, the frontal nerve central, and the lacrimal nerve lateral. Behind the ring, the frontal and temporal dura and the meningo-orbital band lead toward the cavernous sinus.
Dissection sequence
Dissection photographs
16 photographs, numbered in sequence. Select a photograph to view it larger.
Skull Base Dissection Atlas Chapter 07 of 16
Cavernous Sinus
The cavernous sinus is dissected extradurally from the middle fossa. After an anterior clinoidectomy, the temporal dura is peeled off the lateral wall to expose the trigeminal divisions, the ocular motor nerves, and the cavernous carotid artery with its branches.
- Orbit, cavernous sinus, and infratemporal fossa
- 22 photographs
- 10 key steps
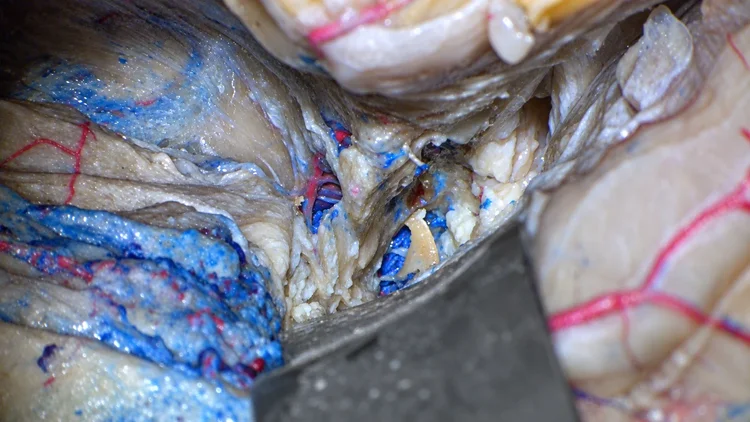
Overview
The lateral wall of the cavernous sinus has two layers. The outer layer, the dura propria, is continuous with the temporal dura. The thinner inner layer carries the oculomotor, trochlear, and ophthalmic nerves. Separating the two layers from the middle fossa floor gives an extradural view of the lateral wall from the superior orbital fissure back to Meckel’s cave. The photographs include the anterior clinoidectomy, the peel of the dura propria, and the spaces between the nerves of the lateral wall, with the blue-injected venous compartments around them.
The exposure is bounded by the anterior clinoid region and superior orbital fissure in front, the petrous apex and Meckel’s cave behind, the foramina rotundum and ovale below, and the temporal dura above and laterally. The paraclinoid carotid and its dural rings are covered in Distal Dural Ring, drilling of the petrous apex in Petrosectomy, and the sinus seen from the sphenoid in Expanded Endonasal Approaches.
Lab setup
- Specimen supine, head rotated 30 to 45 degrees to the opposite side and the vertex tilted slightly down, so the middle fossa floor lies in the line of sight
- Operating microscope throughout
- High-speed drill with 2 to 4 mm diamond burs and continuous irrigation for the middle fossa floor, the clinoid, and the optic canal roof
- No. 11 or 15 blade, sharp and blunt microdissectors, fine scissors, and self-retaining retractor blades for the temporal dura
- Injected specimen (red arteries, blue veins); the venous injection fills the cavernous compartments and their connections to the pterygoid plexus
Key steps
Landmarks to identify are in bold. The numbered photographs below appear in their original order.
Step 1: Elevate the temporal dura from the middle fossa floor
Reflect the temporalis muscle and take the temporal squama down to the middle fossa floor, extending the bone opening forward to the greater sphenoid wing so that the frontal and temporal dura meet at the sphenoid ridge. Drill the bony ridges of the floor flat, including the prominence that often lies just lateral to the maxillary and mandibular nerves, so that the line of sight runs along the floor.
Elevate the temporal dura from lateral to medial. Follow the middle meningeal artery to the foramen spinosum and divide it there. The foramen ovale and the mandibular nerve (V3) lie just anteromedial to the foramen spinosum; the foramen rotundum and the maxillary nerve (V2) lie farther forward, toward the superior orbital fissure.
Behind V3, the greater superficial petrosal nerve runs anteromedially on the petrous surface toward the foramen lacerum. Lift the dura from behind forward so the nerve stays on the bone. The arcuate eminence and the petrous ridge mark the posterior limit of the exposure.
Step 2: Divide the meningo-orbital band
Elevate the frontal and temporal dura from the lesser sphenoid wing and drill the wing flat toward the anterior clinoid process. At the lateral edge of the superior orbital fissure, the meningo-orbital band tethers the temporal dura to the periorbita, and it may carry a small recurrent branch of the lacrimal artery. Cut the band for a few millimeters from lateral to medial, staying at its lateral edge, which lies away from the oculomotor nerve.
The cut opens the plane between the dura propria and the inner layer of the lateral wall. Begin the peel here with a sharp dissector: the outer layer lifts with the temporal dura, and the inner layer stays on the nerves entering the fissure. The ophthalmic nerve (V1) is the first nerve to come into view below the fissure, and the lateral edge of the anterior clinoid process is now exposed above and medial to it.
Step 3: Remove the anterior clinoid process
Elevate the dura medial to the superior orbital fissure from the lesser wing until the roof of the optic canal is exposed; where that bone is thin, the optic nerve shows as a pale shadow beneath it. The falciform ligament lies on the intradural side, at the intracranial opening of the canal. Thin the roof of the optic canal with a diamond bur under irrigation and lift the remaining shell off the nerve.
Core the anterior clinoid process with the bur and separate it from the lesser wing at its front. The oculomotor nerve runs in the fibrous wall directly under its lateral surface, so lift the thinned lateral shell away from that wall with a fine dissector. Divide the optic strut, the bony bridge between the optic canal and the superior orbital fissure, with a diamond bur; it may contain an extension of the sphenoid sinus. Free the tip from its dural and interclinoid attachments and remove it.
The space left by the clinoid exposes the clinoidal segment of the internal carotid artery, covered by the carotico-oculomotor membrane, between the optic nerve medially and the oculomotor nerve laterally. The dural rings around this segment are followed in Distal Dural Ring.
Step 4: Peel the dura propria off the trigeminal divisions
Continue the peel backward from the superior orbital fissure. Lift the dura propria off the ophthalmic nerve, then off the maxillary nerve at the foramen rotundum and the mandibular nerve at the foramen ovale. Start each separation sharply with a blade and continue with a blunt dissector once the plane is open. The dural web between V2 and V3 (the lateral loop) and the dural attachment along the lateral edge of V3 usually need to be cut sharply.
Venous channels that connect the cavernous sinus with the pterygoid plexus cross this area around the foramen ovale and the lateral loop; here they are filled with blue injection. Continue the peel toward the trigeminal ganglion, lifting the dura propria as one sheet from the anterior border of the nerves back to the petrous ridge.
Tip. Work along the long axis of each trigeminal division; the plane opens most easily parallel to the nerve fibers.
Step 5: Expose the trigeminal ganglion in Meckel’s cave
Behind the three divisions, the trigeminal ganglion lies in Meckel’s cave, a dural pouch that opens from the posterior fossa and rests on the trigeminal impression of the petrous apex. Lift the dura propria off the lateral surface of the ganglion to the edge of the petrous ridge, where the superior petrosal sinus runs in the dura along the ridge.
At the posterior margin of the exposure, the greater superficial petrosal nerve passes beneath V3 and the ganglion toward the foramen lacerum, with the horizontal petrous carotid below it. Two triangles on the middle fossa floor are defined here. The posterolateral (Glasscock) triangle lies lateral to the nerve, between it, the lateral edge of V3, and a line from the foramen spinosum to the arcuate eminence; the horizontal petrous carotid lies beneath its floor. The posteromedial (Kawase) triangle lies medial to the nerve, between it, the ganglion, and the petrous ridge, and overlies the petrous apex. Drilling of these triangles is covered in Petrosectomy.
Step 6: Identify the nerves of the lateral wall
With the dura propria removed, the inner layer shows the nerves of the lateral wall. The oculomotor nerve is highest, entering the roof of the sinus and running forward under the clinoid region. The trochlear nerve runs just below it, and the ophthalmic nerve runs obliquely upward below both toward the superior orbital fissure. The maxillary nerve leaves the lower margin of the sinus to enter the foramen rotundum, and the mandibular nerve passes almost straight down to the foramen ovale.
Near the fissure, the trochlear nerve crosses above the oculomotor nerve to reach the medial orbit. The oculomotor nerve enters the roof within a short dural sleeve, the oculomotor cistern, and divides into its superior and inferior divisions in the anterior part of the sinus, close to the fissure. The inner layer is thin enough that the cavernous carotid shows through it in the spaces between the nerves.
Step 7: Open the infratrochlear (Parkinson) triangle
Open the space between the trochlear nerve and the ophthalmic nerve, the infratrochlear (Parkinson) triangle, by incising the inner layer between them and clearing the blue-injected venous space beneath. This window opens onto the posterior bend of the cavernous carotid, where the artery turns from its posterior vertical segment into the horizontal segment.
Identify the meningohypophyseal trunk arising from the posterior bend and follow its three usual branches: the tentorial artery running back along the tentorial edge, the dorsal meningeal artery running medially toward the clival dura and the abducens nerve, and the inferior hypophyseal artery running medially to the posterior lobe of the pituitary gland. The abducens nerve is visible through the same window, medial to V1 and lateral to the carotid. The same region can also be reached between the oculomotor and trochlear nerves, through the supratrochlear triangle.
Tip. Clear the injected venous cast in small fragments along the carotid wall; each branch is easiest to recognize at its origin.
Step 8: Open the anteromedial and anterolateral triangles
Between the ophthalmic nerve and the maxillary nerve, the anteromedial triangle lies below the horizontal cavernous carotid and the anterior bend; deep to it are the abducens nerve and the lateral wall of the sphenoid sinus. Identify the inferolateral trunk arising from the lateral side of the horizontal segment. It passes above the abducens nerve, supplies the nerves of the lateral wall, and sends branches toward the superior orbital fissure, the foramen rotundum, and the foramen ovale.
Between the maxillary and mandibular nerves, the anterolateral triangle leads toward the lateral recess of the sphenoid sinus, which lies medial to V2 and below the cavernous sinus. The bone between the two nerves can be thin over a well-pneumatized sinus.
Trace the abducens nerve forward within the sinus, lateral to the carotid and medial to the ophthalmic nerve. It receives sympathetic fibers from the carotid plexus and then enters the orbit through the superior orbital fissure inside the annulus. Branching patterns and triangle borders vary between specimens and descriptions, so each triangle is identified by the structures that bound it.
Step 9: Follow the abducens nerve to the petrous apex
Posteriorly, follow the abducens nerve back to where it enters the sinus at the exit of Dorello’s canal. Here it passes beneath the petrosphenoidal ligament (Gruber ligament), which runs from the petrous apex to the side of the dorsum sellae near the posterior clinoid process, and it is surrounded by a venous plexus. The venous confluence at this point links the cavernous sinus with the superior petrosal sinus, the inferior petrosal sinus, and the basilar plexus on the clivus.
Below this level, the petrolingual ligament spans from the lingula of the sphenoid to the petrous apex over the carotid and marks where the petrous carotid becomes the cavernous carotid. Above, the anterior petroclinoid fold, the posterior petroclinoid fold, and the interclinoid fold outline the oculomotor triangle, where the oculomotor nerve pierces the roof of the sinus. These folds lie on the intradural surface of the roof; relate them to the nerves exposed in the lateral wall before reviewing the whole carotid course.
Step 10: Review the carotid course and medial relations
Follow the internal carotid artery through the whole exposure. It leaves the carotid canal above the foramen lacerum, passes beneath the petrolingual ligament, ascends as the posterior vertical segment, turns at the posterior bend, runs forward as the horizontal segment, and turns upward at the anterior bend beneath the clinoid region. It leaves the sinus at the proximal dural ring to become the clinoidal segment in the space opened by the clinoidectomy.
Medial to the carotid, the pituitary gland lies against the medial wall of the cavernous sinus, and the intercavernous sinuses connect the two sides around the sella. Confirm each nerve’s relationship to the artery: the oculomotor, trochlear, and ophthalmic nerves in the lateral wall, the abducens nerve free within the sinus beside the carotid, and the maxillary nerve below the lower margin of the sinus.
Dissection sequence
Dissection photographs
22 photographs, numbered in sequence. Select a photograph to view it larger.
Skull Base Dissection Atlas Chapter 08 of 16
Distal Dural Ring
The distal dural ring and the paraclinoid internal carotid artery are dissected with both the microscope and the endoscope. The endoscope was used to view the ophthalmic artery during the extradural part of the ring opening.
- Orbit, cavernous sinus, and infratemporal fossa
- 28 photographs
- 10 key steps
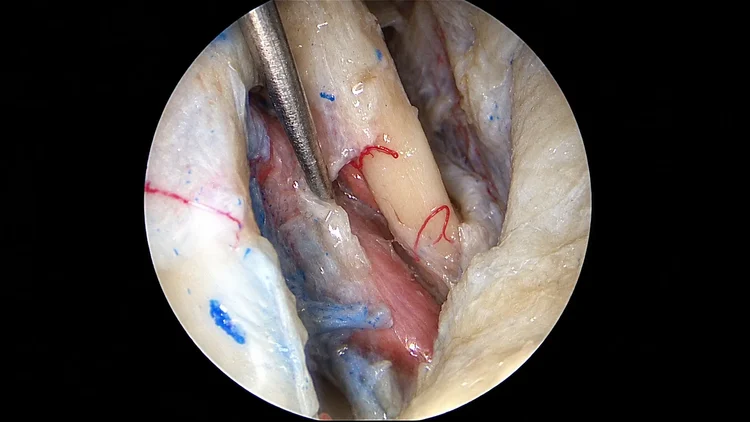
Overview
The paraclinoid internal carotid artery passes through two dural rings. The proximal ring forms from the dura on the lower surface of the anterior clinoid process and is continuous with the carotico-oculomotor membrane. The distal ring forms from the dura on the upper surface of the clinoid and marks where the artery becomes intradural. The clinoidal segment lies between the two rings. The ophthalmic artery usually arises just above the distal ring and runs forward below the optic nerve, so its origin is checked before the ring is cut.
Photographs 1 to 3 are microscope views and photographs 4 to 28 are endoscope views. The sequence starts with the extradural clinoid region and the junction of the optic nerve and carotid, then shows the paraclinoid carotid, tuberculum, and sella from the sphenoid side. The clinoidectomy and the lateral wall of the cavernous sinus are also covered in Cavernous Sinus, and the sphenoid exposure in Sphenoid Sinus and Sellar Region and in Expanded Endonasal Approaches.
Lab setup
- Specimen supine, head rotated about 30 degrees to the opposite side and slightly extended so the anterior clinoid lies at the center of the field
- Operating microscope for the extradural clinoid exposure
- 4 mm rigid endoscopes, 0-degree and 30- or 45-degree, for close views of the optic nerve and carotid junction and of the sphenoid side
- High-speed drill with 2 to 3 mm diamond burs and continuous irrigation for the optic canal roof, clinoid, and optic strut
- Fine microdissectors, a sickle knife or No. 11 blade, and microscissors for the dural rings
- Injected specimen (red arteries, blue veins)
Key steps
Landmarks to identify are in bold. The numbered photographs below appear in their original order.
Step 1: Expose the anterior clinoid region extradurally
Through a frontotemporal craniotomy with the sphenoid ridge drilled flat, elevate the frontal and temporal dura from the lesser sphenoid wing toward the anterior clinoid process. Divide the meningo-orbital band for a few millimeters at the lateral edge of the superior orbital fissure so that the temporal dura can be peeled off the front of the cavernous sinus wall, as described in Cavernous Sinus.
Continue the elevation medially over the orbital roof toward the planum sphenoidale until the roof of the optic canal is exposed and the optic nerve shows as a pale shadow where the bone is thin. The falciform ligament lies on the intradural side, at the intracranial opening of the canal. The clinoid is now visible in full: the optic canal along its medial side, the superior orbital fissure below and lateral to it, and the oculomotor nerve in the fibrous tissue along its lateral edge. Use the microscope for this stage and for the bone removal that follows.
Step 2: Remove the anterior clinoid and optic strut
Unroof the optic canal with a diamond bur under continuous irrigation, thinning the bone and lifting the last shell off the nerve sheath. Hollow the anterior clinoid process from within, detach it from the lesser sphenoid wing, and peel its thinned lateral wall off the oculomotor nerve. Divide the optic strut last; it is the bony bridge between the optic canal and the superior orbital fissure, and it may contain an extension of the sphenoid sinus. Free the tip from its dural attachments and remove it.
The space left by the bone is the clinoidal space. The clinoidal carotid lies in it, lateral and inferior to the optic nerve, with the oculomotor nerve below and lateral to the artery, passing from the roof into the lateral wall of the cavernous sinus. The venous plexus around the clinoidal segment, injected blue, lies below the artery and is continuous with the cavernous sinus.
Tip. While attached, the strut holds the clinoid steady for drilling.
Step 3: Define the clinoidal segment and both rings
Under the microscope, define the two dural layers that the clinoid separated. The proximal dural ring is the lower layer, formed by the dura that lined the undersurface of the clinoid. It continues medially and backward as the carotico-oculomotor membrane between the carotid and the oculomotor nerve, and it is often incomplete. The distal dural ring is the upper layer, formed by the dura that covered the upper surface of the clinoid. It is continuous medially with the falciform ligament over the optic nerve and with the diaphragma sellae.
The distal ring is thickest laterally, where it joins the dura that covered the clinoid. Medially it is thinner, blends with the dura of the carotid sulcus, and may leave a small dural pouch beneath it, the carotid cave. The clinoidal segment lies between the two rings. Lift and dissect the dura around the optic nerve and the carotid with fine instruments, keeping the blue-injected venous plexus below in view.
Step 4: Inspect the ophthalmic artery with the endoscope
Before the ring is cut, bring an angled endoscope to the junction of the optic nerve and the internal carotid artery. It gives a close view of the optic nerve, the carotid beside it, and the space between them where the ophthalmic artery arises and runs toward the optic canal beneath the nerve. In this dissection the endoscope was used to keep the ophthalmic artery in view while the extradural part of the ring was opened.
The same view shows whether the ophthalmic artery arises above the ring from the upper medial wall of the carotid, which is the usual pattern, or from the clinoidal segment below it. An origin below the ring places the artery within the clinoidal space, so confirm its position before any cut. Follow the artery forward as far as the falciform ligament and the optic nerve sheath: it enters the canal within the sheath, below the nerve, and the distal dural ring lies just proximal to its origin in the usual pattern.
Step 5: Open the extradural part of the distal ring
With the ophthalmic artery in view, incise the distal dural ring on its lateral side, where it is thickest, and continue around the clinoidal carotid with a fine dissector held against the outer wall of the artery. Release the ring in short segments with the blade parallel to the arterial wall. As the lateral part opens, the carotid can be followed from the clinoidal segment through the ring into the ophthalmic segment.
Medially, the ring turns toward the optic nerve and continues as the falciform ligament. The carotid cave may extend beneath the ring on this side, so the medial part is the last to be released. Confirm at each stage the positions of the ophthalmic artery, the optic nerve above, and the oculomotor nerve below and lateral to the carotid. The proximal dural ring and the venous plexus below it stay in place during this step.
Step 6: Survey the paraclinoid landmarks from the sphenoid
With the endoscope, view the region from the sphenoid side. Identify the sella in the midline, the planum sphenoidale and tuberculum sellae above it, and the clivus below. On each side, the carotid prominence bulges from the lateral sinus wall, with the optic canal above it. Between them, the lateral opticocarotid recess is the sinus surface of the optic strut. The medial opticocarotid recess lies where the tuberculum, the optic canal, and the paraclinoid carotid meet.
Relate these surfaces to the transcranial views. The bone behind the lateral recess is the same strut that was divided from above, and the upper part of the carotid prominence, just below the optic canal, is the paraclinoid carotid. The cavernous segment continues below and behind it, lateral to the sella.
Step 7: Remove the bone over the paraclinoid carotid
Thin the bone over the paraclinoid carotid and the optic canal with a diamond bur and remove the last shell with a fine dissector. This exposes the dura covering the artery, the cancellous bone of the optic strut region at the lateral opticocarotid recess, and the blue-injected venous spaces of the anterior cavernous sinus below the carotid.
Follow the optic nerve into its canal within its dural sheath, and trace the carotid from its cavernous segment up to the level of the ring. At the upper margin of the paraclinoid carotid, the dura over the artery meets the dura of the optic canal and the tuberculum sellae; this junction marks the distal dural ring from this side. At the lower margin, where the artery emerges from the venous space, lies the proximal ring.
Tip. Move the bur along the long axis of the carotid prominence; the bone over the artery then thins evenly and lifts away as one shell.
Step 8: Map the dura of the tuberculum and sella
With bone removed across the midline, the dura of the planum sphenoidale, tuberculum sellae, and sella is exposed between the two paraclinoid carotids. The superior intercavernous sinus, filled with blue injection, crosses at the level of the tuberculum and joins the cavernous sinus on each side. An inferior intercavernous sinus may cross near the sellar floor, and together these channels can form a venous ring around the gland.
The medial edge of each distal dural ring lies where the tuberculum dura meets the dura over the carotid. Lateral to the sella, the medial wall of the cavernous sinus separates the pituitary gland from the cavernous carotid. Confirm the position of each carotid against the sellar dura and the intercavernous sinus before working on the ring from this side.
Step 9: Define the medial edge of the ring and the hypophyseal arteries
Inspect the medial edge of the ring for the superior hypophyseal arteries. They arise from the medial side of the ophthalmic segment just above the distal dural ring and run medially toward the pituitary stalk and the undersurface of the optic chiasm. The carotid cave, when present, lies at this same medial edge as a small pouch between the ring and the arterial wall.
Incise the dura at the medial edge of the ring and separate the ring from the carotid wall with a fine dissector, working around the artery. Keep the optic nerve above and the ophthalmic artery at the upper margin of the carotid in view as the dissector advances. The superior intercavernous sinus marks the lower limit of the tuberculum dura on this side, and the paraclinoid carotid marks the lateral limit.
Step 10: Follow the carotid through the ring
As the ring is released, follow the carotid from the clinoidal segment, through the ring, into the ophthalmic segment. Releasing the ring frees the paraclinoid carotid from its dural collar, between the venous spaces below it and the bone of the optic strut region.
Review the rings from both sides. From above, the distal dural ring is the upper dural layer of the clinoid and the proximal dural ring the lower one, with the oculomotor nerve below and lateral to the artery. From the sphenoid side, the proximal ring lies at the lower margin of the paraclinoid carotid where it leaves the cavernous sinus, and the distal ring lies at its upper margin against the optic canal and the tuberculum sellae. Together, the microscope and endoscope views show the ring from above and from below.
Dissection sequence
Dissection photographs
28 photographs, numbered in sequence. Select a photograph to view it larger.
Skull Base Dissection Atlas Chapter 09 of 16
Infratemporal and Pterygopalatine Fossae
A preauricular transzygomatic approach reaches the anterior infratemporal fossa through a zygomatic osteotomy, a frontotemporal craniotomy, and the drilled middle fossa floor, and exposes the branches of the maxillary and mandibular nerves. The pterygoid process is then removed to reach the eustachian tube and the nasopharynx.
- Orbit, cavernous sinus, and infratemporal fossa
- 26 photographs
- 12 key steps
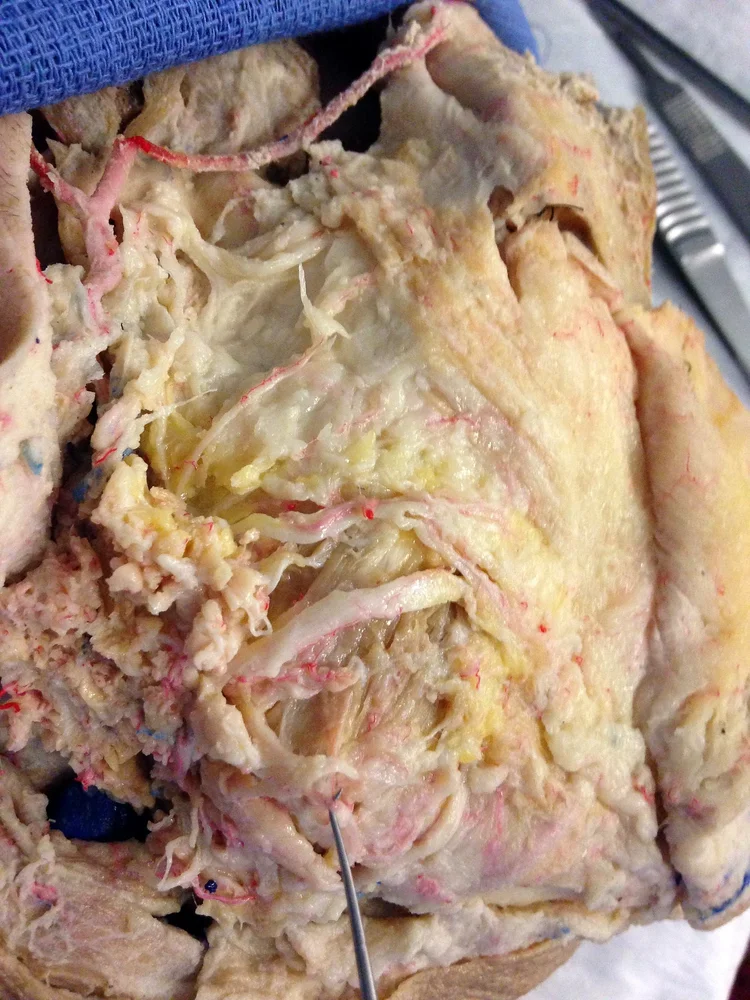
Overview
The infratemporal fossa lies below the middle fossa floor and medial to the zygomatic arch and mandibular ramus. The pterygopalatine fossa lies farther forward, between the back of the maxilla and the pterygoid process, and opens into the infratemporal fossa through the pterygomaxillary fissure. In this dissection both spaces are reached from above and from the side: the arch is mobilized, the temporalis is turned down, and after a frontotemporal craniotomy the middle fossa floor is drilled around the maxillary and mandibular nerves until their foramina are unroofed and the deep spaces open beneath them.
The finished corridor has the maxillary nerve and pterygopalatine fossa in front, the mandibular nerve and eustachian tube behind, the pterygoid muscles laterally and below, and the pharyngobasilar fascia medially. The dural separation over the trigeminal divisions is the same plane used in Cavernous Sinus, and the pterygopalatine fossa is entered from the nasal side in Expanded Endonasal Approaches.
Lab setup
- Specimen supine, head turned about 60 degrees to the opposite side, or in the lateral position, with the zygoma uppermost
- Operating microscope for the extradural, foraminal, and deep stages
- High-speed drill: cutting burs for the craniotomy, coarse diamond burs for the sphenoid wing keyhole, middle fossa floor, foramina, and pterygoid process
- Fine saw or thin cutting bur for the zygomatic osteotomies
- Sharp periosteal elevator for the temporalis; microdissectors, microscissors, and bipolar forceps for the dura and nerve branches
- Injected specimen (red arteries, blue veins), to follow the maxillary artery and the pterygoid venous plexus
Key steps
Landmarks to identify are in bold. The numbered photographs below appear in their original order.
Step 1: Make the sickle-shaped incision and raise the interfascial flap
Start the incision about 5 mm below the root of the zygomatic arch, just in front of the tragus, and curve it up and forward behind the hairline in a sickle shape. Carry the anterior limb farther forward when the dissection will continue to the pterygoid muscles and nasopharynx. Incise the skin, the temporoparietal fascia, and the galea, and leave the deep temporal fascia intact over the temporalis. The superficial temporal artery runs in the temporoparietal fascia in front of the ear, with the auriculotemporal nerve beside it at the zygomatic root.
A few centimeters above the arch, the deep temporal fascia splits into superficial and deep layers around the interfascial fat pad. Incise the superficial layer and raise it with the scalp flap and the fat pad, leaving the deep layer on the muscle. The superficial layer is continuous with the periosteum of the arch, so following this plane downward leads into a subperiosteal dissection of the arch and forward over the lateral orbital rim. Below the arch, the parotid gland and masseter cover the ramus.
Tip. The frontal (temporal) branches of the facial nerve cross the arch in the superficial fascia. Raising the superficial fascial layer and the fat pad in continuity with the scalp keeps these branches inside the flap.
Step 2: Free the zygomatic arch with a limited osteotomy
Strip the periosteum from the upper border and outer surface of the zygomatic arch and the body of the zygoma, and free the deep temporal fascia from the arch’s undersurface, including at the marginal tubercle on the posterior border of the frontal process. Identify the zygomaticofacial foramen on the outer surface of the zygoma, where the zygomaticofacial nerve emerges, and keep the anterior cuts clear of it. Behind the arch, define the root of the zygoma and the glenoid fossa of the temporomandibular joint.
Divide the arch at both ends. Behind, cut obliquely across the zygomatic root just in front of the glenoid fossa so the joint stays closed. In front, start at the marginal tubercle, cut down through the body of the zygoma beside the lateral orbital rim, and finish through its maxillary process. Reflect the freed arch downward with the masseter still attached.
The zygomaticotemporal nerve leaves the zygoma on its temporal surface behind the orbital rim, and both zygomatic nerve branches lie close to the anterior cuts.
Tip. Leaving the arch on the masseter keeps it on a muscular pedicle and lets it fall out of the field without a separate retractor.
Step 3: Reflect the temporalis down through the arch defect
Detach the temporalis from the temporal fossa with a sharp periosteal elevator, starting at the superior temporal line and working downward and forward in the subperiosteal plane. Turn the whole muscle down through the opening left by the osteotomy. It stays attached to the coronoid process of the mandible, and the muscle belly is kept intact.
The deep temporal arteries and deep temporal nerves rise from the infratemporal fossa and enter the deep surface of the muscle. Keep the elevator on bone and limit cautery on the muscle’s undersurface so these vessels and nerves stay with the muscle.
With the muscle down, the squamous temporal bone, the greater wing of the sphenoid, the pterion, and the lateral orbital wall are exposed in one field. With the arch and muscle turned down, the middle fossa floor can be viewed from a low angle, which keeps lifting of the temporal lobe to a minimum.
Step 4: Turn the frontotemporal craniotomy
With a coarse diamond bur, drill a keyhole in the greater wing of the sphenoid where the anterior and middle fossae meet, angling the bur along the plane of the orbital roof, until both frontal dura and temporal dura are exposed and the lateral orbital wall is defined. The anterior branch of the middle meningeal artery runs beneath the sphenoid wing at this point.
From the keyhole, drill a groove downward and backward along the lateral wall and floor of the middle fossa. The groove brings the lower margin of the bone flap down to the floor. Join the keyhole and the lower end of the groove with a craniotome cut over the frontotemporal convexity, using extra burr holes where the dura is stuck to the bone, and lift the flap. In this specimen the temporal dura was also opened over the temporal lobe.
Use the root of the zygoma as a lateral guide to the floor: the foramen ovale lies roughly medial to its anterior margin and the foramen spinosum roughly medial to its midpoint.
Step 5: Flatten the middle fossa floor and find the foramina
Elevate the temporal dura from the floor, working from lateral to medial. Drill the bony ridges of the floor flat with a diamond bur, including the prominence that usually lies just lateral to the mandibular and maxillary nerves, so it no longer blocks the line of sight along the floor.
Follow the middle meningeal artery on the dural surface down to the foramen spinosum, which can be partly covered by a lip of bone; it lies roughly medial to the midpoint of the zygomatic root, as noted in the previous step. The foramen ovale, with the mandibular nerve (V3), lies anterior and medial to the foramen spinosum. The foramen rotundum, with the maxillary nerve (V2), lies farther forward, in front of the tip of the temporal dura and just below the medial end of the superior orbital fissure.
Posteromedial to the foramen spinosum, the greater superficial petrosal nerve runs forward in its groove toward the foramen lacerum. It marks the posterior limit of this exposure, which stays in front of the arcuate eminence and the petrous apex.
Step 6: Peel the dura propria and divide the middle meningeal artery
At the foramen rotundum and foramen ovale, find the plane where the temporal dura leaves the nerve sheaths. Peel the dura propria, the outer layer that is continuous with the dura over the temporal lobe, away from the thin inner layer that stays on V2, V3, and the lateral surface of the trigeminal (gasserian) ganglion. Work from the foramina backward and upward along the nerves.
This separation exposes the lateral loop, the dural bridge between V2 and V3 as they diverge from the ganglion, with a wedge of sphenoid bone between the two foramina. Several emissary veins run with the nerves through the foramina and connect the pterygoid venous plexus below with the cavernous sinus above; in an injected specimen they appear as blue channels along the nerves.
Coagulate and divide the middle meningeal artery at the foramen spinosum. Once it is released, the dura over the temporal lobe can be lifted from the floor, and the whole field from the superior orbital fissure to the foramen spinosum opens.
Tip. The plane is clearest at the foramina, where the dura propria separates easily from the nerve sheaths; start there and follow it back toward the ganglion.
Step 7: Skeletonize the foramina and expose the vidian canal
Enlarge the foramen rotundum and foramen ovale with a diamond bur, following V2 and V3 down through the floor. Opening each foramen along its full length frees the nerve within it.
Then drill the wedge of bone between V2 and V3. The vidian canal appears below and medial to V2. It runs forward through the body of the sphenoid at the base of the pterygoid process, above the junction of the medial and lateral pterygoid plates, and opens into the pterygopalatine fossa. The vidian nerve in the canal is formed by the greater superficial petrosal nerve and the deep petrosal nerve. Deeper drilling between V2 and V3 reaches the base of the pterygoid process.
How the canal presents depends on how far the sphenoid is aerated. With little aeration it is a channel in solid bone below V2. With a large sinus it runs along the floor and lateral wall of the sinus, and the sphenoid sinus mucosa can fill the window between V2 and V3 and cover it.
Tip. In a well-pneumatized specimen, the gray mucosa of the sphenoid sinus can appear medial to V2 and between V2 and V3; drill there with a diamond bur and light pressure.
Step 8: Unroof V2 into the pterygopalatine fossa
Unroof the foramen rotundum completely and follow V2 forward into the pterygopalatine fossa, with the vidian nerve below it. Clear the fat and veins to show the branches.
V2 gives off the zygomatic nerve, which passes through the inferior orbital fissure to divide into zygomaticotemporal and zygomaticofacial branches, and the posterior superior alveolar nerve, which runs a curved course down onto the back of the maxilla toward the maxillary sinus and molar teeth. The trunk then continues through the inferior orbital fissure as the infraorbital nerve.
The pterygopalatine ganglion hangs from the undersurface of V2 and receives the vidian nerve from behind. The greater and lesser palatine nerves descend from it toward the hard and soft palate. Posterior nasal branches and the nasopalatine nerve pass medially through the sphenopalatine foramen, and a small pharyngeal branch runs backward.
The terminal maxillary artery lies in front of the nerves and divides into the posterior superior alveolar, infraorbital, descending palatine, vidian, pharyngeal, and sphenopalatine arteries. The artery of the foramen rotundum runs back along V2.
Step 9: Unroof V3 and trace its branches
Unroof the foramen ovale and follow V3 into the infratemporal fossa, where it lies deep to the lateral pterygoid and divides a short distance below the foramen. The nerve to the medial pterygoid leaves the main trunk and also supplies the tensor veli palatini and tensor tympani. The otic ganglion lies on the medial side of the trunk just below the foramen and receives the lesser petrosal nerve.
The anterior trunk is mainly motor. The masseteric nerve and deep temporal nerves pass laterally over the upper border of the lateral pterygoid, the masseteric nerve reaching the masseter through the mandibular notch. The nerve to the lateral pterygoid enters the deep surface of that muscle, and the buccal nerve, the sensory branch of this trunk, emerges between the two heads of the lateral pterygoid.
The posterior trunk is mainly sensory. The auriculotemporal nerve splits around the middle meningeal artery and runs back behind the neck of the mandible. The lingual nerve and inferior alveolar nerve descend deep to the lateral pterygoid onto the lateral surface of the medial pterygoid; the inferior alveolar nerve gives the mylohyoid nerve, the motor branch of this trunk. The chorda tympani, leaving the skull near the spine of the sphenoid, joins the back of the lingual nerve high in the fossa, passing medial to the inferior alveolar nerve.
Step 10: Remove the lateral pterygoid and the lateral pterygoid plate
The superior head of the lateral pterygoid arises from the infratemporal surface of the greater wing of the sphenoid, and the inferior head from the outer surface of the lateral pterygoid plate; both insert on the neck of the mandibular condyle, and the superior head also attaches to the capsule and disc of the temporomandibular joint. Detach the superior head from the greater wing to follow the buccal nerve forward toward the buccinator, then remove both heads. The maxillary artery runs either superficial or deep to the lateral pterygoid, surrounded by the pterygoid venous plexus, and crosses forward toward the pterygomaxillary fissure.
With the muscle gone, the lateral plate, the medial pterygoid below it, and the maxillary artery are in view. Drill into the base of the pterygoid process below the vidian canal to define the lateral and medial plates. Removing the lateral plate shows the deep head of the medial pterygoid, which arises from the plate’s medial surface, and the tensor veli palatini medial to it, arising from the base of the medial plate and the spine of the sphenoid. Partly remove the medial pterygoid to expose the medial pterygoid plate.
Step 11: Identify the eustachian tube and the nasopharynx
The cartilaginous eustachian tube lies under the floor in the angle on the medial side of the foramen spinosum and the posterior side of the foramen ovale. Drill there to expose it, keeping clear of the glenoid fossa. Its bony part lies in the angle between the squamous and petrous parts of the temporal bone; the cartilaginous part continues in the groove between the petrous bone and the greater sphenoid wing and runs forward, medially, and downward beneath V3 to the nasopharynx. The horizontal petrous carotid artery lies medial to the tube and passes forward beneath the trigeminal ganglion. Translocating V3 backward shows the tensor veli palatini lying over the tube.
Dissect the medial pterygoid plate off the tube and remove it, then take down the tensor veli palatini in stages. This exposes the tube’s entry into the nasopharynx, the levator veli palatini arising from the underside of the petrous bone and running below the tube into the soft palate, the superior pharyngeal constrictor, and the pharyngobasilar fascia. The pterygoid hamulus at the lower end of the medial plate acts as the pulley for the tensor tendon.
Open the tube and pass a dissector along it to show its direction from the infratemporal fossa into the nasopharynx.
Step 12: Review the completed exposure
In the final view the infratemporal fossa and pterygopalatine fossa are open beneath the drilled middle fossa floor. V2 runs forward to the infraorbital nerve, and V3 runs down behind it, with the eustachian tube, pharyngobasilar fascia, and superior pharyngeal constrictor medial to the corridor and the reflected temporalis below.
Opening the bone in front of the pterygopalatine fossa leads into the maxillary sinus through its posterior wall, with the maxillary tuberosity below. This is the same wall that is removed from the nasal side to reach the fossa endoscopically, so the two views can be matched across the posterior maxillary wall, the sphenopalatine foramen, and the vidian canal.
From this field, the vidian canal leads back toward the foramen lacerum and the petrous carotid artery, and V2 and V3 lead back to the trigeminal ganglion in Meckel’s cave, at the posterior edge of the cavernous sinus.
Dissection sequence
Dissection photographs
26 photographs, numbered in sequence. Select a photograph to view it larger.
Skull Base Dissection Atlas Chapter 10 of 16
Mastoidectomy
A mastoidectomy with the posterior wall of the external auditory canal preserved is drilled from the cortical surface to the skeletonized labyrinth and facial nerve. The dissection then continues through the semicircular canals toward the vestibule and the posterior fossa dura.
- Temporal bone and petrous apex
- 17 photographs
- 9 key steps
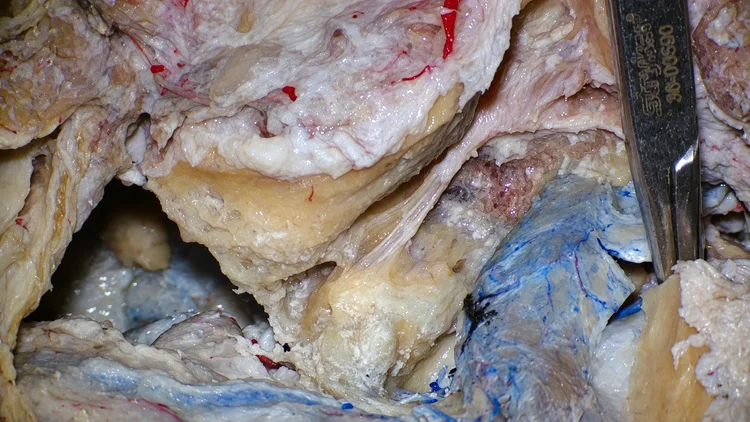
Overview
The mastoid is opened in layers so that each fixed landmark is identified before the bur reaches the structure beneath it: the sigmoid sinus behind, the tegmen and middle fossa dura above, the posterior canal wall in front, and the lateral semicircular canal, facial nerve, and the rest of the labyrinth deep in the cavity. The completed cavity is the starting point for the Retrolabyrinthine Approach and the Transjugular Approach.
The later steps go beyond a standard mastoidectomy: the semicircular canals are opened and followed to the vestibule, which is the bony stage of a translabyrinthine exposure. The photographs come in two series, the second restarting at the bone surface, and include views of the opened semicircular canals.
Lab setup
- Lateral position, or supine with the head turned away and the mastoid uppermost
- Operating microscope: low power for the cortex, higher power for the labyrinth and facial nerve
- High-speed drill: large cutting burs for the cortex and air cells, then smaller cutting and diamond burs near the sinus, tegmen, labyrinth, and facial nerve
- Continuous suction-irrigation to clear bone dust and keep the bone cool
- Flat dissector to lift eggshell bone from the sinus and dura
- Venous-injected specimen (blue veins) to show the sigmoid sinus through thinned bone
Key steps
Landmarks to identify are in bold. The numbered photographs below appear in their original order.
Step 1: Expose the mastoid cortex and its landmarks
Make a C-shaped incision behind the postauricular crease, from above the ear down to the mastoid tip. Raise the skin and subcutaneous tissue first, then incise the deeper musculoperiosteal layer and elevate it forward to the external auditory canal and downward off the attachment of the sternocleidomastoid.
Identify the supramastoid crest, which continues the temporal line backward and lies at about the level of the middle fossa floor. Find the spine of Henle on the posterosuperior rim of the canal, and behind it the shallow, pitted suprameatal (Macewen) triangle, which overlies the antrum. Farther back, locate the asterion, where the lambdoid, parietomastoid, and occipitomastoid sutures meet; it lies near the junction of the transverse and sigmoid sinuses. A mastoid emissary foramen, when present, opens close to the sigmoid sinus.
The internal auditory canal lies deep to the external canal, roughly along the same axis, and serves as a depth reference later in the dissection.
Tip. Mark the temporal line, the canal wall, and the expected line of the sigmoid sinus on the bone before drilling, so the cortical outline stays wide.
Step 2: Remove the cortex and saucerize the air cells
With a large cutting bur, outline a triangle bounded by the temporal line above, the posterior wall of the external auditory canal in front, and a line along the expected course of the sigmoid sinus behind, running down toward the mastoid tip. Remove the cortex inside the outline.
Drill the air cells evenly across the whole field, with strokes parallel to the canal wall and to the sinus, using the side of the bur. Keep the cavity broad and shallow with sloping edges, so the light and the bur reach the deepest part of the cavity. Take the cells down to a uniform level before going deeper in any one area.
Keep the posterior canal wall intact throughout and thin it evenly from behind; this is a canal-wall-up mastoidectomy. The tegmen above and the sinus behind come into view as the cavity deepens.
Tip. Planar drilling brings each landmark into view as a change in color or texture across a broad front, which is the cue to switch to a diamond bur.
Step 3: Expose the sigmoid sinus, tegmen, and sinodural angle
Thin the bone over the sigmoid sinus until its blue color shows through, then thin the tegmen mastoideum until the middle fossa dura shows through. Follow both to the sinodural angle, where they meet. The superior petrosal sinus runs medially along this angle at the junction of the middle and posterior fossa dura.
Paper-thin bone can be lifted off the sinus and dura with a flat dissector, or left as a thin plate. Follow the sinus downward as it curves forward and medially toward the jugular bulb, deep to the mastoid tip cells. When the mastoid is small and the sinus lies far forward, remove the bone behind the sinus as well, so it can be displaced backward later.
Near the aditus ad antrum, the tegmen slopes downward and the dura over it is thin. Work here with a diamond bur and light pressure.
Tip. The blue of the sinus and the pink-gray of the dura appear through bone before the bone is breached; stop thinning at that color change.
Step 4: Find the antrum, the lateral canal, and the incus
Deepen the dissection beneath the suprameatal triangle, parallel with the canal wall, to roughly 1.5 cm. The mastoid antrum is the largest air cell in the cavity. The dense, smooth, yellowish bone of the lateral semicircular canal bulges into its medial wall. Through the aditus ad antrum, the short process of the incus lies in the fossa incudis and points back toward the antrum; seeing the incus confirms that the cell is the antrum.
The lateral canal sets the working depth for the rest of the dissection. The facial nerve and the other semicircular canals lie at or deep to its prominence, so the remaining air cells lateral to that level can be cleared evenly across the cavity: in the sinodural angle, behind the canal wall, and in the tip.
The tympanic segment of the facial nerve runs just below the lateral canal, and the short process of the incus points toward the nerve near the second genu.
Step 5: Outline the course of the facial nerve
Start at the lateral semicircular canal, the most constant landmark for the facial nerve. Below the canal the nerve turns at the second genu into the mastoid segment, which descends through the mastoid to the stylomastoid foramen.
Open the tip cells to define the digastric ridge. The nerve leaves the temporal bone at the anterior end of the ridge, so the ridge points to the lower end of the mastoid segment. Thin the bone along the nerve with a diamond bur and copious irrigation, first on its lateral surface and then on its posterior surface, and leave a thin shell of bone over it.
The chorda tympani usually leaves the lower part of the mastoid segment, a few millimeters above the stylomastoid foramen, and runs up and forward toward the middle ear. The facial recess lies between the chorda tympani laterally, the mastoid segment medially, and the incus buttress above; opening it shows the middle ear. The genu, the mastoid segment, and the chorda tympani together set the anterior and inferior limits of drilling in the mastoid.
Tip. Keep the bur moving parallel to the nerve, so the shell of bone over it thins evenly along its length.
Step 6: Skeletonize the semicircular canals
Follow the lateral semicircular canal backward. Define the posterior semicircular canal, which stands vertically at a right angle to it, medial to its posterior end, and the superior semicircular canal, which rises toward the tegmen. The common crus joins the superior and posterior canals. The subarcuate artery passes through the arc of the superior canal.
Thin the bone over each canal with a diamond bur and irrigation until its outline shows through the bone as a thin line, which looks blue in life and brownish in the cadaver.
Behind the labyrinth, remove the remaining bone over the posterior fossa dura in front of the sigmoid sinus, up to the posterior canal. The endolymphatic sac lies on this dura below and behind the posterior canal, and points toward the lower half of the canal. The jugular bulb lies below the posterior canal, and its height varies.
Tip. Irrigate continuously while thinning the otic capsule. The irrigation keeps the bone cool and washes away bone dust so the canal outlines stay visible.
Step 7: Open the semicircular canals
Drill into the lumen of the lateral semicircular canal and the posterior semicircular canal and follow each around its course. The opened canals show the membranous labyrinth lying inside the bony shell. Then open the superior semicircular canal up toward the tegmen and trace it down to the common crus, which it shares with the posterior canal.
The anterior limb of the lateral canal lies directly above the tympanic segment of the facial nerve, and the posterior canal lies just behind and deep to the second genu, so leave a thin layer of bone over the nerve in front of and below the canals while they are removed.
The subarcuate artery tract runs through the center of the superior canal arc toward the posterior fossa dura, and can be followed as a guide to the arc.
Step 8: Follow the ampullae into the vestibule
Continue drilling toward the ampullated ends of the canals, which open into the vestibule. The ampullae of the superior and lateral canals lie together at the front, close to the labyrinthine and tympanic segments of the facial nerve. The ampulla of the posterior canal lies lower and deeper. The common crus opens into the back of the vestibule.
The vestibular aqueduct enters the vestibule a little below the opening of the common crus. It carries the endolymphatic duct from the endolymphatic sac on the posterior fossa dura, so the sac is a guide to the common crus and the posterior canal.
The vestibule lies medial to the second genu of the facial nerve and lateral to the fundus of the internal auditory canal. Drilling medial to the vestibule leads to the canal and its nerves. The cochlea lies in front of the vestibule.
Step 9: Open the posterior fossa dura
Before opening the dura, identify each boundary of the cavity in turn: sinus, tegmen, canal wall, facial nerve, and opened labyrinth. Then open the posterior fossa dura in the space between the sigmoid sinus behind and the drilled labyrinth in front. The superior petrosal sinus runs along the upper margin of this window, and the jugular bulb lies at its lower margin. The endolymphatic sac lies on the dura in this area.
The cerebellum lies directly beneath the dura. The cerebellopontine angle lies farther medially, with the facial and vestibulocochlear nerves running toward the internal auditory canal.
Compare the size of this window with the presigmoid window in the Retrolabyrinthine Approach, where the canals are left intact. Removing the canals and the vestibule moves the anterior edge of the window forward to the internal auditory canal, while the sigmoid sinus, the tegmen, and the jugular bulb stay as the posterior, upper, and lower edges.
Dissection sequence
Dissection photographs
17 photographs, numbered in sequence. Select a photograph to view it larger.
Skull Base Dissection Atlas Chapter 11 of 16
Retrolabyrinthine Approach
A presigmoid exposure is developed between the sigmoid sinus and the intact labyrinth, and the posterior fossa dura is opened onto the lateral cerebellopontine angle.
- Temporal bone and petrous apex
- 28 photographs
- 9 key steps
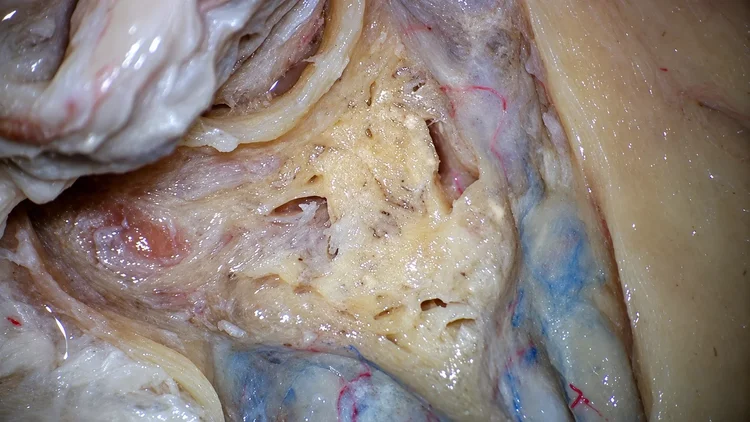
Overview
The retrolabyrinthine exposure uses a complete mastoidectomy to reach the posterior fossa dura in front of the sigmoid sinus. The semicircular canals, facial nerve, and jugular bulb all stay covered by bone, so the size of the dural window depends on how far forward the sinus sits, how low the middle fossa dura lies, and how high the jugular bulb rises.
The mastoid stages are shown in more detail in the Mastoidectomy chapter, which continues through the canals. The same presigmoid window forms the posterior part of the combined exposure in the Petrosectomy chapter, and the angle is seen from behind in the Retrosigmoid Approach chapter.
Lab setup
- Lateral position, head turned so the mastoid is uppermost
- Operating microscope for drilling and for the intradural view
- High-speed drill: cutting burs for the cortex and air cells, diamond burs over the sinus, tegmen, labyrinth, and facial nerve
- Continuous suction-irrigation, and a flat dissector to lift eggshell bone from the sinus and dura
- Dural scissors and fine sutures for marking and retracting the dural flap
- Injected specimen (red arteries, blue veins)
Key steps
Landmarks to identify are in bold. The numbered photographs below appear in their original order.
Step 1: Open the scalp and expose the mastoid
Make a C-shaped retroauricular incision a few centimeters behind the ear, from above the auricle down to the mastoid tip. Raise the flap in two layers: first the skin and subcutaneous tissue, then the deeper fibrous and muscular layer, which can be incised in a C shape and turned forward. A strip of the galeofascial layer can be harvested at this stage for closing the dura later. Expose the posterior auricular muscle and the attachment of the sternocleidomastoid, and elevate the muscles from the bone.
Identify the supramastoid crest at the level of the tegmen, the spine of Henle and the suprameatal (Macewen) triangle behind the canal, and the asterion, which marks the region of the transverse and sigmoid sinus junction. The sutures around the mastoid help orient the cortical outline. The internal auditory canal lies deep to the external canal, roughly along the same axis.
Tip. Expose the mastoid widely, from the zygomatic root to behind the asterion; the presigmoid window depends on removing bone over and behind the sinus.
Step 2: Drill the mastoid and decompress the sigmoid sinus
Outline the cortical triangle between the temporal line, the posterior wall of the external auditory canal, and the expected line of the sigmoid sinus, and drill the air cells evenly across the whole field. Keep the cavity broad and shallow.
Thin the bone over the sigmoid sinus until its blue color shows through. Remove the bone over the sinus completely, together with a margin of bone behind it, so the sinus can be displaced backward out of the line of sight; this matters most in a small mastoid, where the sinus often lies far forward. Lift the last thin layer from the sinus with a flat dissector. Thin the tegmen over the middle fossa dura and follow the sinus up to the sinodural angle. The superior petrosal sinus runs along the junction of the tegmen and the posterior fossa dura.
Step 3: Find the antrum and the facial nerve landmarks
Deepen the cavity under the suprameatal triangle to the mastoid antrum, the largest air cell. The hard, smooth bone of the lateral semicircular canal bulges into its medial wall, and the short process of the incus lies in the aditus and points back toward the antrum. These are the first deep landmarks.
The facial nerve and the rest of the labyrinth lie at or deep to the level of the lateral canal, so the air cells lateral to that level can be cleared evenly, including those in the sinodural angle and the tip. The tympanic segment of the facial nerve runs just below the lateral canal, the most constant landmark for the nerve. The second genu turns down below the canal into the mastoid segment, which descends in front of the posterior canal to the stylomastoid foramen at the anterior end of the digastric ridge.
Define the digastric ridge in the tip cells and thin the bone along the course of the nerve, leaving it covered. The nerve marks the anterior limit of the presigmoid field.
Step 4: Skeletonize the labyrinth and keep it intact
Follow the lateral semicircular canal backward. Define the posterior semicircular canal at a right angle to it and the superior semicircular canal rising toward the tegmen; the common crus joins the superior and posterior canals. The subarcuate artery passes through the arc of the superior canal.
Thin the bone over each canal with a diamond bur and continuous irrigation until the canal outline shows through as a thin line, leaving the otic capsule intact. Irrigation keeps the bone cool and washes away bone dust so the outline stays visible.
Behind the labyrinth, remove the bone over the posterior fossa dura as far forward as the posterior canal. Taking down the thin shelf of bone on the deep side of the canal widens the line of sight to the lateral cerebellopontine angle. The endolymphatic sac lies on this dura below the posterior canal and points toward the lower half of the canal.
Tip. Stop thinning each canal as soon as its outline shows; the otic capsule stays closed throughout this approach.
Step 5: Follow the sigmoid sinus down to the jugular bulb
Follow the sigmoid sinus downward. Toward the jugular bulb the sinus wall is more fragile, so a thin shell of bone may be kept over its lower curve. The jugular bulb lies in front of and medial to the lower sinus and below the posterior semicircular canal.
The height of the bulb varies widely. A high bulb can rise almost to the posterior canal and fill the lower part of the window, while a low bulb leaves a wide band of bone below the canal. The mastoid segment of the facial nerve lies in front of the bulb.
The cochlea lies well forward, in front of the vestibule and medial to the middle ear, and bone removal in this exposure stays behind the posterior canal and the facial nerve.
Step 6: Define the presigmoid dural window
Remove the remaining bone from the posterior fossa dura between the sigmoid sinus and the posterior semicircular canal. This area, Trautmann’s triangle, is bounded by the superior petrosal sinus above, the sigmoid sinus behind, and the labyrinth in front, with the jugular bulb at its lower edge.
The endolymphatic sac lies on this dura below the posterior canal, and the sinodural angle marks the upper corner of the window. Check that the dura is bare from the sinus to the canal and from the superior petrosal sinus to the bulb before opening.
Tip. Retract the decompressed sinus gently backward with a flat instrument to judge how much dura is available before planning the incision.
Step 7: Open the dura and inspect the cerebellopontine angle
Open the presigmoid dura in front of the sigmoid sinus, below the superior petrosal sinus, and retract the flap. The corridor points to the lateral cerebellopontine angle. The facial nerve and vestibulocochlear nerve run from the brainstem toward the porus of the internal auditory canal, and a loop of the anterior inferior cerebellar artery often lies near or between them.
Above, the trigeminal nerve and the superior petrosal veins cross toward the petrous apex. Below, the glossopharyngeal nerve and vagus nerve run toward the jugular foramen. The flocculus and the choroid plexus of the lateral recess lie just below and behind the facial and vestibulocochlear nerves.
Inspect the angle with the microscope tilted forward along the posterior surface of the petrous bone, then backward toward the brainstem, to see how far the window reaches in each direction.
Step 8: Compare with the retrosigmoid view
Through a retrosigmoid craniotomy, the cerebellar hemisphere fills the opening and is retracted to reach the angle. The arachnoid over the cranial nerves is opened from behind, and the nerves are followed from the brainstem toward the porus of the internal auditory canal.
From this direction the trigeminal nerve lies above, the facial and vestibulocochlear nerves in the middle, and the lower cranial nerves below, in the same order seen through the presigmoid window. The presigmoid route reaches the same nerves from a more anterior and lateral direction with less cerebellar retraction, through a window limited by the labyrinth (see the Retrosigmoid Approach chapter).
Compare the two views at the same nerves: note which side of the facial and vestibulocochlear complex each route shows best, and where the anterior inferior cerebellar artery loop appears in each.
Step 9: Review the limits of the presigmoid window
With the dura opened in front of the sigmoid sinus and the labyrinth preserved, the window lies between the posterior semicircular canal and the facial nerve in front, the sinus behind, the superior petrosal sinus and middle fossa dura above, and the jugular bulb below.
Keeping the semicircular canals, cochlea, and internal auditory canal intact limits the working angle. A translabyrinthine extension enlarges the window by removing the canals and opening the internal auditory canal, and dividing the superior petrosal sinus and tentorium joins the window to a middle fossa exposure, as in the combined petrosal approach.
Review the whole field before finishing: sinus, tegmen, labyrinth, facial nerve, bulb, and the nerves of the angle seen through the dura.
Dissection sequence
Dissection photographs
28 photographs, numbered in sequence. Select a photograph to view it larger.
Skull Base Dissection Atlas Chapter 12 of 16
Petrosectomy
The petrosal approach, described by Al-Mefty and colleagues for petroclival meningiomas, joins a temporal exposure above the petrous ridge with a presigmoid exposure below and behind it by dividing the superior petrosal sinus and tentorium, and in its combined form adds drilling of the petrous apex through the middle fossa.
- Temporal bone and petrous apex
- 25 photographs
- 14 key steps
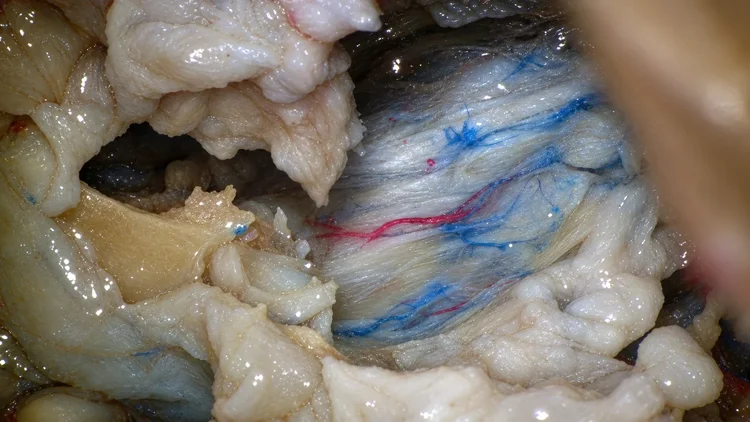
Overview
As an anatomical exercise, the petrosal approach shows how petrous bone can be removed around the structures that limit it: the petrous internal carotid artery, cochlea, labyrinth, internal auditory canal, facial nerve, and the transverse, sigmoid, and superior petrosal sinuses. A mastoidectomy uncovers the presigmoid dura in front of the sigmoid sinus, a temporal and suboccipital craniotomy opens the middle fossa, and drilling of the petrous apex from above (anterior petrosectomy) adds a second window onto the posterior fossa. Ligating the superior petrosal sinus and dividing the tentorium then join the exposures into one corridor that spans the petroclival region, from Meckel’s cave and the back of the cavernous sinus to the jugular foramen.
The guide follows the combined sequence from the incision to the intradural survey of the petroclival region. Photographs 1 to 10 mainly document the middle fossa component, and photographs 11 to 25 continue with a further dissection of the same approach. The mastoid and presigmoid stages are shown in more detail in the Mastoidectomy and Retrolabyrinthine Approach chapters, the cerebellopontine angle nerves are seen from behind the sigmoid sinus in the Retrosigmoid Approach chapter, and the parasellar course of the third, fourth, and sixth nerves continues in the Cavernous Sinus chapter.
Lab setup
- Lateral position, sagittal plane parallel to the floor, vertex tilted slightly toward the floor so the temporal lobe falls away from the middle fossa floor
- Operating microscope throughout with a wide range of tilt: from above the petrous ridge for the middle fossa and incisura, from behind and below for the presigmoid view and the lower cranial nerves
- High-speed drill: cutting burs for the mastoid cortex and air cells; 2 to 4 mm diamond burs for the grooves and near the sinuses, labyrinth, facial nerve, carotid artery, and internal auditory canal; continuous irrigation
- Dural elevators, small dissectors, a sharp hook, arachnoid knife, microscissors, fine bipolar forceps, and two self-retaining retractors for the temporal and presigmoid dura
- 4-0 suture for ligating the superior petrosal sinus and tacking back the cut tentorium; hemostatic material and cottonoids for venous oozing
- Injected specimen (red arteries, blue veins) to follow the sinuses, basal vein, petrosal veins, and venous channels around the trigeminal ganglion
Key steps
Landmarks to identify are in bold. The numbered photographs below appear in their original order.
Step 1: Incise the scalp and raise a two-layer flap
Mark the zygomatic root, the tragus, the mastoid tip, and the asterion. Plan a U-shaped incision around the ear. Its anterior limb starts on the zygomatic root a finger’s breadth (about 1 cm) in front of the tragus; its upper limb runs back above the ear along the superior temporal line; its posterior limb descends a little over 2 cm behind the asterion and stops just past the level of the mastoid tip. Elevate the scalp in two layers: skin and galea first, then a vascularized layer of deep temporal fascia, pericranium, and the upper fibers of the sternocleidomastoid, cut as a U and left attached on a broad base for use at closure.
Reflect the temporalis muscle anteriorly to expose the squamous temporal bone and the root of the zygoma. Free the splenius capitis, the semispinalis capitis, and the upper fibers of the obliquus capitis superior from the mastoid body and the lateral occipital bone, reflect them backward, and coagulate the mastoid emissary vein at its foramen. Identify the squamosal, parietomastoid, occipitomastoid, and lambdoid sutures, the supramastoid crest, and the spine of Henle at the posterosuperior margin of the external auditory canal.
Tip. Separate the galea from the pericranium well beyond the edges of the skin opening before cutting the deep layer. The extra margin gives a longer vascularized flap that reaches the petrous ridge at closure.
Step 2: Mark the sinuses and outline the bone flap
Before drilling, draw the surface course of the venous sinuses on the bone. A line from the zygomatic root to the inion approximates the transverse sinus, the posterior border of the mastoid approximates the sigmoid sinus, and the asterion lies close to the lower edge of their junction. The supramastoid crest and the posterior part of the squamosal suture lie close to the level of the middle fossa floor.
Outline a bone flap centered on the transverse-sigmoid junction, with a long temporal portion over the squama above the zygomatic root and a shorter occipital portion behind the asterion. Plan the mastoidectomy in front of the sigmoid sinus within the same field, so that the middle fossa floor, the sinuses, and the presigmoid dura are reached through one exposure. Mark two burr holes: a temporal one just over 1 cm above the top of the squamosal arch, and an occipital one about 2 cm behind the asterion, in line with the transverse sinus.
Tip. Compare the exposed sinuses with these marks once the mastoid is drilled. The comparison shows how closely the surface landmarks predict the sinuses in each specimen.
Step 3: Drill the mastoid and skeletonize the sigmoid sinus
Outline a triangle on the mastoid cortex between the posterior end of the zygomatic root, the mastoid tip, and a point just in front of the asterion, and remove the cortex inside it with a cutting bur. Lower the air cells evenly across the whole field. The bone over the sigmoid sinus turns blue as it thins posteriorly, and the tegmen over the middle fossa dura forms the roof. Follow both to the sinodural angle, where the superior petrosal sinus leaves the junction of the two.
About 1.5 cm deep to the suprameatal triangle, open the mastoid antrum. The dense yellow bone of the lateral semicircular canal bulges into its medial wall, and the short process of the incus points into it from in front. Change to a diamond bur and thin the bone over the sigmoid sinus down toward the jugular bulb. Peel the remaining thin plate off the sinus with a flat dissector. Once free, the sinus can be pressed backward, which widens the angle into the posterior fossa.
Tip. Use the lateral semicircular canal as the depth gauge. Air cells lateral to its outer surface can be cleared broadly, and drilling slows once that plane is reached.
Step 4: Thin the operculum and expose the presigmoid dura
Trace the lateral semicircular canal backward to the posterior semicircular canal, which lies at a right angle to it, and follow the superior semicircular canal up toward the tegmen; the common crus joins the posterior and superior canals. Locate the mastoid segment of the facial nerve anterior and inferior to the lateral canal, where it descends toward the digastric ridge, and keep a shell of bone over it. Thin the bone over the canals with a diamond bur and keep their lumens closed.
Medial to the posterior canal, a block of dense petrous bone (the operculum) stands between the mastoid cavity and the posterior fossa dura. Reduce it with a coarse diamond bur and steady irrigation, working medial to the yellow capsule of the posterior canal. Remove the plate of bone between the sigmoid sinus and the labyrinth until the presigmoid dura is exposed from the superior petrosal sinus above to the jugular bulb below. The endolymphatic sac lies on this dura below the posterior canal; divide its duct at the bone so the dura falls away from the labyrinth. The window (Trautmann’s triangle) is bounded by the sigmoid sinus, the superior petrosal sinus, and the bony labyrinth, and its size depends on how far forward the sinus and how high the jugular bulb lie.
Tip. Where the sigmoid sinus turns forward into the jugular bulb, the bone often forms a sharp ridge. Reduce it to a thin shell and leave the shell in place wherever the sinus wall clings to it.
Step 5: Turn the temporal and suboccipital craniotomy
Use a 4 mm diamond bur to cut two troughs: a subtemporal trough running forward from the mastoid cavity along the middle fossa floor, in line with the zygomatic root, and a suboccipital trough running back along the underside of the occipital bone below the transverse sinus. Take each trough down to a paper-thin layer and remove that layer with a small curette. Make the burr holes at the marked sites above the squamosal suture and behind the asterion, separate the dura from the inner table between them, and connect the troughs and holes with a craniotome. Most of the flap lies over the temporal squama, and the transverse-sigmoid junction stays on the dura as the bone is lifted.
Remove the remaining bone over the transverse and sigmoid sinus so that the temporal dura, the sinuses, and the presigmoid dura form one continuous field. Drill the inner table of the temporal squama flush with the middle fossa floor, and flatten the bony ridges of the floor that block the line of sight toward the petrous apex. Leave the glenoid fossa of the temporomandibular joint, the tegmen tympani over the middle ear, and the arcuate eminence intact. Place two self-retaining retractors, one on the basal temporal dura and one on the presigmoid dura.
Step 6: Elevate the dura from the middle fossa floor
Under the microscope, elevate the temporal dura from posterior to anterior. Follow the middle meningeal artery to the foramen spinosum, coagulate and divide it, and pack the foramen with hemostatic material; the foramen ovale lies anterior and medial to it. Projected medially, the zygomatic root gives a rough guide: its front end points toward the foramen ovale, its middle toward the foramen spinosum, and its back end toward the geniculate ganglion.
Open the plane along the line where the temporal dura meets the fibrous sheath of the mandibular nerve, and peel the outer dural layer off the mandibular nerve and the lateral wall of Meckel’s cave to expose the trigeminal ganglion. Find the greater superficial petrosal nerve in its groove and cut it free from the elevating dura early with sharp dissection; any pull on it reaches the geniculate ganglion and the facial nerve. Posteriorly, the arcuate eminence marks the approximate position of the superior semicircular canal already seen from the mastoid side. Medially, strip the dura from the petrous ridge, where the superior petrosal sinus runs in its groove. The ridge is often uneven, with two rises along its length; strip the dura over each one to see the full edge and the sinus groove.
Tip. The emissary vein of the foramen ovale links the cavernous sinus with the pterygoid plexus. Pack around it with hemostatic material under light pressure and use the bipolar sparingly next to the mandibular nerve.
Step 7: Define the rhomboid and drill the petrous apex
The drilling area is a rhomboid bounded by the greater superficial petrosal nerve laterally, the petrous ridge medially, the arcuate eminence posteriorly, and the posterior border of the mandibular nerve and trigeminal impression anteriorly. The axis of the internal auditory canal runs close to the line that halves the angle formed by the greater superficial petrosal nerve and the arcuate eminence. The horizontal petrous carotid lies beneath the greater superficial petrosal nerve, and the cochlea sits in the angle between the carotid genu, the geniculate ganglion, and the internal auditory canal.
Remove the cortical and cancellous bone of the apex between the internal auditory canal and the mandibular nerve, medial to the horizontal carotid. Uncover the canal most widely at the porus, where the bone can be cleared around most of its circumference; farther laterally, the cochlea in front and the superior canal behind narrow the removable bone to a strip over the roof of the canal. The petrous tip is hidden beneath the trigeminal ganglion; hold the ganglion and mandibular nerve forward with a spatula to reach it. In the isolated middle fossa route the foramen ovale is unroofed so the nerve can move forward freely; in the combined approach, the same mobility comes later from opening the porus trigeminus and the tentorial roof of Meckel’s cave, and the foramen ovale stays closed. The petroclival and petrosphenoidal ligaments anchor the tip, so drill it thin and then peel the last fragment off these attachments.
Tip. Locate the cochlea from its three neighbors (the carotid genu, the geniculate ganglion, and the internal auditory canal) before drilling near the lateral part of the canal.
Step 8: Expose the posterior fossa dura at the apex
As the apex is removed, the posterior fossa dura appears in the floor of the window, from the porus of the internal auditory canal posteriorly to the petrous tip anteriorly. Carry the drilling down in front of the canal until the inferior petrosal sinus appears; it runs along the petroclival junction and marks the lower limit of the window. The abducens nerve lies medial to the window, where it enters Dorello’s canal at the upper end of this sinus, and the clivus continues medially beyond it.
Review the extradural limits from the middle fossa before opening the dura: the horizontal carotid under the greater superficial petrosal nerve, the cochlea in front of the lateral part of the canal, the superior semicircular canal under the arcuate eminence, and the trigeminal ganglion displaced forward. In the combined approach, the apex window and the presigmoid window open onto the same posterior fossa dura. The labyrinth and the internal auditory canal lie between them, and the superior petrosal sinus runs above both. Together, the two windows expose the lateral brainstem and clivus over a long vertical span while the cochlea and semicircular canals stay intact.
Step 9: Open the temporal and presigmoid dura
Open the temporal dura with a low incision along the middle fossa floor that follows the superior petrosal sinus a few millimeters lateral to it, and fold the flap upward so it covers the temporal lobe. Incise the presigmoid dura parallel to the sigmoid sinus, between the sinus and the endolymphatic sac, from the region of the jugular bulb up to just below the superior petrosal sinus, so that the two incisions converge on the sinus. Where the apex has been drilled, open the posterior fossa dura in the window as well, along the petrous ridge.
Before elevating the temporal lobe, locate each vein that leaves its lateral and basal surfaces. The vein of Labbé and the other lateral and basal temporal veins run toward the transverse sinus and the tentorium; some travel attached to the dura or within the tentorium for a short distance before they reach a sinus. Follow each one to its entry point and keep it intact. Elevate the inferior temporal gyrus gently with a spatula placed over the dural flap.
Under the lobe, follow the upper surface of the tentorium medially to its free edge at the incisura. The uncus and parahippocampal gyrus overhang the edge, and the midbrain lies medial to it.
Tip. Opening the arachnoid of the cerebellopontine angle through the presigmoid incision releases cerebrospinal fluid and slackens the brain for the work under the temporal lobe.
Step 10: Open the ambient cistern and trace the trochlear nerve
Open the arachnoid of the ambient cistern along the free tentorial edge. The posterior cerebral artery and the basal vein run around the midbrain in this cistern, giving small branches to the brainstem and the medial temporal lobe. Below the edge, the superior cerebellar artery runs parallel to the posterior cerebral artery around the upper pons and midbrain, separated from it by the oculomotor nerve anteriorly and the tentorial edge laterally.
The trochlear nerve runs forward just beneath the free edge, between the two arteries, and pierces the underside of the free edge posterolateral to the posterior clinoid process. Open the superficial tentorial layer for about 1 cm along the nerve to unroof its tentorial tunnel and expose the segment that runs in the dura before it reaches the cavernous sinus. From there the nerve continues in the lateral wall of the cavernous sinus and crosses above the oculomotor nerve.
Farther forward and medially, the oculomotor nerve passes toward the oculomotor triangle and enters the roof of the cavernous sinus through its own short dural canal, which can be followed for several millimeters. Note the anterior petroclinoid fold, the posterior petroclinoid fold, and the interclinoid fold that frame the triangle.
Tip. Identify the trochlear entry point before any tentorial cut. The division of the tentorium is placed behind it.
Step 11: Ligate the superior petrosal sinus, cut the tentorium
Ligate the superior petrosal sinus where the temporal and presigmoid incisions meet: pass a 4-0 suture through the presigmoid dura and under the sinus, loop it a second time, tie it, and cut the sinus next to the knot. Identify the petrosal vein complex on the cerebellar side, where it drains into the sinus, and note its relation to the cut.
Cut the tentorium from the divided sinus medially toward the incisura, posterior to the entry point of the trochlear nerve, coagulating tentorial vessels as the cut advances. Near its medial end the cut can open venous channels at the back of the cavernous sinus; control oozing there and from the sinus stump with gentle packing of hemostatic material. Tack the cut tentorial leaf back with a suture to widen the field.
Dividing the tentorium joins the middle and posterior fossae into one corridor. The posterior cerebral artery lies above the cut edge, and the superior cerebellar artery, the trigeminal nerve, and the pons lie in the floor of the opening. The lateral semicircular canal and superior semicircular canal remain visible at the lateral margin of the field as orientation points for the views that follow.
Step 12: Open Meckel’s cave and follow the trigeminal nerve
Extend the tentorial cut forward along the petrous ridge to the porus trigeminus. Divide the fibrous ring where the trigeminal nerve enters Meckel’s cave, and remove the tentorial dura that forms the roof of the cave over the trigeminal ganglion, so that the root and ganglion can be followed as one structure. Pack the superior petrosal sinus stump and the small veins in the roof of the cave with hemostatic material, and limit coagulation over the ganglion.
Open the arachnoid of the lateral pontomesencephalic cistern over the nerve and follow it from its root entry zone on the lateral pons through the porus to the ganglion. The larger sensory root carries the motor root along its medial side, and the superior cerebellar artery runs above the root, often with a loop toward it. Petrosal veins from the cerebellum join the superior petrosal sinus lateral to the porus, and their pattern varies between sides.
With the cave open, trace the three divisions forward from the ganglion. The drilled petrous apex window lies under the ganglion and root and adds a direct line of sight to the anterolateral pons and the middle clivus.
Step 13: Inspect the basilar apex and the abducens nerve
Tilt the microscope superiorly and anteriorly under the temporal lobe. The oculomotor nerve leaves the midbrain between the posterior cerebral artery and the superior cerebellar artery. Follow the posterior cerebral artery medially along its P1 segment to the basilar apex, where the thalamoperforating arteries arise and enter the posterior perforated substance. Farther forward, the posterior communicating artery joins the posterior cerebral artery to the internal carotid artery, which gives rise to the anterior choroidal artery just distal to it. Above and medial to the carotid, the underside of the optic nerve continues back into the optic tract, and the pituitary stalk runs down to its opening in the diaphragma sellae, just ahead of the dorsum sellae.
Lower the view to the pons and the clivus. The basilar artery runs up the front of the pons, and the anterior inferior cerebellar artery arises from its lower part. The abducens nerve leaves the brainstem at the pontomedullary sulcus and ascends through the prepontine cistern; the origin of the anterior inferior cerebellar artery on the underside of the pons is a good place to start looking, since the nerve usually emerges close by. Follow it upward to where it pierces the clival dura medial to the trigeminal nerve and enters Dorello’s canal beneath the petrosphenoid ligament, at the upper end of the inferior petrosal sinus. Compare this dural entry point with the position of the drilled petrous apex.
Tip. Small changes in microscope angle bring each of these structures into view in turn, so move the microscope and keep temporal lobe retraction steady.
Step 14: Inspect the seventh, eighth, and lower cranial nerves
Angle the microscope inferiorly and posteriorly over the petrous bone and through the presigmoid opening, and open the arachnoid over the cerebellopontine angle and the lateral medullary cistern. The facial and vestibulocochlear nerves cross the cerebellopontine angle from the pontomedullary junction to the porus of the internal auditory canal, with the anterior inferior cerebellar artery looping near them. The flocculus and the choroid plexus at the foramen of Luschka lie just below and behind the nerves.
Below them, the glossopharyngeal, vagus, and accessory nerves leave the side of the medulla and converge on the jugular foramen. Deeper, the vertebral artery ascends to join its fellow at the vertebrobasilar junction. Lower the microscope further to bring the hypoglossal rootlets into view; they lie anterior to the vagal rootlets, deep in the field, and run toward the hypoglossal canal.
Finish with an overview of the whole corridor. Tilting the microscope from anterior and superior to posterior and inferior brings the cranial nerves from the oculomotor to the hypoglossal into view through one exposure, with the labyrinth and internal auditory canal kept intact between the presigmoid and apex windows.
Dissection sequence
Dissection photographs
25 photographs, numbered in sequence. Select a photograph to view it larger.
Skull Base Dissection Atlas Chapter 13 of 16
Retrosigmoid Approach
A craniotomy behind the sigmoid sinus and below the transverse sinus gives a lateral view of the cerebellopontine angle. The dissection follows the nerves of the angle in three zones, from the trigeminal nerve above to the lower cranial nerves below.
- Posterior fossa and craniocervical junction
- 8 photographs
- 9 key steps
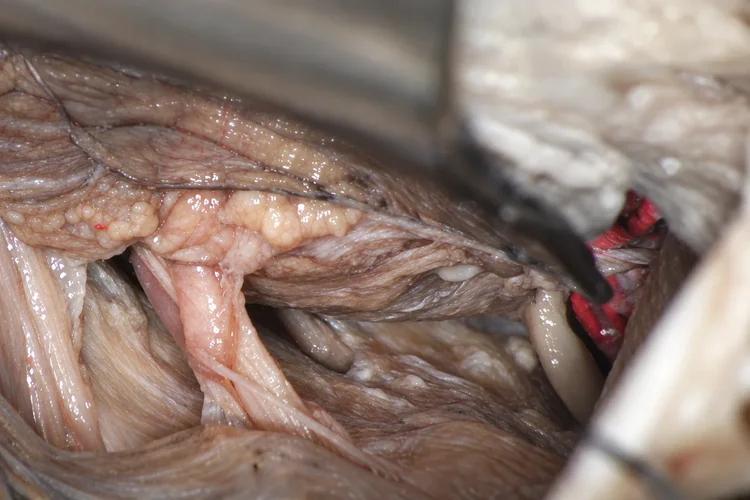
Overview
The retrosigmoid exposure reaches the cerebellopontine angle along the posterior surface of the petrous bone. The view is studied in three zones, each with its own nerves, arteries, and veins: a superior zone around the trigeminal nerve, a middle zone around the facial and vestibulocochlear nerves, and an inferior zone around the glossopharyngeal, vagus, and accessory nerves. The tentorium and superior petrosal sinus bound the view above, the jugular foramen and jugular tubercle below, and the cerebellar hemisphere falls away medially once the cisterns are drained.
The same nerves are seen from in front of the sigmoid sinus in the Retrolabyrinthine Approach chapter and from above the petrous ridge in Petrosectomy. The Far-Lateral Approach chapter carries the exposure down to the foramen magnum.
Lab setup
- Lateral position (or supine with the shoulder raised), head flexed and turned away from the side of dissection so the mastoid body is the highest point
- Operating microscope, and a 30-degree endoscope for looking into the porus and around the nerves
- High-speed drill with cutting and diamond burs, Kerrison rongeurs, and bone wax
- Dural scissors, arachnoid knife, microdissectors, and a narrow brain spatula with cottonoids
- Injected specimen (red arteries, blue veins) to show the sinuses, the petrosal veins, and the arterial loops among the nerves
Key steps
Landmarks to identify are in bold. The numbered photographs below appear in their original order.
Step 1: Map the surface landmarks and incise the scalp
Palpate and mark the mastoid tip, the posterior border of the mastoid body, the inion, and the zygomatic root. A line from the zygomatic root to the inion approximates the transverse sinus, and the posterior border of the mastoid approximates the sigmoid sinus; their meeting point estimates the transverse-sigmoid junction. The retrosigmoid area lies just behind the mastoid body, where the bone surface often dips slightly under the finger.
Make a gently curved or S-shaped incision a few centimeters behind the mastoid, from above the projected transverse sinus to below the level of the mastoid tip. Raise the skin with a thin layer of the underlying fibrous tissue, and harvest a separate piece of this fibrous tissue or pericranium for dural closure.
Tip. Center the incision higher for the superior zone, over the middle of the sigmoid sinus for the middle zone, and lower, behind the mastoid tip, for the inferior zone. In the laboratory, one longer incision serves all three.
Step 2: Reflect the muscles and expose the asterion
Divide the sternocleidomastoid and splenius capitis in line with the incision, then the longissimus capitis and semispinalis capitis, and detach the upper part of the obliquus capitis superior to expose the bone below the mastoid. The occipital artery runs in the fascia deep to the splenius capitis, along the occipital groove just medial to the digastric groove; coagulate or ligate it.
The mastoid emissary vein leaves the bone a few millimeters behind the sigmoid sinus and is a reliable pointer to the sinus. Clear the bone surface to identify the asterion, where the lambdoid, parietomastoid, and occipitomastoid sutures meet. The asterion lies near the lower edge of the transverse-sigmoid junction, although its position varies, so treat it as an estimate.
Step 3: Make the bone opening at the sinus junction
Place a burr hole just below and behind the estimated transverse-sigmoid junction, close to the asterion. Enlarge the opening with the drill and Kerrison rongeurs until the lower edge of the transverse sinus and the posterior edge of the sigmoid sinus are seen, then extend it inferiorly toward the floor of the posterior fossa. Either a craniotomy or a craniectomy works. A groove drilled a few millimeters behind the sinus lets a bone flap lift away where the sinus adheres to the inner table.
Remove bone with a diamond bur up to the margins of both sinuses so that the dural opening can reach the angle between them. Seal opened mastoid air cells with wax. For the inferior zone, carry the opening down toward the foramen magnum and the posterior edge of the occipital condyle.
Tip. The anterior and superior margins of the opening set the line of sight along the petrous surface, so bring them right to the edges of the sigmoid and transverse sinuses.
Step 4: Open the dura and drain the cisterns
Open the dura first at its lower anterior corner and incise the arachnoid of the lateral cerebellomedullary cistern beside the lower cranial nerves to drain cerebrospinal fluid. The cerebellar hemisphere then relaxes and falls away from the petrous surface. Complete a curved or inverted T-shaped dural incision parallel to the transverse sinus and sigmoid sinus, and tack the flaps toward the sinuses to widen the lateral exposure.
Place cottonoids over the petrosal surface of the cerebellum and support it with a narrow spatula. The view now runs along the posterior petrous surface, with the tentorium and superior petrosal sinus above and the region of the jugular foramen below. Work zone by zone, opening the arachnoid over each nerve group in turn; dividing the arachnoid bands between the nerves and the cerebellum lets the hemisphere fall back farther.
Step 5: Explore the superior zone along the tentorium
Angle the microscope upward along the tentorium over the superolateral corner of the cerebellum. Inspect the tentorial surface for bridging veins before moving the cerebellum. Laterally they are usually sparse, and their position varies between specimens. At the tentorial edge, find the trochlear nerve running forward beneath the free edge, with the superior cerebellar artery below it.
Looking laterally, open the arachnoid around the petrosal veins, which collect blood from the petrosal and tentorial surfaces of the cerebellum and drain into the superior petrosal sinus; their pattern varies between sides and specimens. Deep to them the trigeminal nerve runs from the lateral pons to the porus trigeminus at the petrous apex. By the level of the nerve the superior cerebellar artery has commonly split into rostral and caudal trunks, and the caudal trunk often lies close to the root entry zone. The bony prominence above the internal auditory canal, the suprameatal tubercle, hides the porus trigeminus and Meckel’s cave beyond it from this view.
Step 6: Explore the middle zone at the internal auditory canal
Center the view on the facial and vestibulocochlear nerves, which cross the angle together from the pontomedullary junction to the porus of the internal auditory canal. The facial nerve leaves the brainstem anterior to the vestibulocochlear nerve and stays anterior to it, so from this posterior view it is often partly hidden. The vestibulocochlear nerve enters the brainstem just in front of the foramen of Luschka, marked by the tuft of choroid plexus from the lateral recess, and the flocculus lies just below and behind the nerves.
Follow the anterior inferior cerebellar artery around the nerve complex. It may form a loop toward or into the porus and gives rise to the labyrinthine artery, which accompanies the nerves into the canal. The subarcuate artery may be seen entering the bone above and lateral to the porus. A small depression on the petrous surface lateral to the porus marks the endolymphatic sac and lies close to the posterior semicircular canal.
Step 7: Drill the posterior wall of the internal auditory canal
To study the canal contents, drill its posterior wall. Turn a small dural flap on the posterior petrous surface behind the porus of the internal auditory canal, protect the cerebellum and nerves with a thin sheet of bone wax or a cottonoid, and drill with a coarse diamond bur starting at the porus and moving laterally. Remove the bone around at least half of the circumference of the porus before going deeper.
The lateral limit is set by the posterior semicircular canal and the vestibule, which lie lateral to the canal and close to its posterior wall; the depression of the endolymphatic sac is a useful marker for this limit. Below the canal, the dome of the jugular bulb may reach the drilling area. Seal any air cells opened along the way with wax.
Open the dura of the canal along its posterior wall. The facial nerve lies anterosuperiorly, the cochlear nerve anteroinferiorly, and the superior and inferior vestibular nerves posteriorly, with the transverse crest dividing the fundus into upper and lower halves. Follow the labyrinthine artery from its parent loop into the canal.
Step 8: Explore the inferior zone toward the jugular foramen
Angle the microscope downward. The glossopharyngeal, vagus, and accessory nerves leave the side of the medulla in a line of rootlets behind the olive and converge on the jugular foramen. The glossopharyngeal nerve is the uppermost and enters the foramen as a single bundle above the vagal rootlets. The spinal part of the accessory nerve ascends from below through the foramen magnum to join them. The choroid plexus of the lateral recess projects from the foramen of Luschka close to the glossopharyngeal and vagus rootlets.
Deeper and more medially, the vertebral artery ascends toward the basilar artery and gives off the posterior inferior cerebellar artery, whose loops pass among the lower cranial nerve rootlets; its course varies, so trace it from its origin before naming it. The hypoglossal rootlets arise anterior to the olive and usually pass behind the vertebral artery toward the hypoglossal canal, below the jugular tubercle.
Step 9: Look between the nerve groups toward the clivus
Use the spaces between the nerve groups to look toward the clivus. Between the trigeminal nerve and the facial and vestibulocochlear nerves, a medial angle shows the abducens nerve ascending along the clivus from the pontomedullary sulcus toward Dorello’s canal, and the basilar artery with the origin of the anterior inferior cerebellar artery. Between the facial and vestibulocochlear nerves and the lower cranial nerves, the vertebrobasilar junction and the front of the medulla come into view.
Finish by surveying the three zones together, from the tentorium to the jugular foramen, and relate each nerve to its exit point on the petrous bone and skull base. A 30-degree endoscope placed in these windows shows the porus trigeminus and the medial side of the nerves, which the microscope reaches only at a steep angle.
Tip. Compare this view with the presigmoid view of the Retrolabyrinthine Approach chapter: the same nerves appear in the same order, seen from a more posterior angle.
Dissection sequence
Dissection photographs
8 photographs, numbered in sequence. Select a photograph to view it larger.
Skull Base Dissection Atlas Chapter 14 of 16
High Cervical Exposure
An upper neck dissection combined with a mastoidectomy follows the internal jugular vein, the carotid arteries, and the lower cranial nerves from the carotid space up to the jugular foramen and the carotid canal.
- Posterior fossa and craniocervical junction
- 4 photographs
- 9 key steps
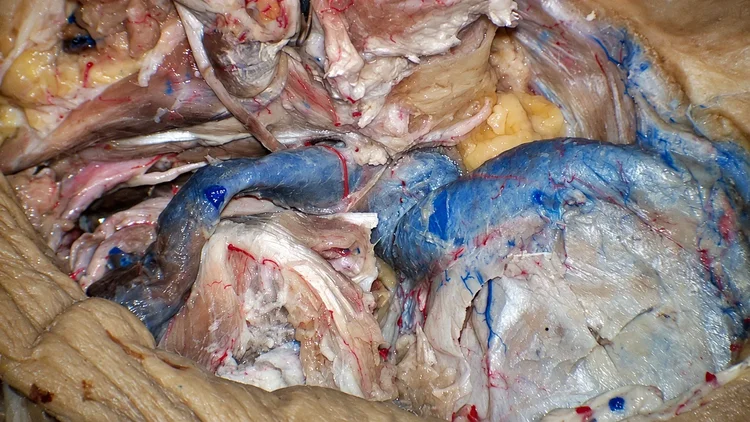
Overview
This dissection opens the carotid space of the upper neck just below the skull base: the internal jugular vein, the internal and external carotid arteries, the glossopharyngeal, vagus, accessory, and hypoglossal nerves, and the transverse process of C1. The corridor is bounded in front by the styloid process and its muscles, behind by the transverse process of C1 and the rectus capitis lateralis, and above by the mastoid tip and the jugular foramen. A mastoidectomy is added so the sigmoid sinus, jugular bulb, and internal jugular vein can be followed as one channel. The photographs document the mastoidectomy and the ligated internal jugular vein.
The Transjugular Approach chapter continues this exposure through the temporal bone into the jugular foramen, and the Far-Lateral Approach chapter reaches the same region from behind, through the suboccipital triangle.
Lab setup
- Lateral position, head turned slightly away and neck mildly extended to open the space between the mastoid tip and the angle of the mandible
- Operating microscope for the carotid space and the mastoid; loupes for the skin and muscle layers
- High-speed drill: 5 to 6 mm cutting burs for the mastoid cortex, 2 to 4 mm diamond burs over the sigmoid sinus and facial nerve
- Fine scissors, bipolar forceps, Penfield dissectors, microdissectors, and vessel loops or sutures to tag the vein and each nerve
- Injected specimen (red arteries, blue veins) to separate the internal jugular vein from the carotid arteries and the venous plexus
Key steps
Landmarks to identify are in bold. The numbered photographs below appear in their original order.
Step 1: Mark the neck landmarks and plan the incision
Palpate and mark the mastoid tip, the angle of the mandible, and the anterior and posterior borders of the sternocleidomastoid muscle. Feel for the transverse process of C1 in the soft tissue between the mastoid tip and the angle of the mandible and mark it. Add the asterion and the external auditory canal so the mastoid stage can be planned on the same field.
Make a curved postauricular incision that starts above and behind the auricle, follows the back of the mastoid process, and descends along the anterior border of the sternocleidomastoid to below the angle of the mandible. The upper limb serves the mastoid and the lower limb serves the carotid space. Raise the skin and subcutaneous fat forward with the auricle and keep the superficial fascia on the muscle as a separate layer.
Tip. The transverse process of C1 is the deep reference point for the whole exposure. Confirm it by palpation before deep dissection and return to it whenever orientation is uncertain.
Step 2: Reflect the sternocleidomastoid muscle
Identify the great auricular nerve as it crosses the superficial surface of the sternocleidomastoid muscle toward the lobule of the ear, with the external jugular vein descending across the muscle just in front of it. Keep the nerve as a marker of the superficial plane. Detach the sternocleidomastoid from the mastoid process and the lateral part of the superior nuchal line, and reflect it backward and down.
As the muscle is reflected, look for the accessory nerve entering its deep surface in the upper third. Later steps follow this nerve up to the jugular foramen. Deep to the sternocleidomastoid, the splenius capitis inserts on the mastoid and the lateral superior nuchal line, and the longissimus capitis attaches to the posterior margin of the mastoid process. Detach both from the mastoid to uncover the digastric groove on the medial side of the mastoid tip. The tail of the parotid gland lies in front of the upper field.
Step 3: Reflect the digastric and find the facial nerve exit
Identify the posterior belly of the digastric muscle arising from the digastric groove. The stylomastoid foramen lies at the anterior end of this groove, so the facial nerve leaves the skull just in front of the digastric origin and enters the posterior surface of the parotid gland. Find the nerve trunk between the mastoid tip and the tail of the parotid, then reflect the digastric forward and down so it lies out of the carotid space.
The occipital artery runs backward along the lower border of the posterior belly and passes medial to the mastoid tip in the occipital groove. Along its upper border, the stylohyoid muscle runs parallel to it from the styloid process. The styloid process and its muscles form the anterior edge of the carotid space. Keep them as a fixed reference while the vessels are exposed, since the glossopharyngeal nerve and the external carotid artery are both identified by their relationship to these muscles.
Step 4: Open the carotid sheath and identify the arteries
Open the deep cervical fascia along the anterior border of the sternocleidomastoid and enter the carotid sheath. The internal jugular vein lies lateral, the internal carotid artery medial, and the vagus nerve in the posterior groove between them. The ansa cervicalis lies on the front of the sheath. Behind the sheath, the cervical sympathetic trunk runs vertically on the longus capitis.
Follow the common carotid artery up to its bifurcation and separate the internal carotid artery, which gives no branches in the neck, from the external carotid artery. Identify the external carotid branches at this level: the occipital artery from its posterior surface, the ascending pharyngeal artery from its medial side close to the bifurcation, and the superior thyroid, lingual, and facial arteries from its front. Higher up, the external carotid artery passes deep to the posterior belly of the digastric and the stylohyoid on its way into the parotid gland, while the internal carotid artery stays medial to the styloid muscles as it ascends to the skull base.
Step 5: Identify the lower cranial nerves in the neck
Find each nerve where it is easiest to recognize, then trace it upward. The hypoglossal nerve curves forward across the lateral surface of the internal and external carotid arteries just below the posterior belly of the digastric, hooked under the sternocleidomastoid branch of the occipital artery. Its descending branch runs down on the sheath to the ansa cervicalis. Traced upward, the nerve runs between the internal jugular vein and the internal carotid artery, close to the vagus nerve, with which it is often connected.
The accessory nerve crosses the internal jugular vein near the transverse process of C1, on the lateral surface of the vein in most specimens and behind it in the rest, before entering the sternocleidomastoid. The superior laryngeal nerve leaves the vagus high in the neck and passes medial to the carotid arteries. The glossopharyngeal nerve is the most anterior of the group: it passes forward on the lateral surface of the internal carotid artery, deep to the styloid process, and winds around the stylopharyngeus to pass between the internal and external carotid arteries toward the pharynx.
Tip. Tag each nerve with a loop or suture as soon as it is named. Just below the foramen the nerves branch and interconnect, so names are confirmed by following the clearer distal course back toward the skull base.
Step 6: Define the C1 transverse process and its muscles
Clear the soft tissue over the transverse process of C1. Several muscles attach to it: the rectus capitis lateralis runs up to the jugular process of the occipital bone, the obliquus capitis superior runs up and back to the occiput, the obliquus capitis inferior arrives from the spinous process of C2, and the levator scapulae descends from its tip. The accessory nerve crosses in front of the process.
The rectus capitis lateralis divides this region. The internal jugular vein descends from the jugular foramen directly in front of it, and the vertebral artery runs behind it after leaving the transverse foramen of C1 and curving medially toward the posterior arch. The anterolateral exposure of this chapter works in front of the muscle, and the far-lateral exposure works behind it.
Tip. Leave the rectus capitis lateralis attached until both the internal jugular vein and the vertebral artery are identified. Its fibers point straight up to the jugular foramen.
Step 7: Drill the mastoid and skeletonize the sigmoid sinus
Outline the mastoidectomy with a cutting bur along the temporal line above, the posterior wall of the external auditory canal in front, and a line behind the asterion, carried down to the mastoid tip. Remove the air cells, open the mastoid antrum, and identify the dense bone of the lateral semicircular canal in its medial wall. Thin the bone over the sigmoid sinus and the tegmen, leaving a thin shell over each.
Follow the sigmoid sinus down. Behind it, remove enough bone to show a strip of posterior fossa dura. In front of it, the mastoid segment of the facial nerve descends from below the lateral canal to the stylomastoid foramen; keep a layer of bone over the nerve. Below the posterior semicircular canal, the sinus turns forward and medially to become the jugular bulb. Remove the mastoid tip out of the digastric groove to connect the mastoid cavity with the neck.
Step 8: Follow the venous channel and ligate the vein
With the mastoid tip removed, trace the sigmoid sinus, the jugular bulb, and the cervical internal jugular vein as one continuous channel. The bulb lies medial to the facial nerve at the stylomastoid foramen, and the styloid process lies lateral to the upper internal jugular vein as it leaves the foramen. The posterior belly of the digastric, already reflected, marks the level of the facial nerve exit from below.
Ligate the internal jugular vein in the upper neck. Free the accessory nerve from the surface of the vein, since the nerve crosses the vein close to the level where the vein is mobilized. Separate the vein from the vagus nerve and the internal carotid artery along its medial side, then lift it toward the skull base. Lifting the vein uncovers the tissue at the outlet of the jugular foramen and the front of the rectus capitis lateralis.
Step 9: Inspect the nerves and arteries deep to the vein
With the vein turned up, the outlet of the jugular foramen opens. The internal carotid artery lies anteromedial, ascending to the carotid canal, which sits directly in front of the jugular foramen, separated from it by a thin ridge of bone. The glossopharyngeal nerve is the most anterior nerve, next to the artery, and the vagus nerve and accessory nerve lie behind it. The hypoglossal nerve leaves the hypoglossal canal medial to and slightly below the jugular foramen, then descends between the vein and the artery before turning forward.
Trace each nerve back toward its foramen, the internal carotid artery to the carotid canal, and the vein to the jugular bulb. The inferior petrosal sinus joins the medial side of the venous channel at the foramen, usually passing between the glossopharyngeal and vagus nerves. The tympanic branch of the glossopharyngeal nerve leaves the nerve near the foramen and enters the bone between the carotid canal and the jugular foramen. Before finishing, confirm that every nerve and vessel named in the neck can be followed to its opening in the skull base.
Dissection sequence
Dissection photographs
4 photographs, numbered in sequence. Select a photograph to view it larger.
Skull Base Dissection Atlas Chapter 15 of 16
Transjugular Approach
A postauricular transmastoid exposure combined with a high cervical dissection reaches the jugular bulb and the lower cranial nerves at the jugular foramen from below and from the side at the same time.
- Posterior fossa and craniocervical junction
- 28 photographs
- 12 key steps
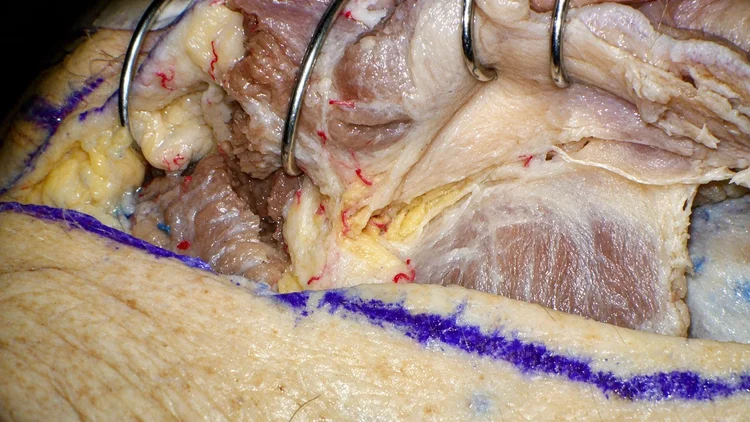
Overview
The transjugular exposure joins three fields: the high cervical carotid space in front of the transverse process of C1, a mastoidectomy with skeletonization of the facial nerve and labyrinth, and removal of the bone around the jugular bulb. Together they open the jugular foramen from below and from the lateral side. The corridor is bounded anteriorly by the styloid process and the internal carotid artery, superiorly by the labyrinth and the facial nerve, posteriorly by the sigmoid sinus and the occipital condyle, and medially by the lower cranial nerves and the posterior fossa dura.
The High Cervical Exposure chapter shows the neck stage in a short series, the Mastoidectomy chapter covers the temporal bone landmarks in more detail, and the Far-Lateral Approach chapter reaches the region behind the condyle along a posterolateral line. The intradural side of these nerves appears in the Retrosigmoid Approach and Far-Lateral Approach chapters.
Lab setup
- Lateral position, head turned slightly away from the dissected side with the mastoid at the highest point
- Operating microscope for the temporal bone and jugular foramen; loupes for the flap and muscle layers
- High-speed drill: 5 to 6 mm cutting burs for the mastoid cortex, 2 to 4 mm diamond burs over the sigmoid sinus, facial nerve, jugular bulb, and condyle
- Microdissectors, fine scissors, bipolar forceps, sutures or vessel loops for the internal jugular vein and the nerves, and oxidized cellulose for packing
- Ruler for scale photographs of the flap and field
- Injected specimen (red arteries, blue veins)
Key steps
Landmarks to identify are in bold. The numbered photographs below appear in their original order.
Step 1: Mark the landmarks and make a C-shaped incision
Mark the mastoid tip, the asterion, the angle of the mandible, and the anterior border of the sternocleidomastoid muscle. Palpate the transverse process of C1 between the mastoid tip and the angle of the mandible and mark it as well; it is the main deep landmark of the neck stage.
Make a C-shaped incision that begins above and behind the auricle, curves behind the mastoid process to a point posterior to the asterion, and descends along the anterior border of the sternocleidomastoid to below the angle of the mandible. The upper limb exposes the mastoid and the lateral occipital bone, and the lower limb exposes the internal jugular vein and the carotid space. Measure the field with a ruler before raising the flap so the photographs carry a scale.
Step 2: Raise the flap and find the great auricular nerve
Elevate the skin flap forward with the auricle, splitting the superficial fascia so a separate fascial layer stays on the muscles. Just below the mastoid tip, find the great auricular nerve ascending on the surface of the sternocleidomastoid muscle toward the lobule of the ear, and free a length of it as a marker of this plane.
Lift the fascia left on the muscles as a second, separate sheet, from the posterior auricular muscle above to the upper sternocleidomastoid below. The posterior auricular vein runs behind the ear toward the external jugular vein, and small branches of the occipital artery lie on the muscle surface. Once the fascia is lifted, the posterior auricular muscle and the sternocleidomastoid are seen clearly as the first muscle layer.
Tip. Keep the fascial sheet intact and separate from the skin flap. It gives a clean surface to read the muscle layers underneath.
Step 3: Reflect the sternocleidomastoid and splenius capitis
Cut the sternocleidomastoid muscle and the occipital muscle attachments in a C shape along the mastoid and the superior nuchal line, leaving a cuff of tissue on the bone. Reflect the sternocleidomastoid forward. Deep to it lie the broad splenius capitis, attached to the mastoid and the lateral superior nuchal line, and the longissimus capitis, attached to the mastoid process below and deep to the splenius. The semispinalis capitis lies medial, inserting between the superior and inferior nuchal lines.
Spread the splenius fibers to reach the thin fascia beneath them, which extends forward to the styloid region. Fat, veins, and the occipital artery lie under this fascia; the artery emerges from beneath the digastric and winds medial to the mastoid tip. Incise the fascia and find the artery before dividing or retracting it. Then turn the sternocleidomastoid and the lateral muscles of the middle layer forward until the mastoid body is bare. Deep to the occipital artery lies the obliquus capitis superior, inserting on the occipital bone between the superior and inferior nuchal lines.
Step 4: Reflect the digastric and expose the C1 transverse process
Identify the posterior belly of the digastric muscle in the digastric groove and reflect it forward. This keeps the dissection behind the stylomastoid foramen, where the facial nerve leaves the skull just in front of the digastric origin. The posterior edge of the parotid gland lies in front of the field.
Retract the obliquus capitis superior and the deeper suboccipital muscles backward. This uncovers the transverse process of C1 and the occipital bone lateral to the condyle. Muscles attached to the process include the rectus capitis lateralis, the obliquus capitis superior, the obliquus capitis inferior, and the levator scapulae. The accessory nerve passes just in front of the transverse process and crosses the internal jugular vein, on the lateral surface of the vein in most specimens and behind it in the remainder.
Tip. The rectus capitis lateralis runs from the transverse process of C1 to the jugular process, with the internal jugular vein in front of it and the vertebral artery behind it. Use it to stay oriented between the two.
Step 5: Dissect the vessels and nerves of the carotid space
Open the deep fascia over the internal jugular vein. Find the hypoglossal nerve crossing lateral to the carotid arteries, deep to the posterior belly of the digastric and the stylohyoid muscle, on its way forward above the greater horn of the hyoid bone. Its descending branch joins fibers from C2 and C3 to form the ansa cervicalis.
Retract the vein laterally to find the internal carotid artery medial to it, with the vagus nerve in the groove between and behind them. At this level the hypoglossal nerve crosses lateral to the vagus, and small communicating fibers often join the two. The glossopharyngeal nerve runs forward on the lateral side of the internal carotid artery, deep to the stylohyoid muscle, and crosses the stylopharyngeus on its way to the pharyngeal wall.
The muscles from the styloid process form the anterior limit of this dissection: the stylohyoid most superficial, the styloglossus deeper, and the stylopharyngeus deepest, with the stylohyoid ligament among them. The external carotid artery lies in front of the internal carotid artery here and gives the occipital artery from its posterior surface.
Tip. Name the nerves where their courses are distinct and trace them back toward the skull base; just below the foramen their branches and connections make them hard to separate.
Step 6: Expose the vertebral artery behind C1
Behind the transverse process, define the suboccipital triangle formed by the obliquus capitis superior, the obliquus capitis inferior, and the rectus capitis posterior major. Clear the venous plexus in the triangle to find the vertebral artery lying in the groove on the upper surface of the posterior arch of C1. If fat and veins obscure the artery, feel along the upper surface of the arch for the groove. The venous plexus around the artery is continuous with the epidural and paravertebral plexuses and connects with the sigmoid sinus through the condylar emissary vein.
With the obliquus capitis superior and the rectus capitis posterior major and minor turned back, the posterior atlanto-occipital membrane spans the space above the arch, and the artery passes through its lateral edge, medial to the joint. Lateral to the membrane, the joint capsule binds the occipital condyle to the lateral mass of C1, and the posterior condylar emissary vein leaves the bone behind the condyle toward the sigmoid sinus. Dividing the membrane shows the dura of the upper cervical canal. Detaching the rectus capitis lateralis widens the view of both condyles, and unroofing the transverse foramen of C1 from behind frees the artery so it can be moved posteriorly.
Step 7: Drill the mastoid and identify the labyrinth
With a large cutting bur, take down the mastoid cortex in the area framed by the posterior root of the zygoma, the mastoid tip, and the region of the asterion. Clear the air cells broadly and open the mastoid antrum deep to the spine of Henle, roughly 1.5 cm in from the surface. The dense, yellowish bone of the lateral semicircular canal bulges into the medial wall of the antrum, and the facial nerve passes immediately in front of and below it.
The posterior semicircular canal lies behind the lateral canal and at right angles to it, with the endolymphatic sac on the dura below and medial to it. The superior semicircular canal rises toward the middle fossa floor and can stay covered here. Decompress the sigmoid sinus and thin the tegmen. The vestibule and cochlea lie in front of and medial to the posterior canal, so keep the drilling behind and below it.
Tip. The dense bone of the lateral canal points back toward the posterior canal; trace it before drilling behind the antrum.
Step 8: Skeletonize the facial nerve and open the facial recess
Find the facial nerve at its second genu, just in front of and below the lateral semicircular canal, and follow its mastoid segment down to the stylomastoid foramen with a diamond bur under continuous irrigation, leaving a thin shell of bone. The chorda tympani leaves the nerve and runs up and forward toward the middle ear. At the foramen the nerve is wrapped in a dense fibrous sheath; keep the sheath intact.
Open the facial recess between the facial nerve, the chorda tympani, and the short process of the incus to see the stapes and the promontory, where the tympanic nerve crosses the cochlea. Preserve the annulus of the tympanic membrane. The tympanic nerve is a branch of the glossopharyngeal nerve. Followed downward, it leads through the bone in front of the jugular bulb to the jugular foramen, which makes it a useful guide to the glossopharyngeal nerve from above.
Step 9: Expose the jugular bulb and connect to the neck
The jugular bulb lies inferior and deep to the semicircular canals, below the posterior semicircular canal and medial to the mastoid segment of the facial nerve; its height varies between specimens and sides. Remove the infralabyrinthine bone over the bulb. Where the sigmoid sinus turns into the bulb, a thin spur of bone often clings to the venous wall; reduce it with the diamond bur and leave its last flexible layer on the vein.
Remove the mastoid tip to join the mastoid cavity to the cervical field, so the sigmoid sinus, bulb, and internal jugular vein lie in one continuous exposure. When the facial nerve is lifted out of the stylomastoid foramen and transposed forward, the styloid process appears medial to the foramen and lateral to the jugular channel. Drilling above and in front of the bulb exposes the vertical segment of the petrous internal carotid artery, with the tympanic nerve in the bone between the carotid canal and the jugular foramen.
Tip. Thin the bone over the bulb with a diamond bur and lift the last shell with a dissector. The shell protects the thin venous wall until the full outline of the bulb is visible.
Step 10: Drill the posterior condyle and hypoglossal canal
Work below the bulb and in front of the vertebral artery. Remove the posterior part of the occipital condyle above its joint with the lateral mass of C1. The posterior condylar emissary vein may run within the condyle; control and divide it as it is reached. Within the cancellous bone, the cortical tube of the hypoglossal canal appears above the joint as a bluish line, colored by the venous plexus of the hypoglossal canal; the Far-Lateral Approach chapter describes this view in detail.
Opening the canal shows the hypoglossal nerve in its dural sleeve, the anterior condylar vein draining toward the suboccipital plexus, and a small meningeal branch of the ascending pharyngeal artery. On leaving the canal, the nerve makes a sharp bend below the jugular foramen and descends medial to the internal jugular vein into the neck. The jugular tubercle lies above the canal.
Step 11: Open the sigmoid sinus and jugular bulb
Open the lateral wall of the sigmoid sinus, the jugular bulb, and the upper internal jugular vein, and remove the injected cast. Leave the medial wall at first: it faces the neural part of the jugular foramen, and the lower cranial nerves lie directly behind it. Look on the medial wall of the bulb for the opening of the inferior petrosal sinus, which usually enters between the glossopharyngeal nerve and the vagus nerve.
The jugular foramen has three parts: a small anteromedial petrosal part that receives the inferior petrosal sinus, a large posterolateral sigmoid part continuous with the sinus and bulb, and an intrajugular part between them, where the glossopharyngeal, vagus, and accessory nerves pass along the intrajugular processes. The glossopharyngeal nerve runs in its own anterior channel, and the vagus and accessory nerves travel together behind it.
Tip. Pack the opening of the inferior petrosal sinus with a small piece of oxidized cellulose before peeling the medial wall; it keeps the field clear while the nerves are separated.
Step 12: Trace the lower cranial nerves through the foramen
Remove the medial venous wall to expose the extradural course of the nerves. Use the cochlear aqueduct as a guide: it runs from the basal turn of the cochlea to the jugular foramen and opens at the level of the glossopharyngeal nerve, so drilling below its lower end is close to that nerve. The glossopharyngeal nerve gives off the tympanic nerve and, below the foramen, a carotid sinus branch that joins a branch of the vagus nerve. In front of the bulb, the vertical petrous internal carotid artery turns forward just below the cochlea.
The jugular tubercle lies beneath the nerves, between the jugular foramen and the hypoglossal canal, and the accessory nerve lies lowest on it. Thinning the tubercle with a diamond bur under the nerves lengthens the view along the lower clivus, and the inferior petrosal sinus and the lateral edge of the clivus come into view medially. Opening the dura above the foramen shows the same nerves inside the dura, with the hypoglossal nerve rootlets running forward and laterally into its canal.
Dissection sequence
Dissection photographs
28 photographs, numbered in sequence. Select a photograph to view it larger.
Skull Base Dissection Atlas Chapter 16 of 16
Far-Lateral Approach
This chapter follows the extreme lateral (ELITE) variant of the far-lateral approach: the posterior neck muscles are turned forward in layers, the V3 vertebral artery is freed on the arch of C1, and the posteromedial occipital condyle and the jugular tubercle are drilled to open a view along the front of the medulla.
- Posterior fossa and craniocervical junction
- 38 photographs
- 14 key steps
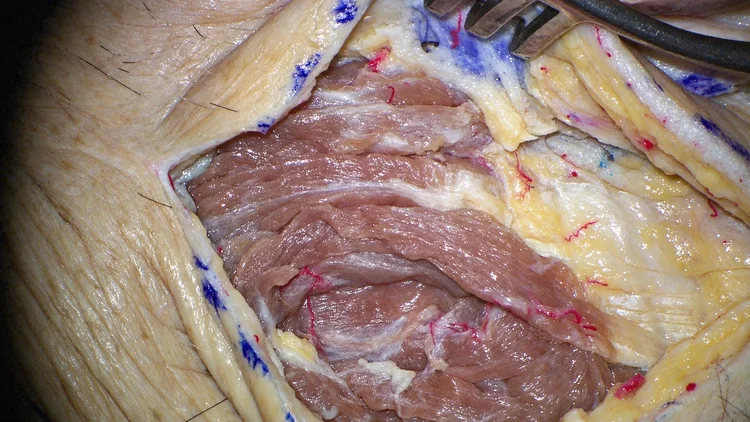
Overview
The extreme lateral infrajugular transcondylar exposure (ELITE) is a variant of the far-lateral approach. Its route is dorsolateral: the muscles attached to the occiput are detached and turned forward layer by layer, the occipital condyle is reached from behind, and the line of sight passes below the jugular foramen, across the drilled condyle and jugular tubercle, to the front of the foramen magnum. The corridor is bounded laterally by the sigmoid sinus and the jugular bulb, inferiorly by the posterior arch of C1 and the V3 vertebral artery, and anteriorly by the occipital condyle, the hypoglossal canal, and the jugular tubercle.
The steps run from positioning through the muscle layers, the craniotomy, the vertebral artery, and the condylar drilling to the dural opening and the intradural anatomy of the foramen magnum. Photographs 1 to 32 follow the extradural stages through condylar drilling, and photographs 33 to 38 add views that include the intradural stage. The Transjugular Approach chapter works on the jugular bulb from an anterolateral direction, in front of the transverse process of C1, and the High Cervical Exposure chapter covers the carotid space anterior to this corridor.
Lab setup
- Lateral (park-bench) position, head flexed, turned away, and tilted toward the opposite shoulder
- Operating microscope for the suboccipital triangle, vertebral artery, condyle, and cisterns; loupes for the incision and the superficial muscles
- High-speed drill: cutting burs for the craniotomy and posterior mastoid, 2 to 4 mm diamond burs with irrigation for the transverse foramen of C1, the condyle, and the jugular tubercle
- Periosteal elevators, microdissectors, bipolar forceps, Kerrison rongeurs, fine scissors, and a narrow spatula for cerebellar retraction
- Sutures or vessel loops for the occipital and vertebral arteries; gauze sponges to cover the exposed dura; dural tack-up sutures
- Injected specimen (red arteries, blue veins) to show the venous plexus around the vertebral artery, the condylar veins, and the hypoglossal canal plexus
Key steps
Landmarks to identify are in bold. The numbered photographs below appear in their original order.
Step 1: Position the head and plan the lazy-S incision
Place the specimen in the lateral position. Flex the head, turn it away from the dissected side, and tilt it toward the opposite shoulder so the mastoid process is the highest point and the angle between the occiput and the arch of C1 opens. Mark the mastoid tip and the posterior border of the mastoid body, the asterion, the inion, the superior nuchal line, and the spinous process of C2. Palpate the transverse process of C1 between the mastoid tip and the angle of the mandible.
The exposure is centered on the occipital condyle, which sits below the mastoid tip and on its medial side. Draw a lazy-S incision with its upper end just below the asterion, its middle curving behind the mastoid, and its lower limb descending into the upper neck along the posterior border of the sternocleidomastoid muscle. The opening reaches from the midline of C1 and C2 to the mastoid tip.
Tip. Mark the expected position of the condyle on the skin, below and medial to the mastoid tip, and center the curve of the S on that mark.
Step 2: Raise the flap and expose the superficial layer
Reflect the skin and subcutaneous tissue. The posterior auricular vein runs behind the ear and drains into the external jugular vein, and the occipital vein crosses the back of the scalp. The first muscle layer consists of the sternocleidomastoid muscle, the occipital belly of the occipitofrontalis, and the trapezius; along the superior nuchal line, a gap of a few centimeters separates the lateral border of the trapezius from the sternocleidomastoid. The splenius capitis shows in the gap between these two muscles. The great auricular nerve angles up across the surface of the sternocleidomastoid toward the ear, a few centimeters below the mastoid tip.
Find the occipital artery where it pierces the fascia at the upper border of the splenius capitis, just behind the sternocleidomastoid. The greater occipital nerve surfaces farther medially, where the upper border of the splenius capitis meets the edge of the trapezius and the semispinalis capitis. Clean the fascia over the sternocleidomastoid. A patch of it can be taken now and kept moist for the dural closure.
Tip. Lift the occipital belly off the bone to see the lambdoid, parietomastoid, and occipitomastoid sutures converge at the asterion, which lies near the junction of the transverse and sigmoid sinuses.
Step 3: Turn the sternocleidomastoid and splenius forward
In the extreme lateral variant, the muscles attached to the occiput are turned forward so the condyle is reached from behind. Raise each layer separately in the lab to learn it. Detach the sternocleidomastoid muscle from the mastoid process and the lateral superior nuchal line and reflect it forward and down. The accessory nerve enters its deep surface lower in the neck, below the working area.
The splenius capitis now lies in full view. Its fibers climb laterally from the nuchal ligament and the upper thoracic spines to insert on the mastoid and the lateral part of the superior nuchal line, under the sternocleidomastoid attachment. Detach it from the superior nuchal line and the mastoid and reflect it forward as well. Deep to it, a distinct fascial membrane lies over the middle layer, formed by the longissimus capitis and the semispinalis capitis. The occipital artery and the suboccipital veins run in a layer of fat just under this membrane. Laterally, the posterior belly of the digastric and the digastric groove come into view, with the levator scapulae lower in the field.
Tip. Define this membrane before cutting deeper. It is the plane that keeps the occipital artery intact and lets it be followed along its whole course.
Step 4: Follow the occipital artery and the longissimus
Open the fascial membrane and follow the occipital artery from the occipital groove, medial to the mastoid tip and deep to the posterior belly of the digastric, backward toward the scalp. Its course varies between specimens: it may cross superficial or deep to the longissimus capitis. Its branches and the accompanying veins lie on the surface of the semispinalis capitis and the obliquus capitis superior.
The longissimus capitis is a narrow strap whose upper tendon inserts on the back of the mastoid process; its lower attachments lie on the vertebrae of the lower neck and upper thorax. Detach it from the mastoid and turn it forward. The same fascial membrane extends forward under it toward the styloid region and lies over the deep muscle layer. Free the occipital artery and hold it out of the field with a suture, or divide it, so the deep layer can be reached. The greater occipital nerve pierces the semispinalis capitis close to the occiput and runs up to the scalp with the medial branches of the artery.
Step 5: Reflect the semispinalis and open the triangle
The semispinalis capitis is the broad vertical muscle beside the midline. Its upper end fills the strip of occipital bone between the superior nuchal line and the inferior nuchal line, and its lower fibers come from vertebrae low in the neck and high in the thorax. Detach it from the occiput and turn it back toward the midline; it is the one muscle in this sequence reflected posteriorly. Clear the dense fascia beneath it to show the deep layer.
The obliquus capitis superior spans from the upper surface of the transverse process of C1 to the occipital bone between the nuchal lines, just lateral to the semispinalis attachment. The obliquus capitis inferior runs from the spinous process of C2 to the same transverse process, and the rectus capitis posterior major runs from the C2 spinous process to the inferior nuchal line. These three muscles frame the suboccipital triangle, with the rectus capitis posterior minor medial to it. The floor is the posterior arch of C1 and the posterior atlanto-occipital membrane. The greater occipital nerve curves around the lower border of the obliquus capitis inferior. Detach the obliquus capitis superior from the occiput and turn it forward and down toward its attachment on C1.
Tip. Detach the obliquus capitis superior under direct vision. The V3 segment of the vertebral artery crosses the suboccipital triangle close to its lower edge.
Step 6: Open a lateral suboccipital craniotomy
Expose the occipital bone from the asterion and the back of the mastoid process to the rim of the foramen magnum, noting the mastoid emissary vein near the occipitomastoid suture. Turn a lateral suboccipital craniotomy and drill the posterior mastoid to uncover the posterior edge of the sigmoid sinus down to its lowest point. Cover the exposed dura with a moist gauze sponge.
Then take down the rim of the foramen magnum from the opisthion, its posterior midpoint, laterally to the back of the occipital condyle. Behind the condyle, the condylar fossa holds the opening of the posterior condylar emissary vein, a channel between the vertebral venous plexus and the lowest part of the sigmoid sinus that travels in the condylar canal. Coagulate and cut the vein, or plug its opening with bone wax.
Tip. The condylar canal runs from the condylar fossa toward the sigmoid sinus, behind the condyle. Keep it distinct from the hypoglossal canal, which passes through the base of the condyle in an anterolateral direction.
Step 7: Find the V3 vertebral artery on the arch of C1
Find the posterior tubercle of C1 in the midline, about 1 cm below the opisthion exposed in the previous step, and clear the lamina of C2 and the ipsilateral posterior arch of C1. Work laterally along the upper border of the arch in the subperiosteal plane. Roughly 2 cm from the midline, the upper surface dips into the sulcus arteriosus (J-groove), the bed of the horizontal V3 segment of the vertebral artery. Medial to the groove the upper border of the arch can be cleared freely; from the groove laterally, the artery lies directly on the bone.
The artery runs in a dense venous plexus inside its periosteal sheath, so subperiosteal dissection lifts the artery and plexus together as one sleeve. The suboccipital nerve, the dorsal ramus of C1, emerges between the artery and the arch. The groove varies: it may be shallow or nearly flat, or bridged by a bony or fibrous ring that encloses the artery. This segment gives small muscular branches and the posterior meningeal artery, and in some specimens the posterior inferior cerebellar artery or the posterior spinal artery has an extradural origin here. For a lower exposure, remove the ipsilateral half of the posterior arch of C1 from the midline to the groove.
Tip. Build the search on fixed bone: the opisthion, then the C1 tubercle below it, then the groove lateral to the tubercle. Each point leads to the next.
Step 8: Free the vertebral artery from C1
Clear the venous plexus and follow the vertebral artery from the transverse foramen of C1 along the sulcus arteriosus to the point where it pierces the dura at the lateral margin of the foramen magnum. Divide the posterior atlanto-occipital membrane over the groove, where it binds the artery to the bone, to see the dural entry. Extend the soft tissue dissection laterally onto the transverse process of C1; the C2 nerve and the artery between C1 and C2 come into view below.
Open the posterior wall of the transverse foramen of C1 with a diamond bur under irrigation, leaving the venous sleeve around the artery intact. Release the artery from the periosteum of the foramen, translocate it posteriorly and medially out of the foramen, and hold it with a suture. The posterior surface of the occipital condyle, the capsule of the atlanto-occipital joint, and the lateral mass of C1 now lie in view deep to the artery.
Tip. Move the artery inside its periosteal sleeve; the sleeve keeps the venous plexus together and gives a firm hold for the suture.
Step 9: Drill the posteromedial occipital condyle
Angle the microscope so the line of sight runs from lateral to medial across the back of the occipital condyle. With the vertebral artery held aside, take down the posteromedial corner of the condyle and preserve the atlanto-occipital joint below it. Drill through the cortical shell into the cancellous core in small steps with a diamond bur under irrigation.
As the cancellous bone is thinned, a tube of compact bone with a blue tint appears above the joint, oriented roughly along the joint line. It is the wall of the hypoglossal canal; the tint comes from the venous plexus of the hypoglossal canal, which surrounds the dural sleeve of the hypoglossal nerve. Skeletonize the canal and keep it closed. Its intracranial opening commonly lies near the junction of the posterior and middle thirds of the condyle, and the jugular tubercle rises above it.
This bone removal is the transcondylar part of the exposure. Drilling farther forward through the joint, the lateral mass of C1, and the anterior arch of C1 leads to the dens; the steps here keep the joint.
Tip. Treat the hypoglossal canal as the depth and upper limit of condylar drilling. Once its cortical wall is outlined, the bone that can be removed around it is clearly defined.
Step 10: Drill the jugular tubercle
The jugular tubercle is the rounded prominence of the occipital bone above the hypoglossal canal, medial to the jugular foramen and beneath the lower sigmoid sinus and the jugular bulb. Inside the dura, the glossopharyngeal, vagus, and accessory nerves cross its intracranial surface on their way to the jugular foramen, so removing it opens the view in front of these nerves.
Working extradurally above the skeletonized canal, thin the tubercle with a diamond bur under constant irrigation, moving from the condyle forward and upward. Keep the dura over the tubercle intact. The tubercle extends about 1.5 cm from back to front. Its anterior part is tucked under the sigmoid sinus and jugular bulb, and removing more of it there carries the line of sight farther toward the front of the brainstem. This is the transtubercular part of the exposure.
Before opening the dura, review the extradural field: the drilled tubercle and the canal below it, the remaining occipital condyle and the joint, the vertebral artery on its suture, and the sigmoid sinus along the lateral edge.
Tip. Cool the bone with continuous irrigation; the glossopharyngeal, vagus, and accessory nerves run just inside the dura that covers the tubercle.
Step 11: Open the dura at the foramen magnum
Incise the dura in a curve from the cerebellar convexity down past the rim of the foramen magnum onto the upper cervical cord, staying behind the dural entry of the vertebral artery. Begin at the lower end, over the lateral cerebellomedullary cistern, and open that cistern and the cisterna magna before completing the curve; with the cisterns drained, the cerebellar tonsil and the hemisphere drop back from the dura. Tack the leaflets back to the soft tissue.
The dura forms a fibrous ring around the artery at its entry; the C1 nerve and the posterior spinal artery often pass through the same opening. Inside the cistern, the spinal root of the accessory nerve is typically the most superficial structure. It ascends along the cord and medulla behind the dentate ligament and in front of the dorsal rootlets of C1 and C2. The highest tooth of the dentate ligament attaches to the dura at the level of the foramen magnum, behind the intradural vertebral artery. The C1 dorsal root is small and may be absent or joined to the accessory nerve.
Tip. Use the dentate ligament as a dividing plane: the accessory nerve and the dorsal rootlets lie behind it, and the vertebral artery and the ventral rootlets lie in front of it.
Step 12: Trace the vertebral artery and PICA
Retract the cerebellum gently upward and medially with a narrow spatula and divide the arachnoid bands that tether the tonsil and the hemisphere to the lower cranial nerves. Trace the vertebral artery from its dural entry as it ascends forward around the medulla, in front of the accessory nerve and the dentate ligament, toward the vertebrobasilar junction, usually near the pontomedullary sulcus. The anterior spinal artery arises from the medial side of the two vertebral arteries close to that junction.
Find the origin of the posterior inferior cerebellar artery, most often from the intradural vertebral artery near the olive. It may also arise lower, close to the dural entry, or outside the dura. Note where the hypoglossal rootlets pass, since they commonly run next to the origin. Follow the artery back around the medulla, between or around the lower cranial nerve rootlets, toward the cerebellar tonsil. Name its segments as they are followed: the anterior medullary segment in front of the medulla, the lateral medullary segment beside the olive among the rootlets, and the tonsillomedullary segment around the lower half of the tonsil, where it often forms a caudal loop.
Step 13: Trace the lower cranial nerves to their foramina
The glossopharyngeal nerve, the vagus nerve, and the cranial rootlets of the accessory nerve leave the postolivary sulcus in a vertical row, with the glossopharyngeal nerve highest and formed by one or two rootlets. Follow them laterally over the drilled jugular tubercle to the jugular foramen. There a dural septum separates the glossopharyngeal nerve, which enters its own anterior opening, from the vagus and accessory nerves, which enter together behind it. Choroid plexus from the foramen of Luschka lies behind the glossopharyngeal and vagus rootlets, with the flocculus above them.
The hypoglossal rootlets leave the preolivary sulcus between the pyramid and the olive and run laterally to the hypoglossal canal, usually in two bundles that pierce the dura separately and may unite inside the canal. The intracranial opening of the canal lies at the base of the occipital condyle, below and medial to the jugular foramen, with the tubercle between them. The relationship of the vertebral artery to these rootlets varies between specimens and between sides: rootlets may pass in front of the artery, behind it, or on both sides. Record the pattern on each side.
Tip. Follow each rootlet from the medulla outward to its dural opening; the openings confirm which nerve each rootlet belongs to.
Step 14: Look forward to the vertebrobasilar junction
With the jugular tubercle removed, the line of sight passes in front of the lower cranial nerves to the front of the medulla, the lower clivus, and the vertebrobasilar junction. Identify the lower basilar artery, the opposite vertebral artery, and the anterior inferior cerebellar artery arising from the basilar artery.
Above the lower cranial nerves, the facial nerve and the vestibulocochlear nerve cross the cerebellopontine angle to the internal auditory canal. The abducens nerve leaves the brainstem medial to them, often near the origin of the anterior inferior cerebellar artery, and ascends through the prepontine cistern to pierce the clival dura and enter Dorello’s canal. Start from its exit at the brainstem, where it is easiest to recognize, and trace it upward to the dural entry.
Finish by relating each intradural structure to its extradural landmark: the hypoglossal rootlets to the skeletonized hypoglossal canal, the glossopharyngeal, vagus, and accessory nerves to the jugular foramen beneath the sigmoid sinus and jugular bulb, and the vertebral artery back to its dural entry and the arch of C1. Confirm that each nerve can be followed from the brainstem to its foramen.
Dissection sequence
Dissection photographs
38 photographs, numbered in sequence. Select a photograph to view it larger.
Skull Base Dissection Atlas Fellow reference
Fellow Dissection Completion Checklist
Use this checklist to record orientation, structure tracing, and photographic documentation for each region of the atlas.
- 13 modules
- 107 items
- Saved in this browser
Completion standard
How to use the checklist
Work through it after the chapters to confirm that each region was oriented, dissected in sequence, and documented clearly enough to reconstruct the three-dimensional anatomy later.
For each module, record whether the relevant structures were identified, traced to their next compartment or foramen, and photographically documented. When the anatomy is paired, note the side. A complete image set has an orientation image, a completed-dissection image, and a labeled image.
Module 01
Endoscopic nasal entry and nasoseptal flap
Module 02
Ethmoid, frontal recess, and anterior skull base
Module 03
Sphenoid, sellar, and parasellar landmarks
Module 04
Expanded endonasal and endoscopic orbital corridors
Module 05
Microsurgical orbit and superior orbital fissure
Module 06
Anterior clinoid, distal dural ring, and cavernous sinus
Module 07
Infratemporal and pterygopalatine fossae
Module 08
Mastoid, middle ear, labyrinth, and internal auditory canal
Module 09
Petrosectomy corridors
Module 10
Transjugular and high cervical exposure
Module 11
Retrosigmoid and cerebellopontine angle anatomy
Module 12
Far-lateral, pericondylar, and craniovertebral anatomy
Module 13
Final integrated intradural review
Record